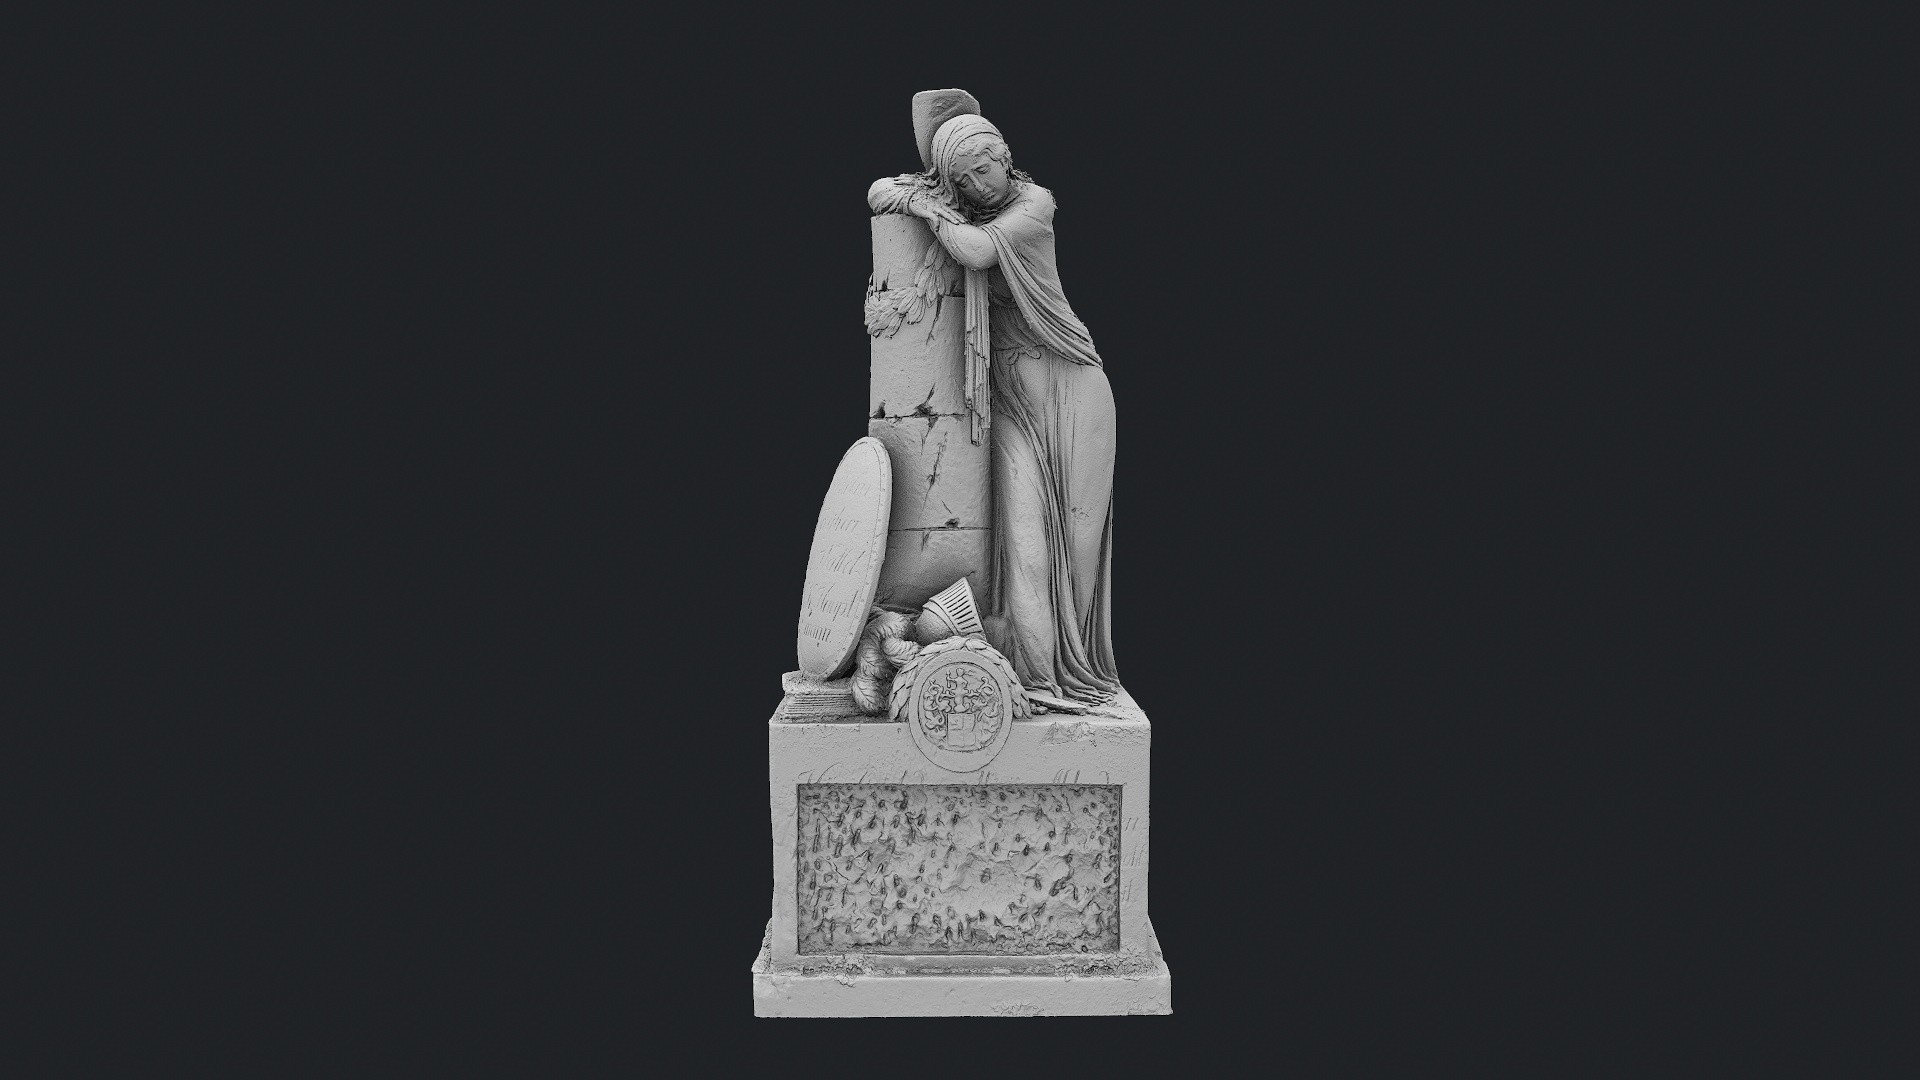
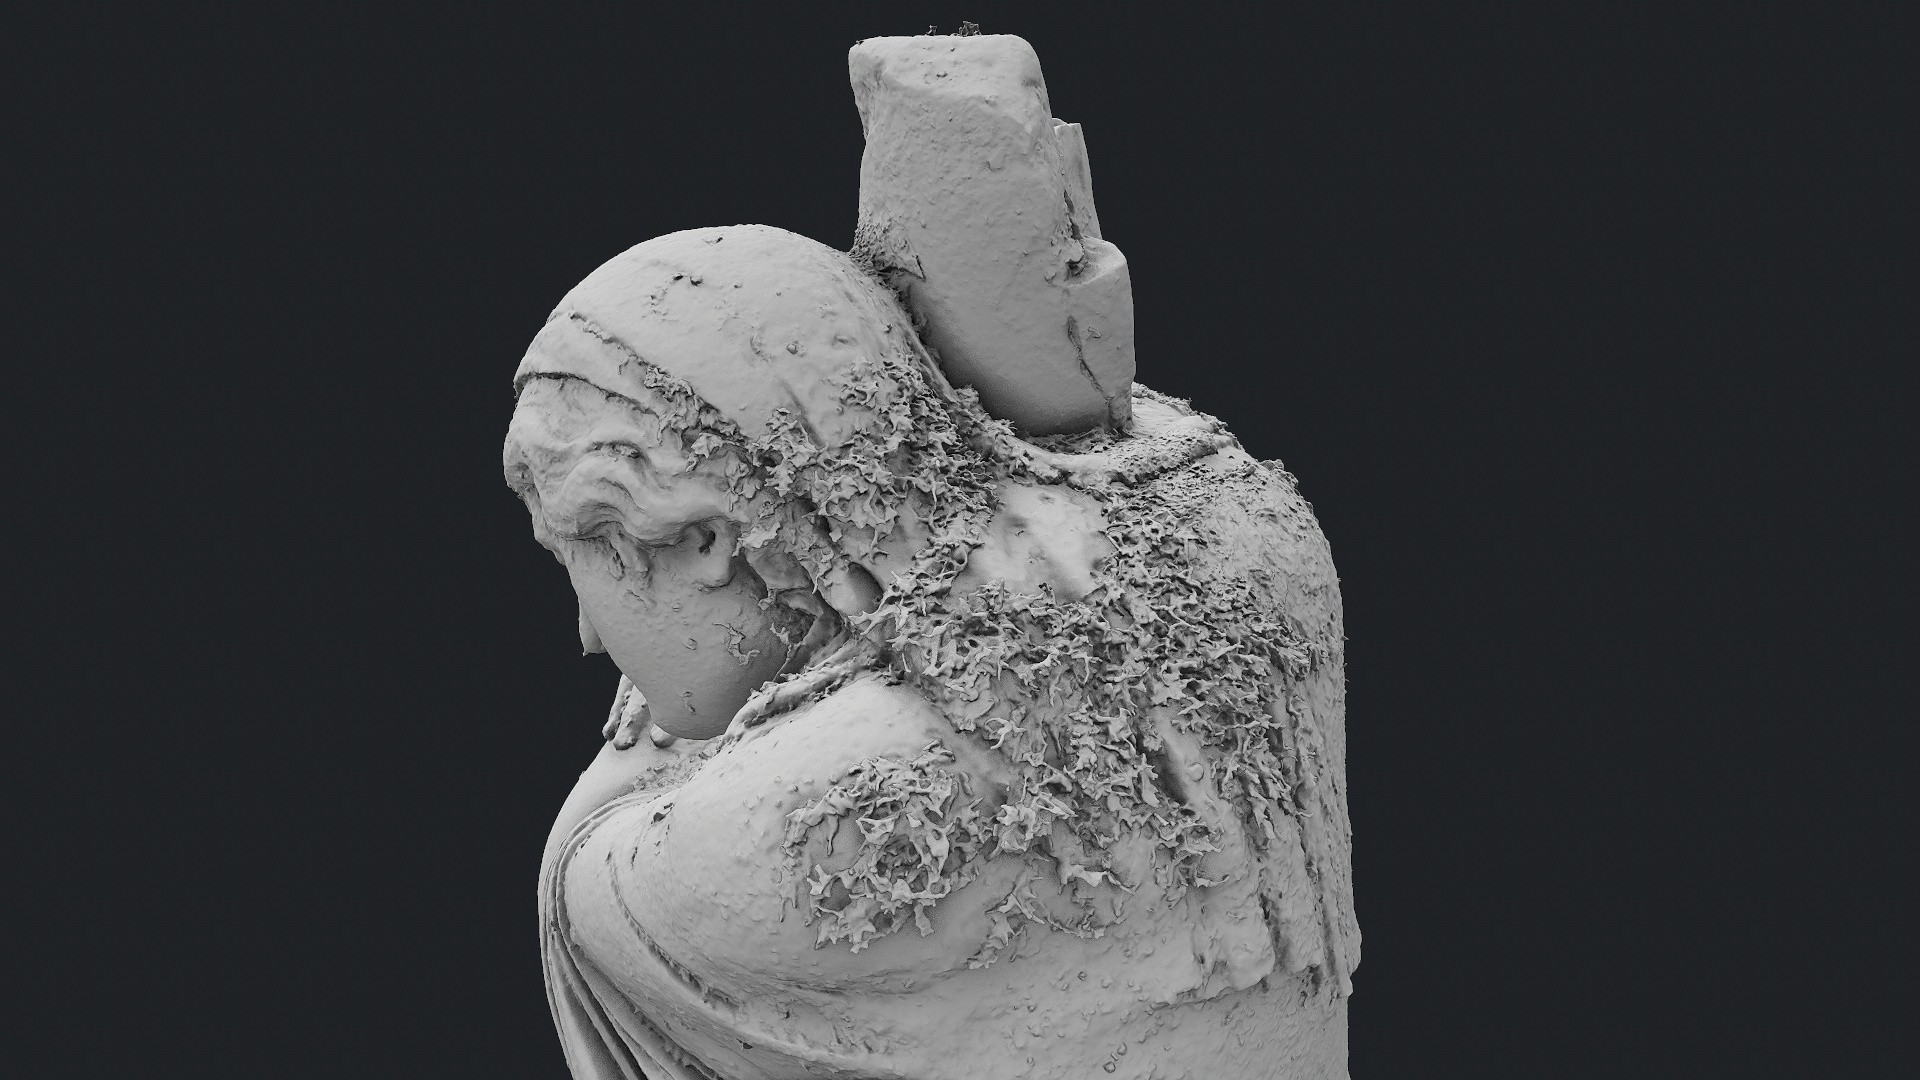
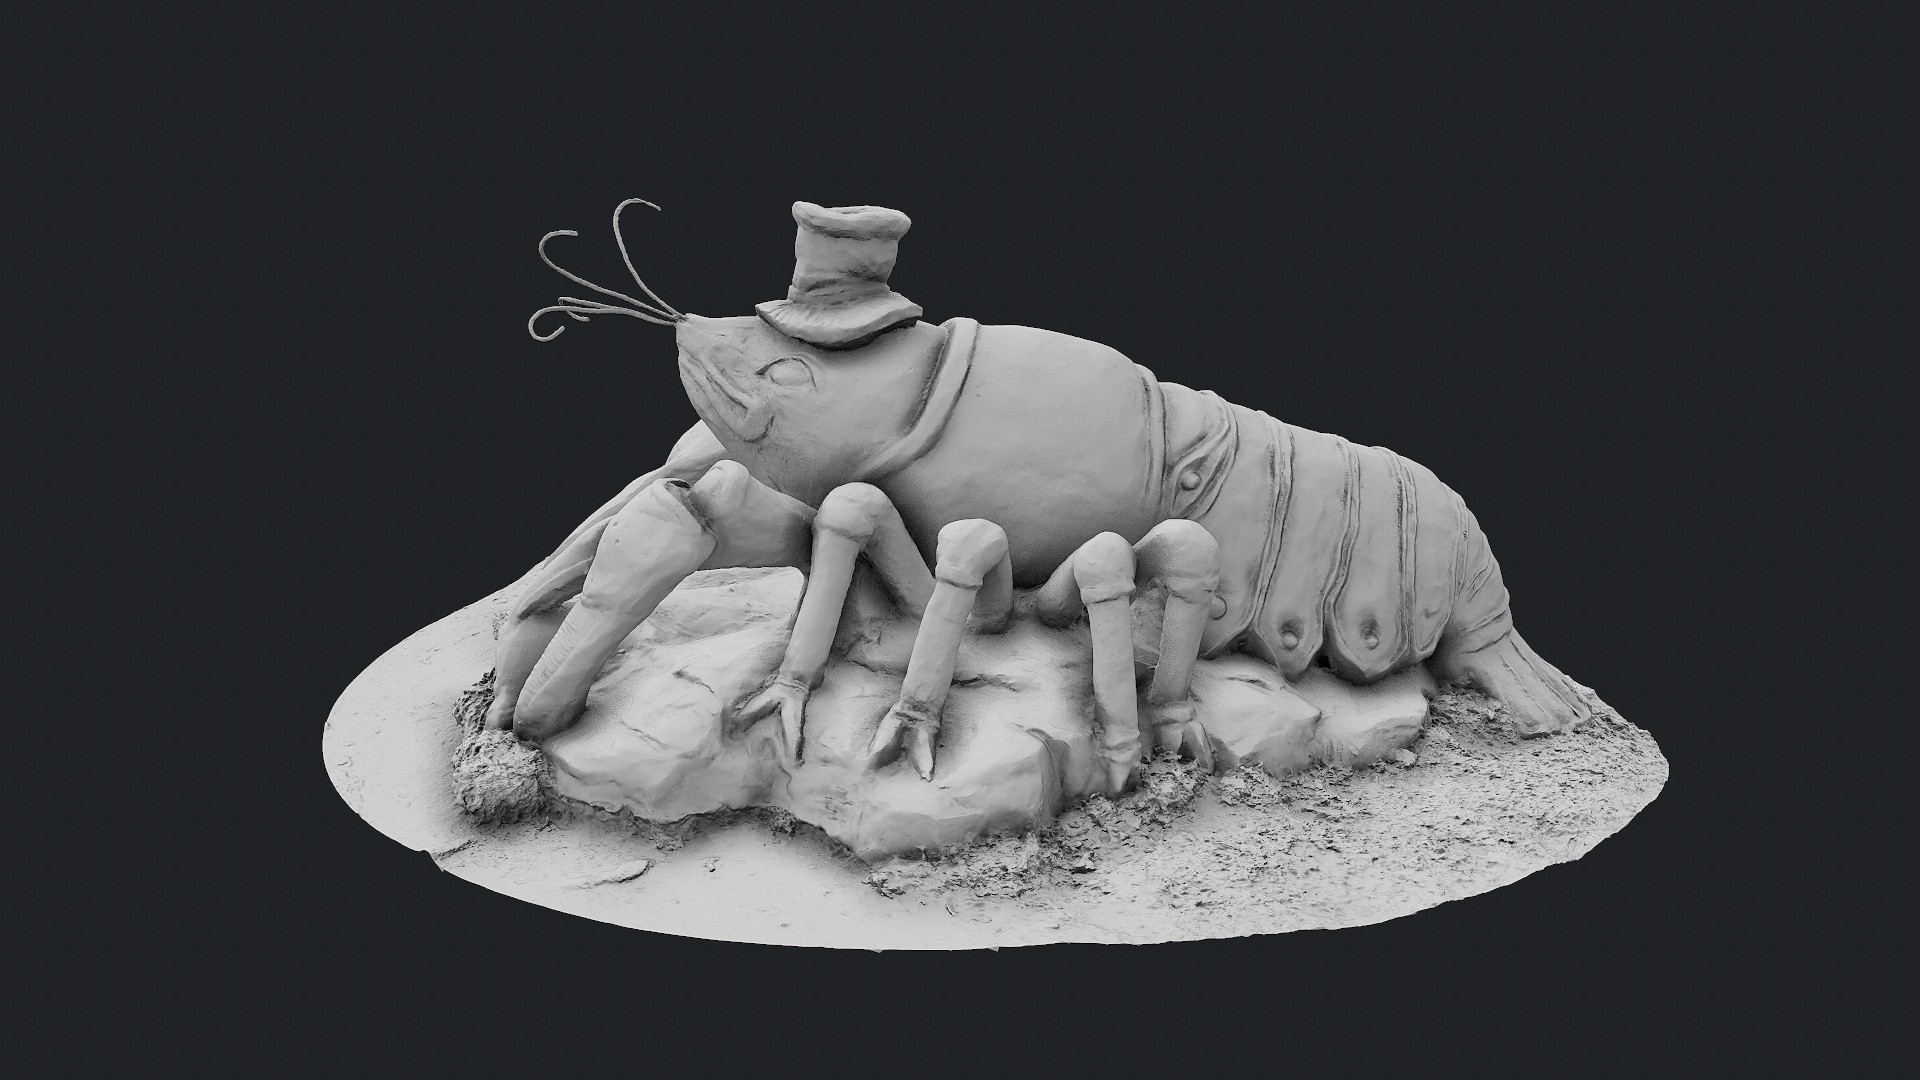
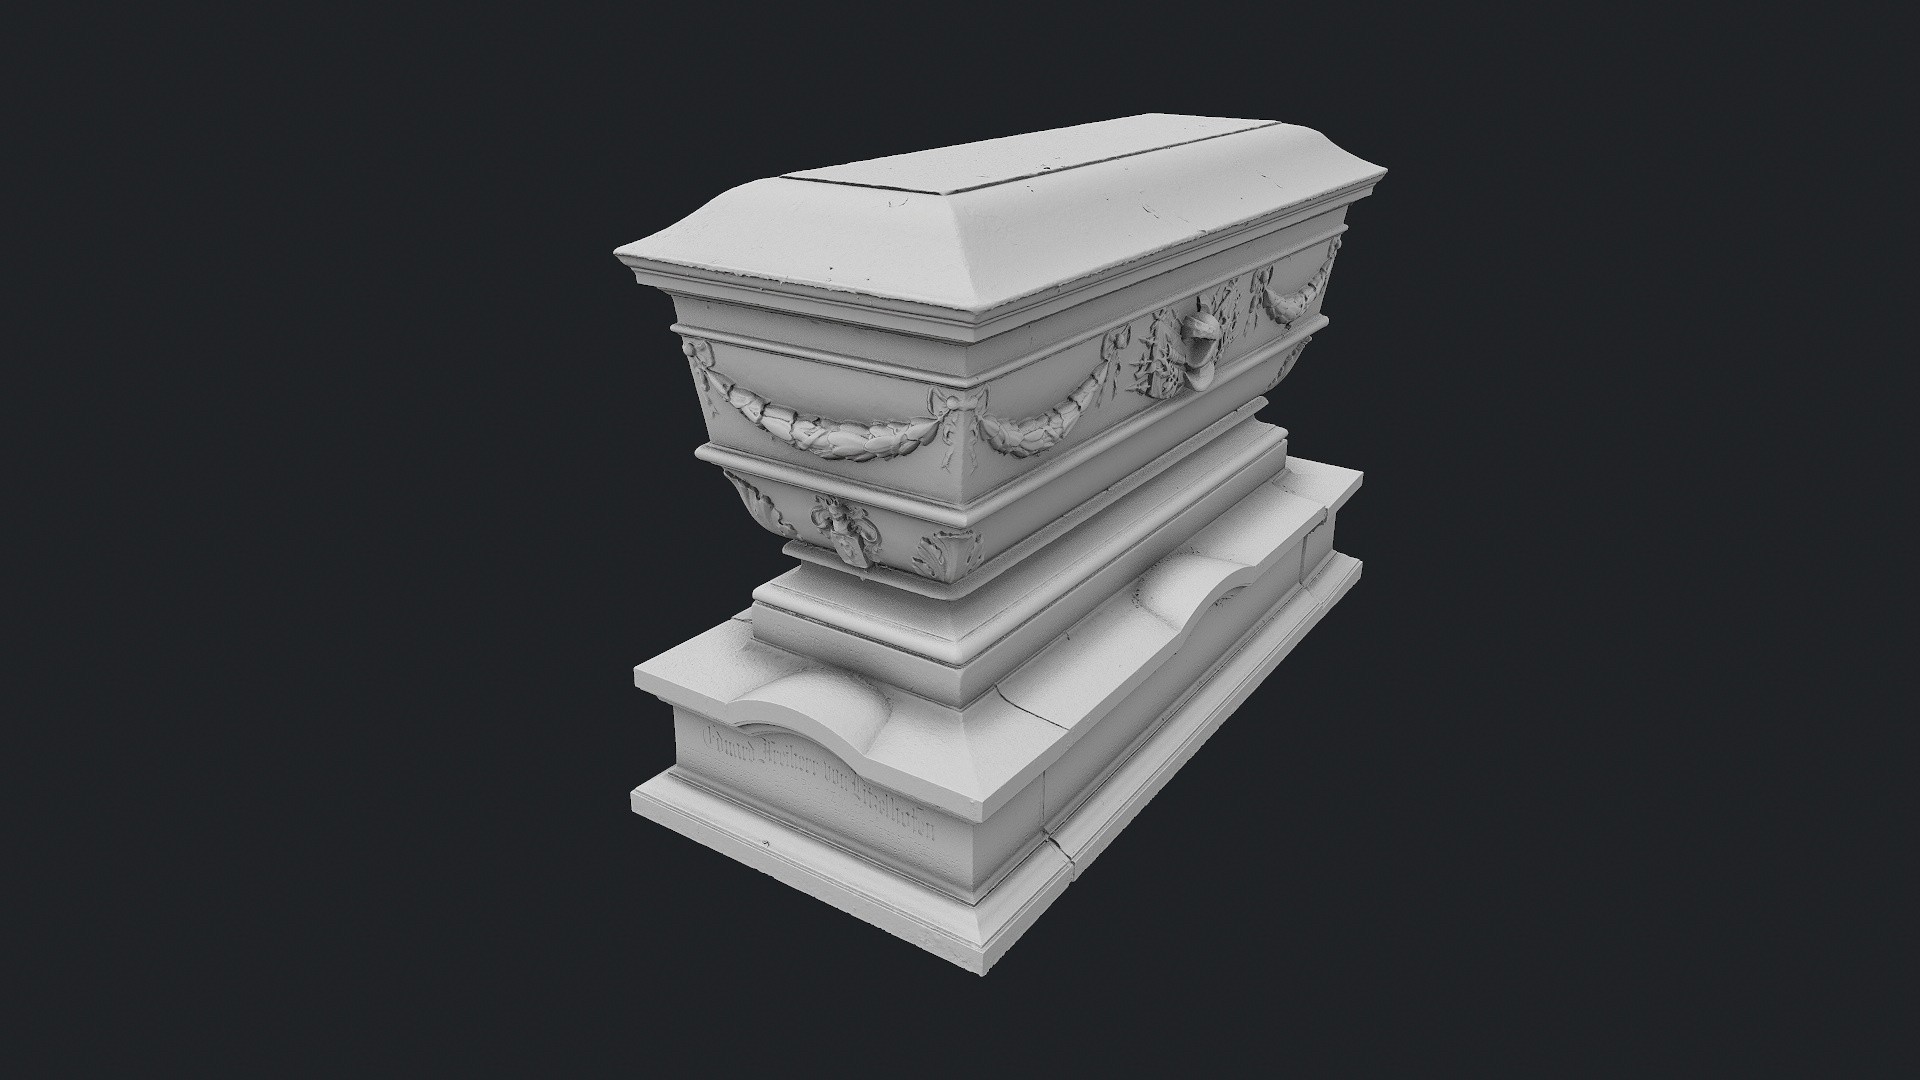
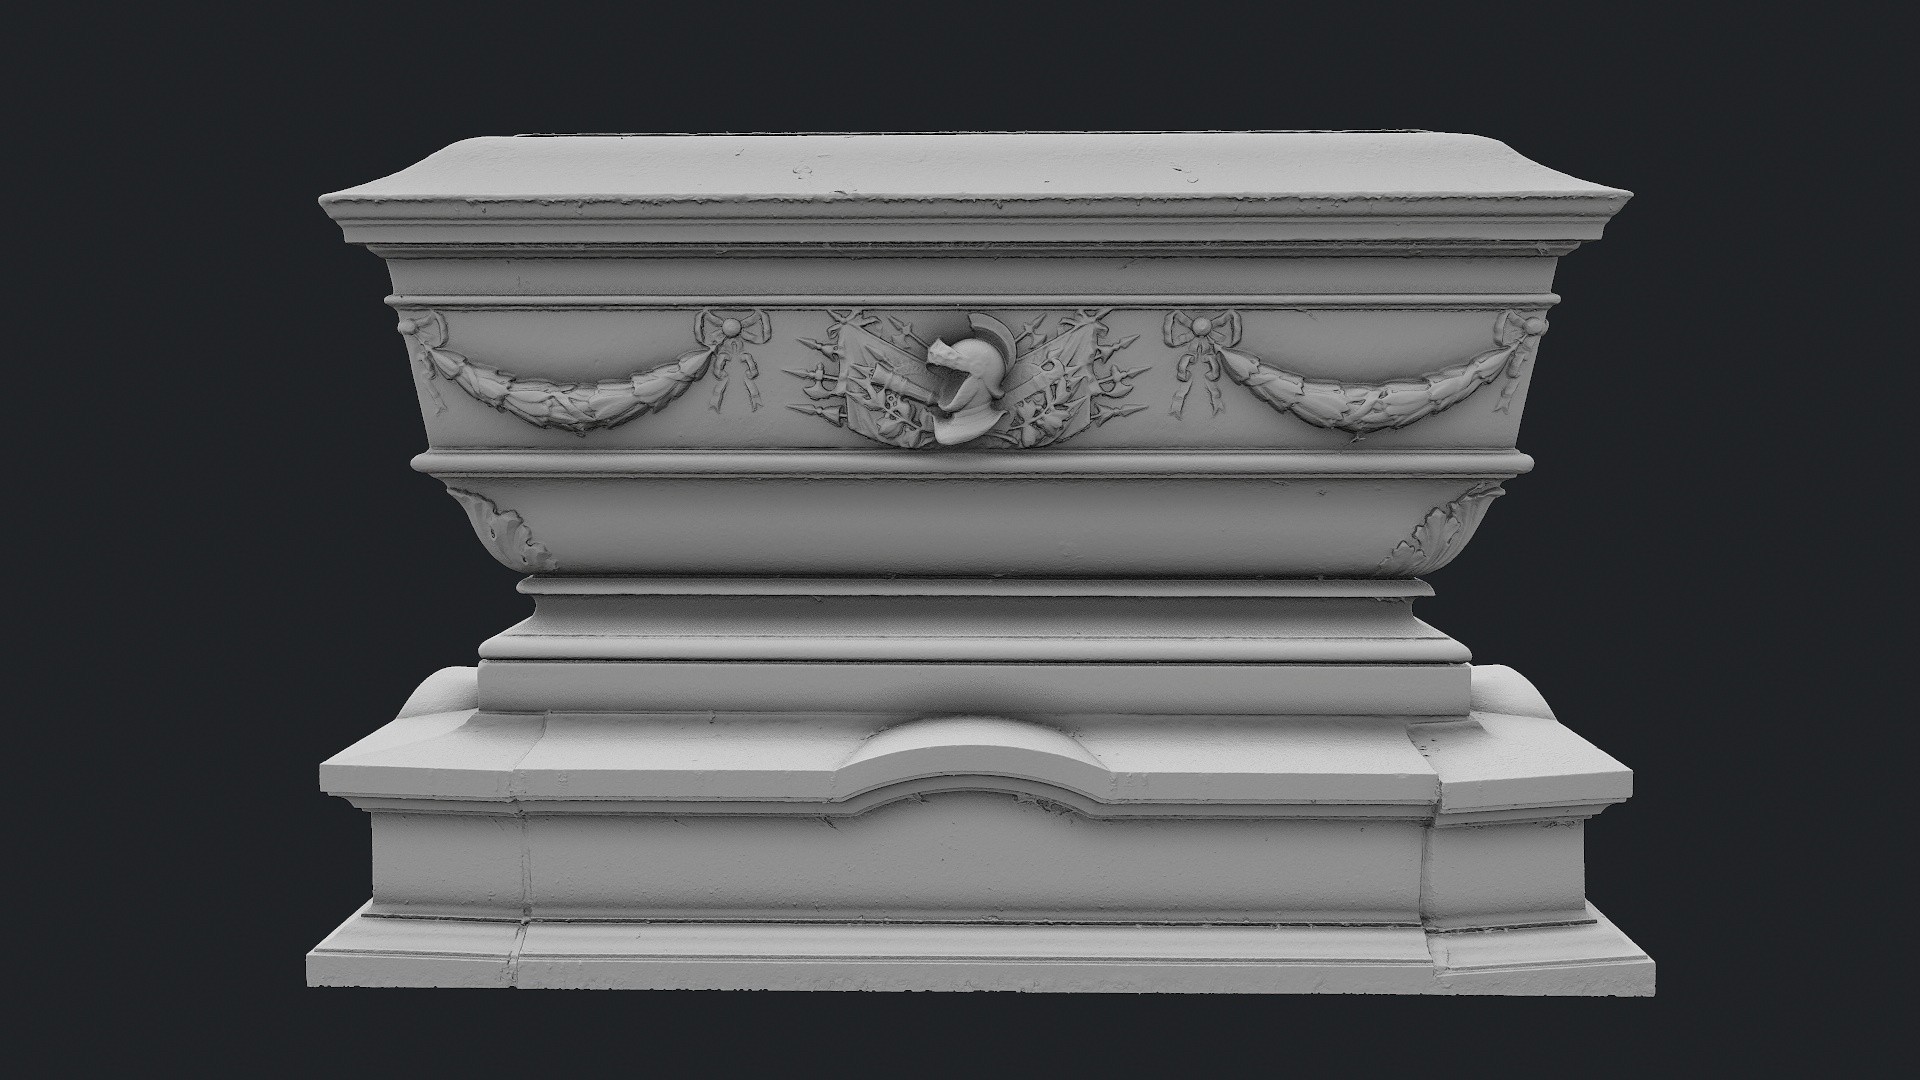
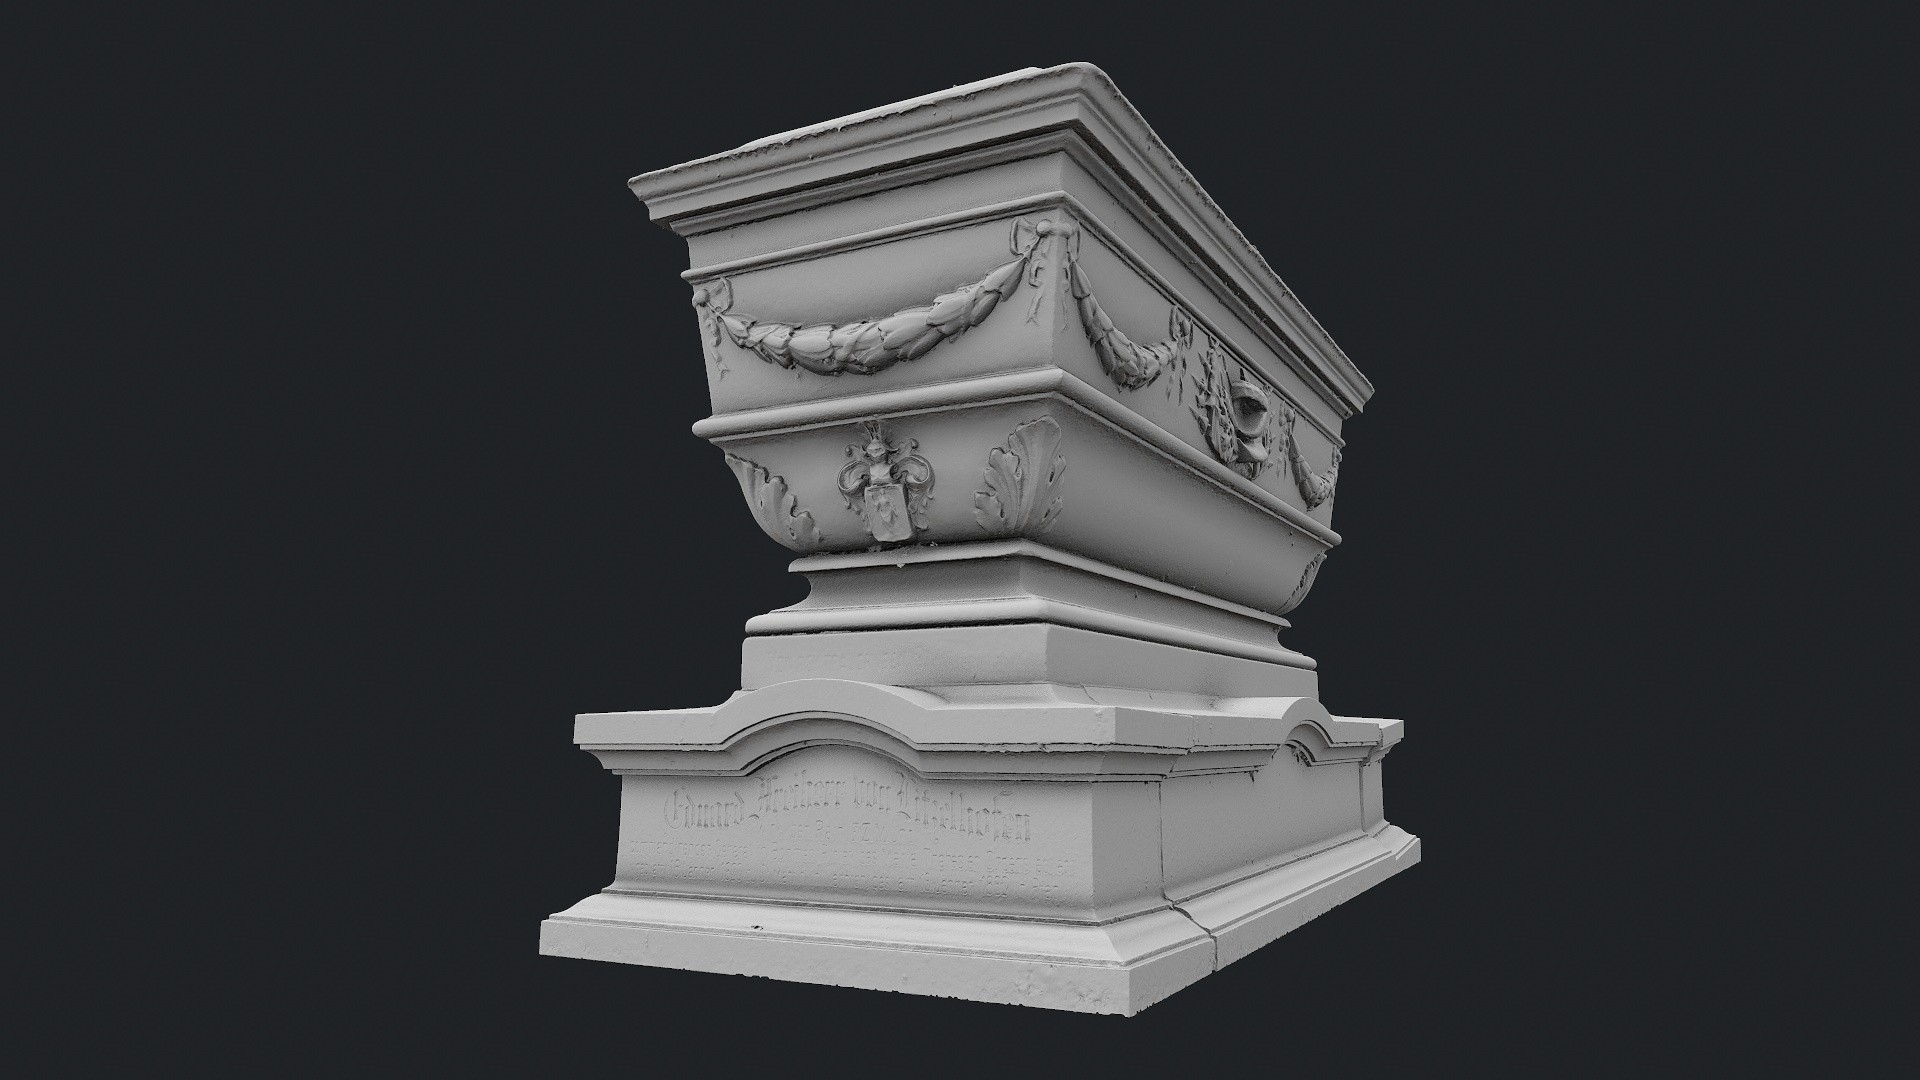
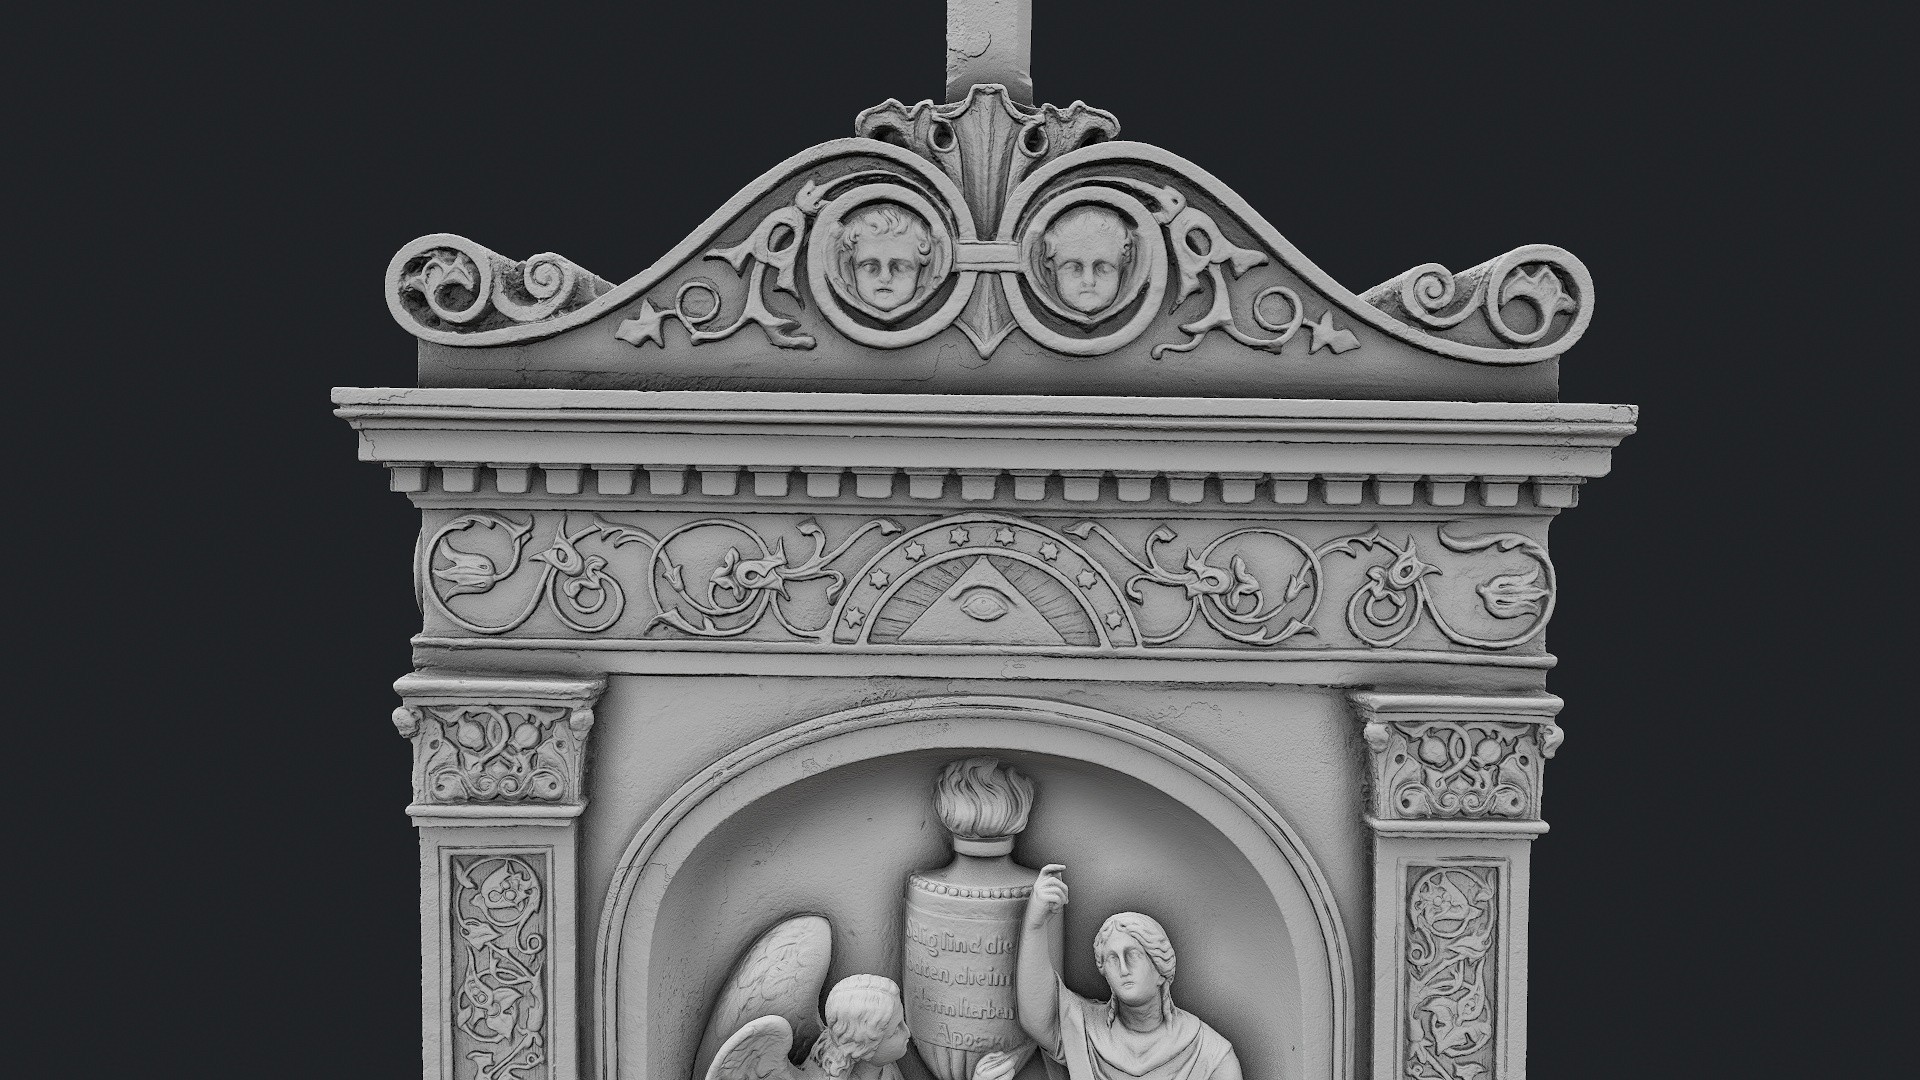
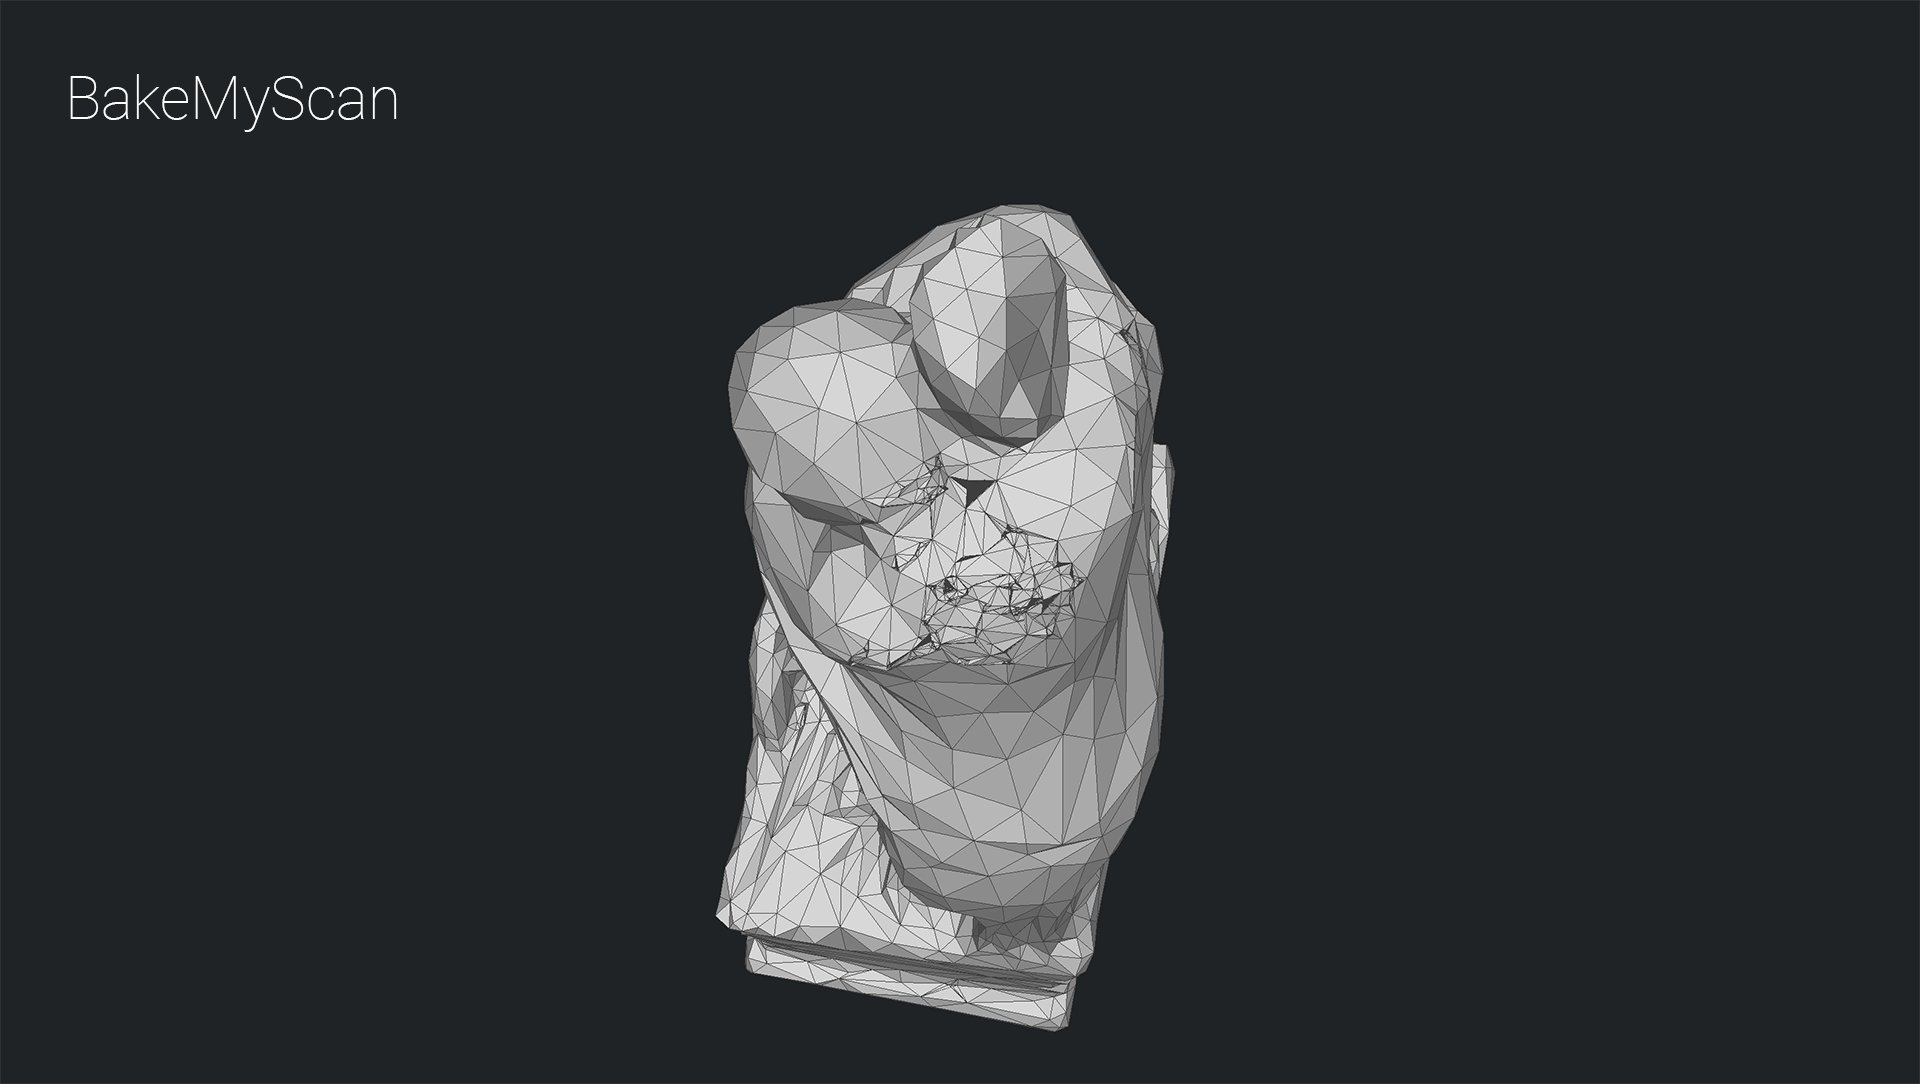
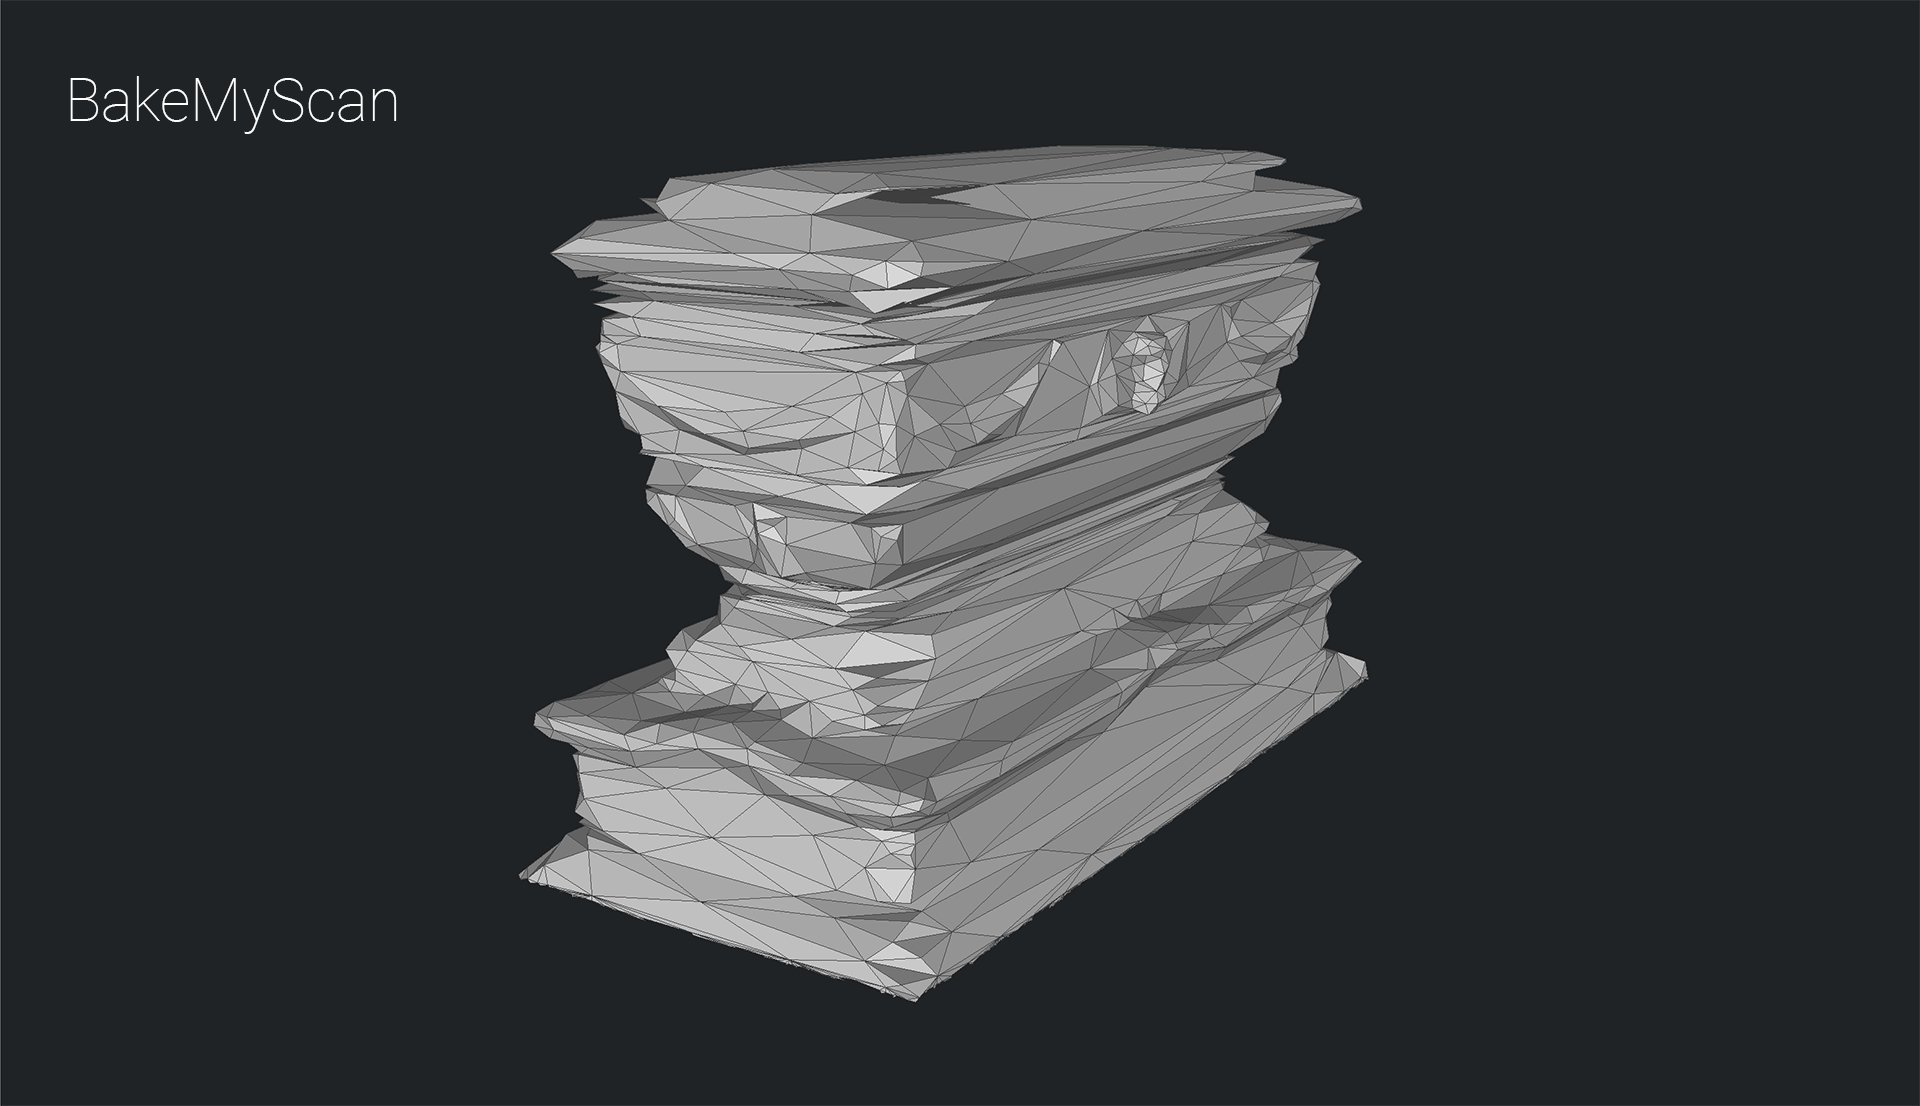
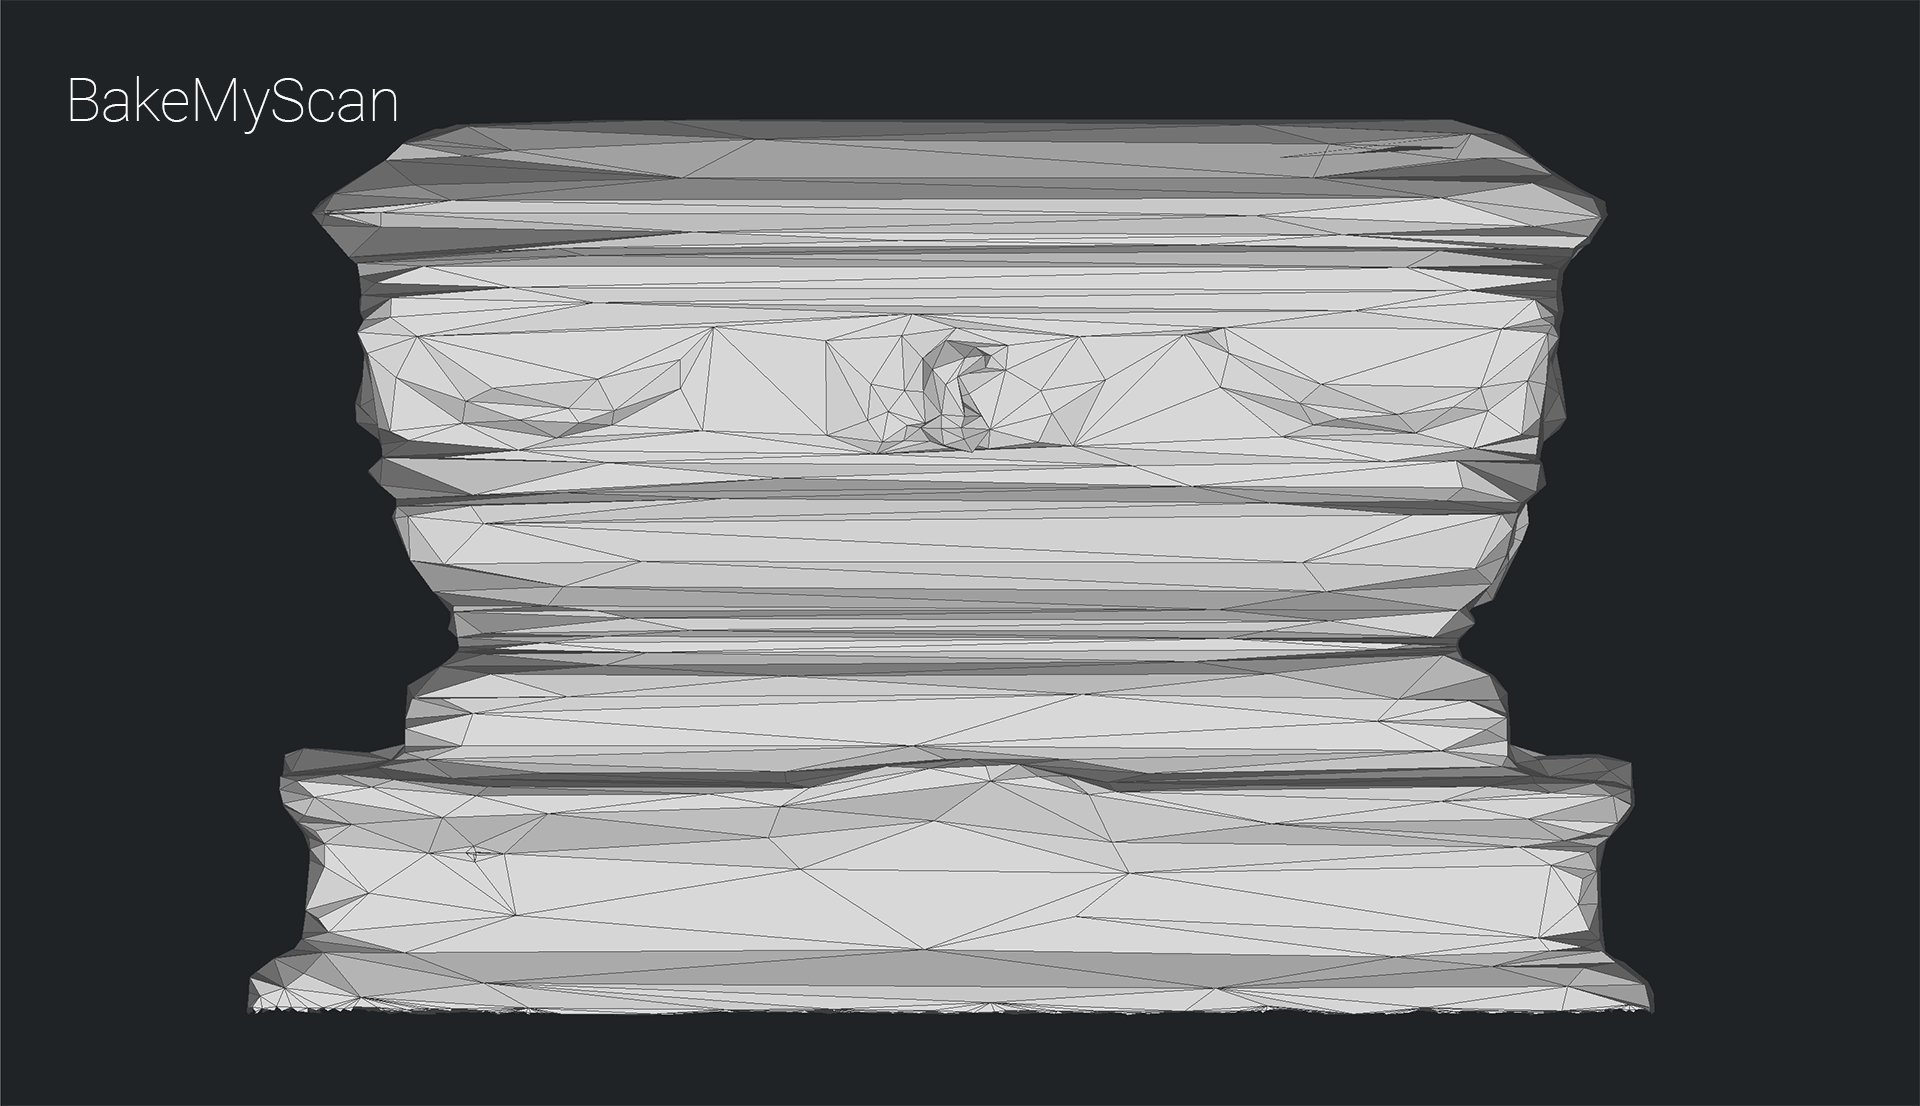
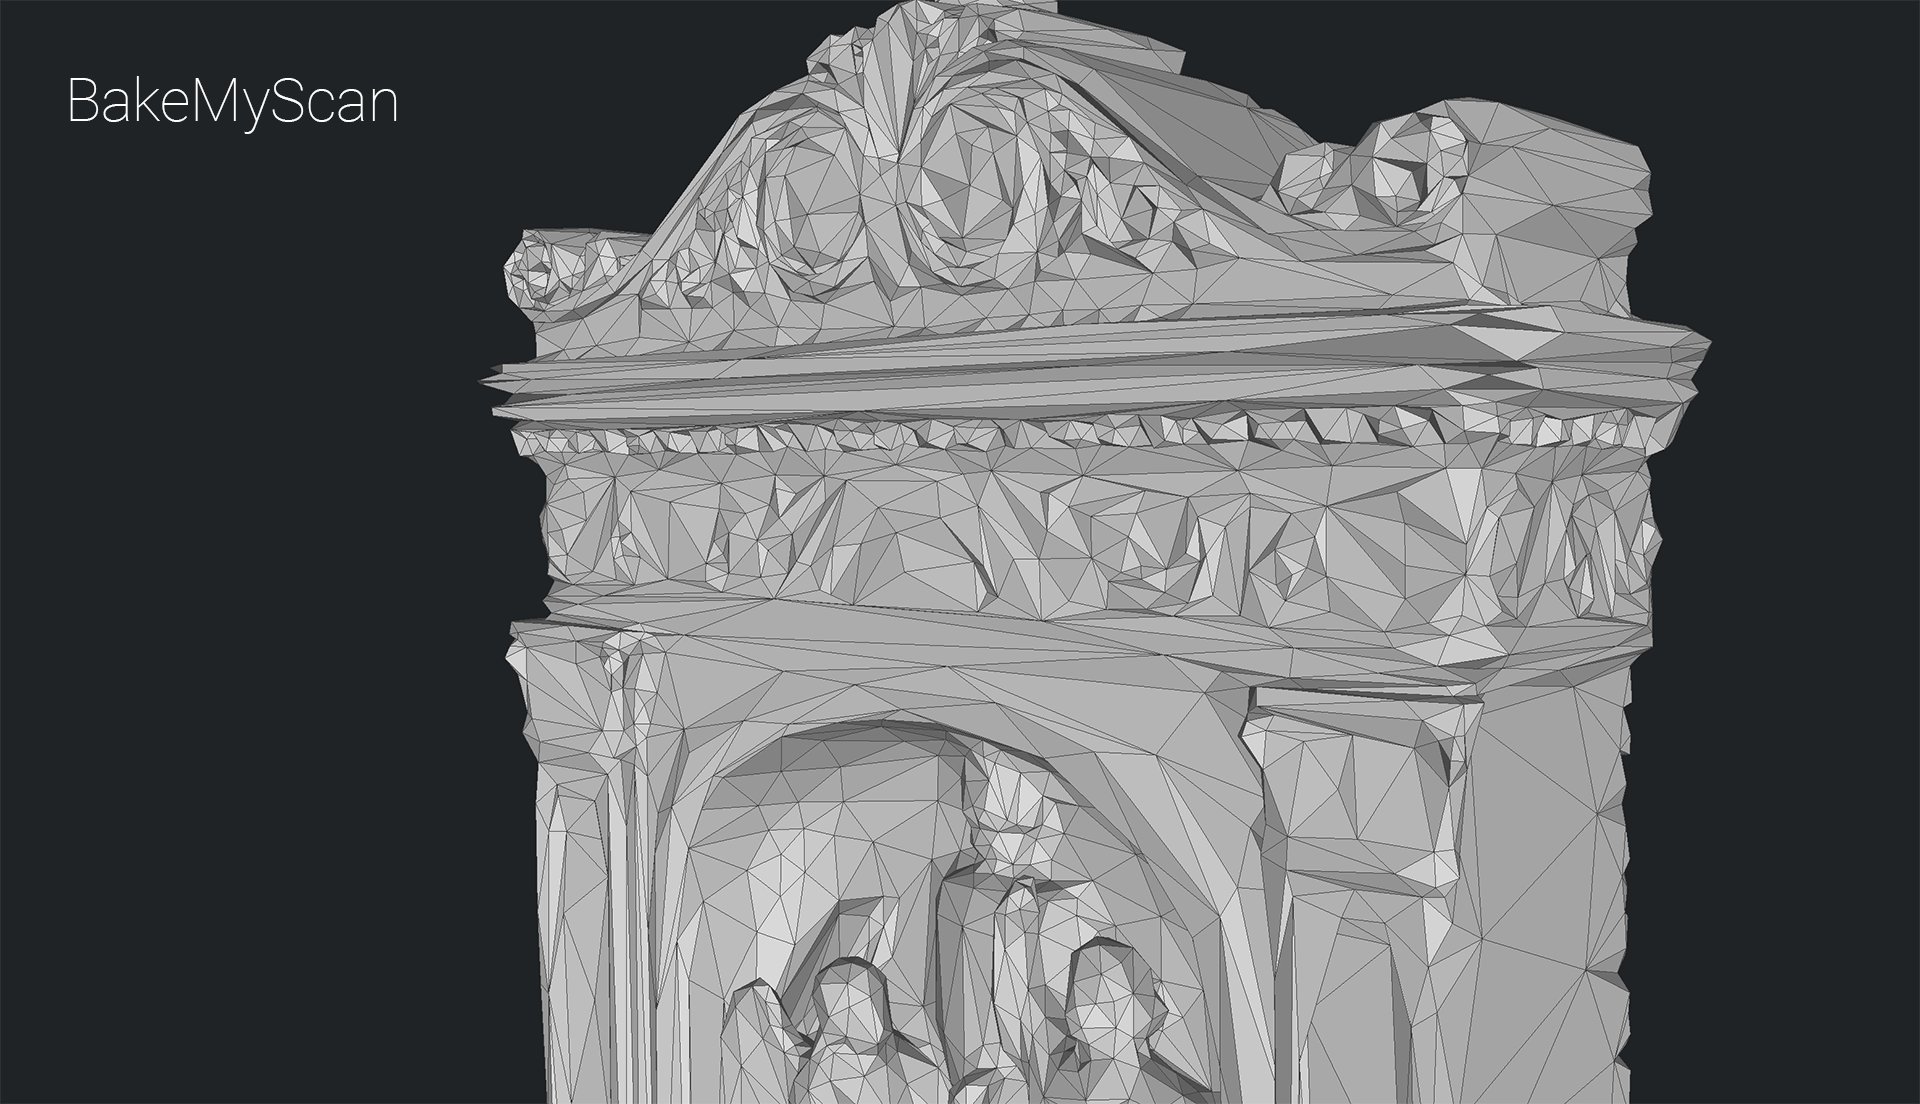
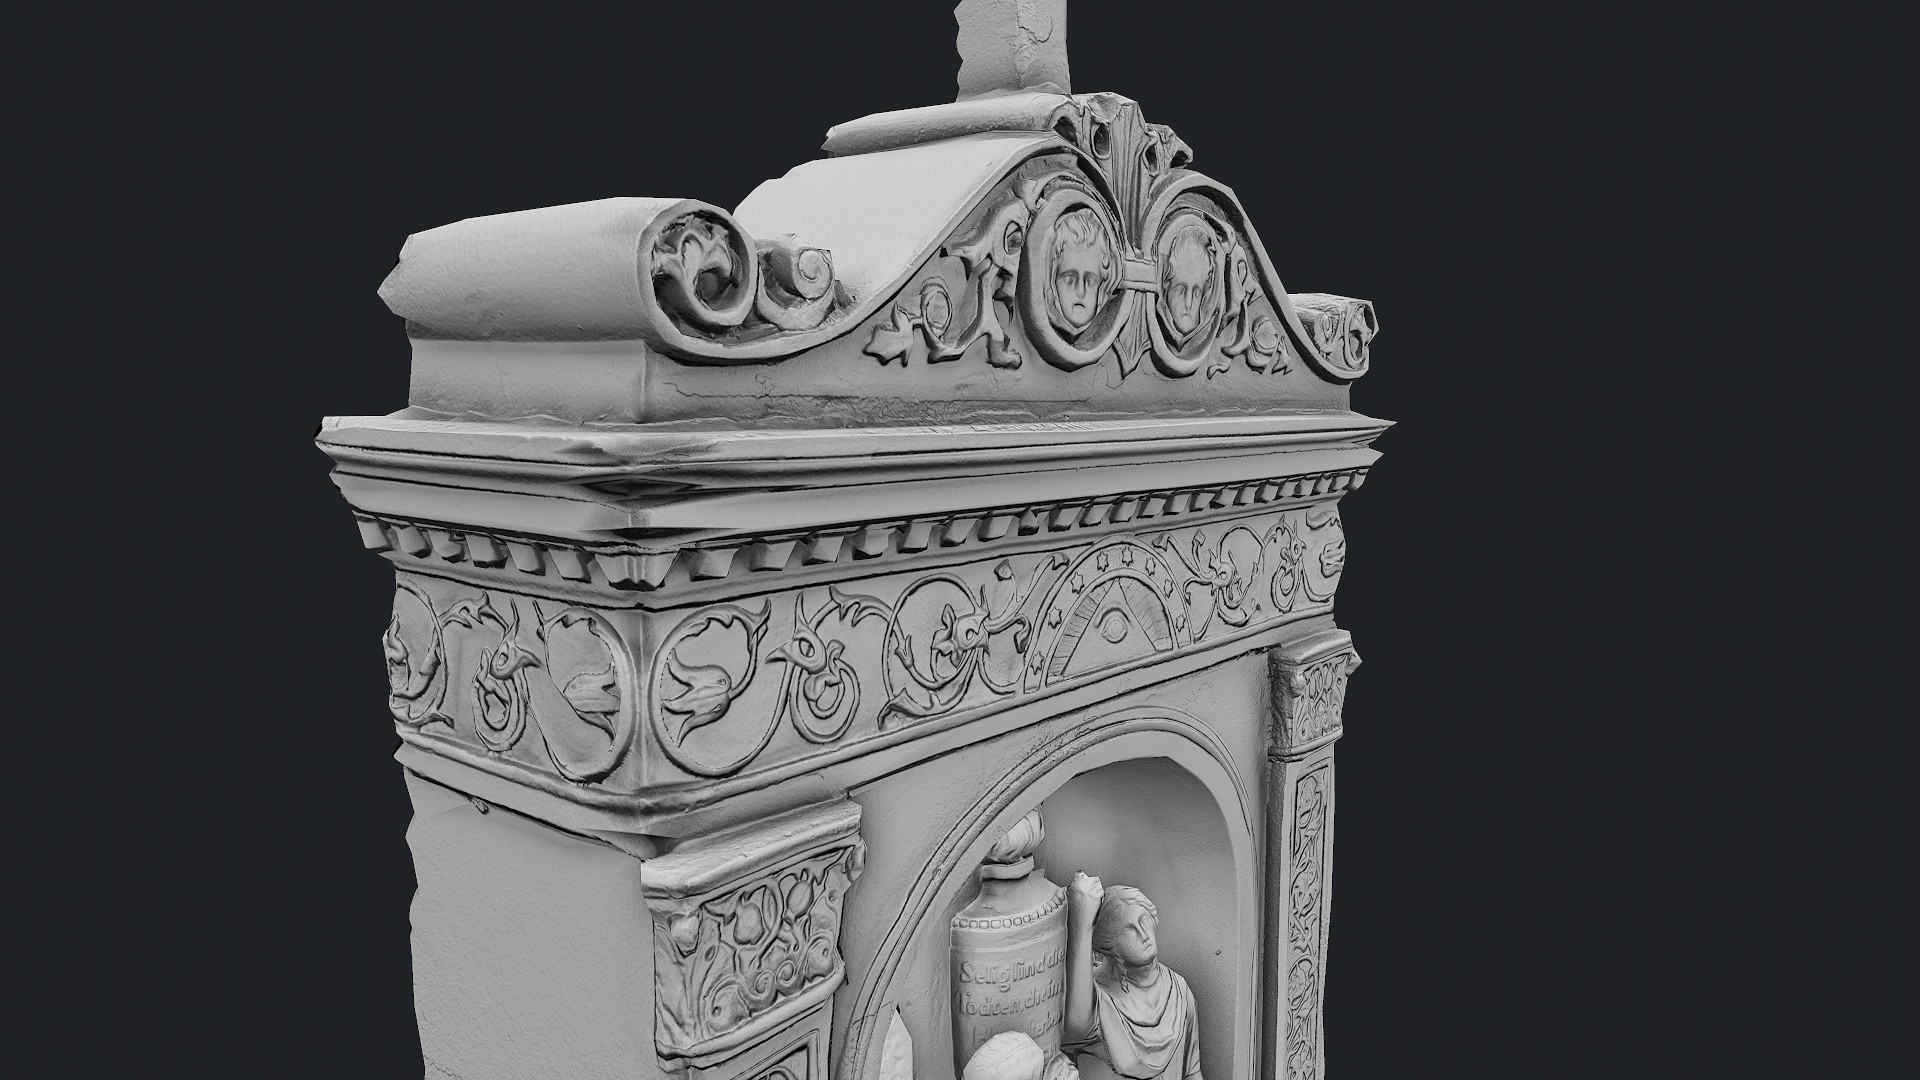
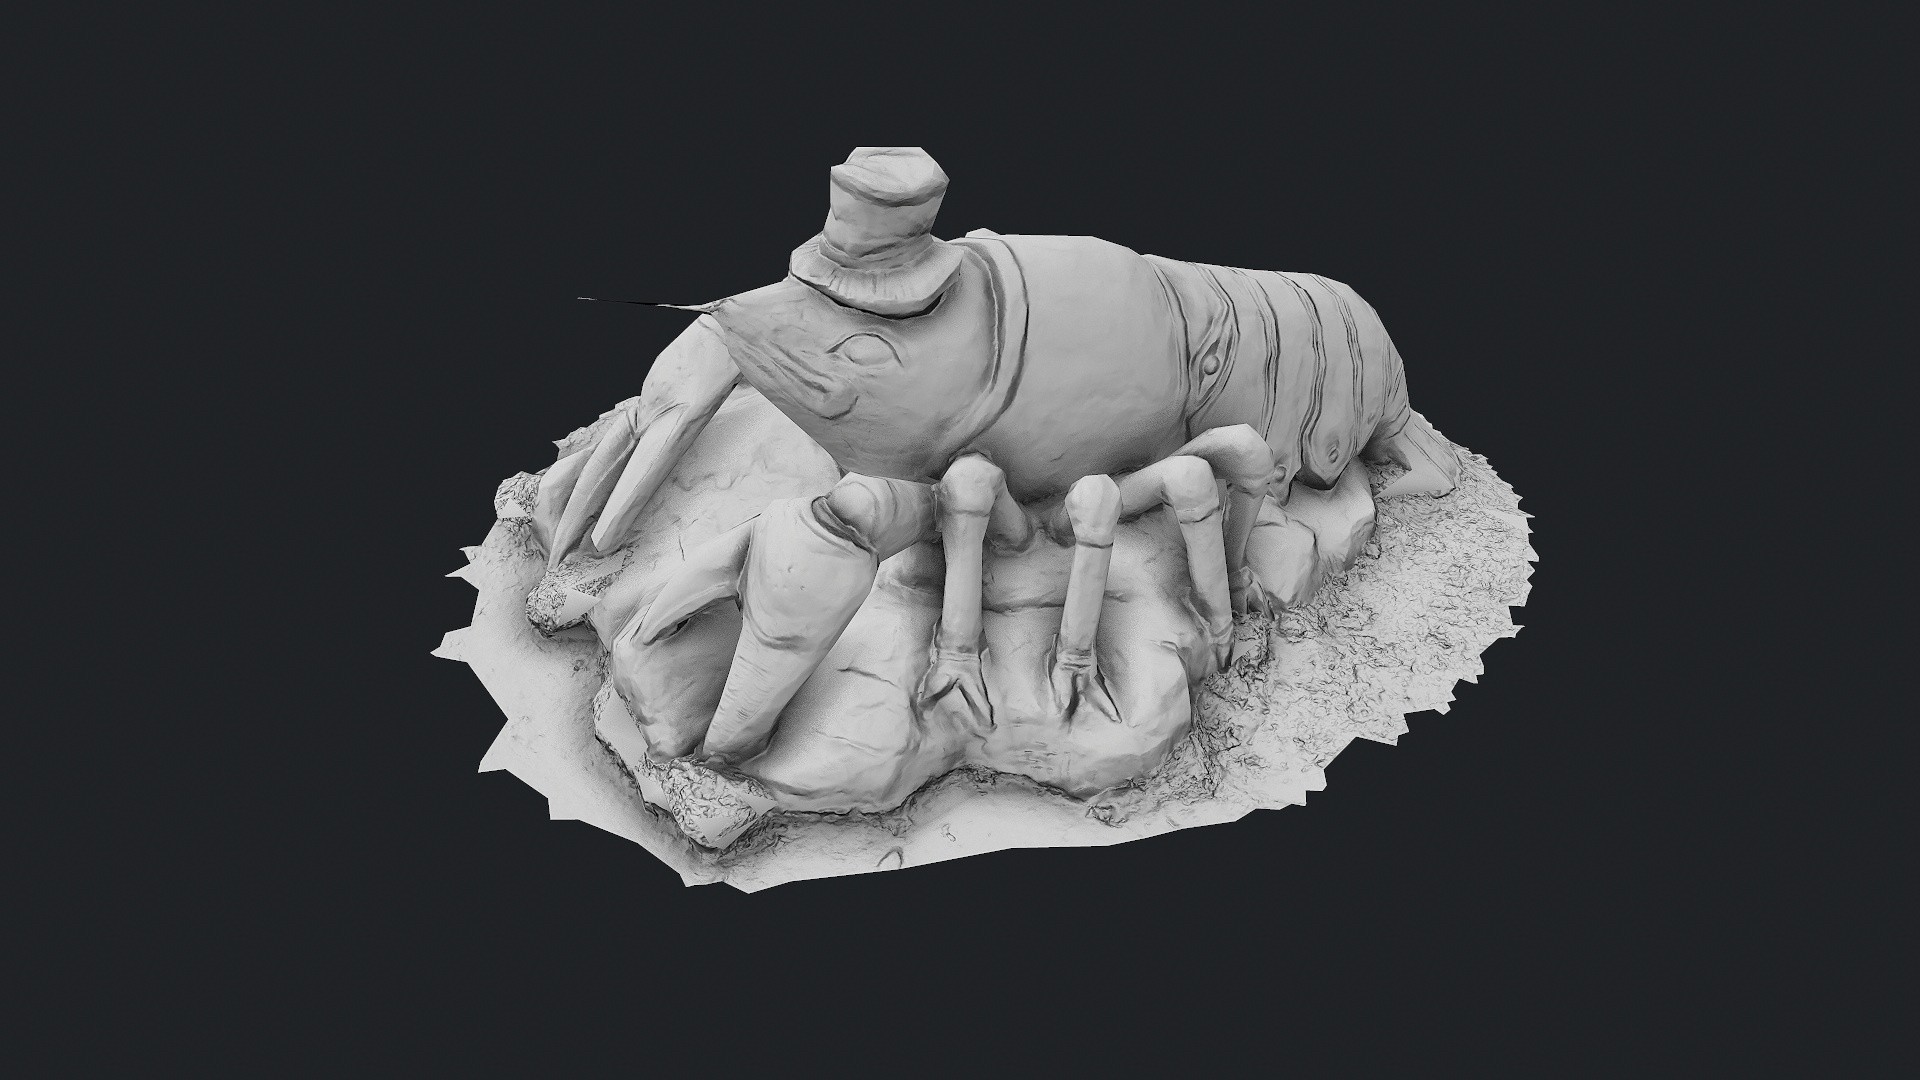
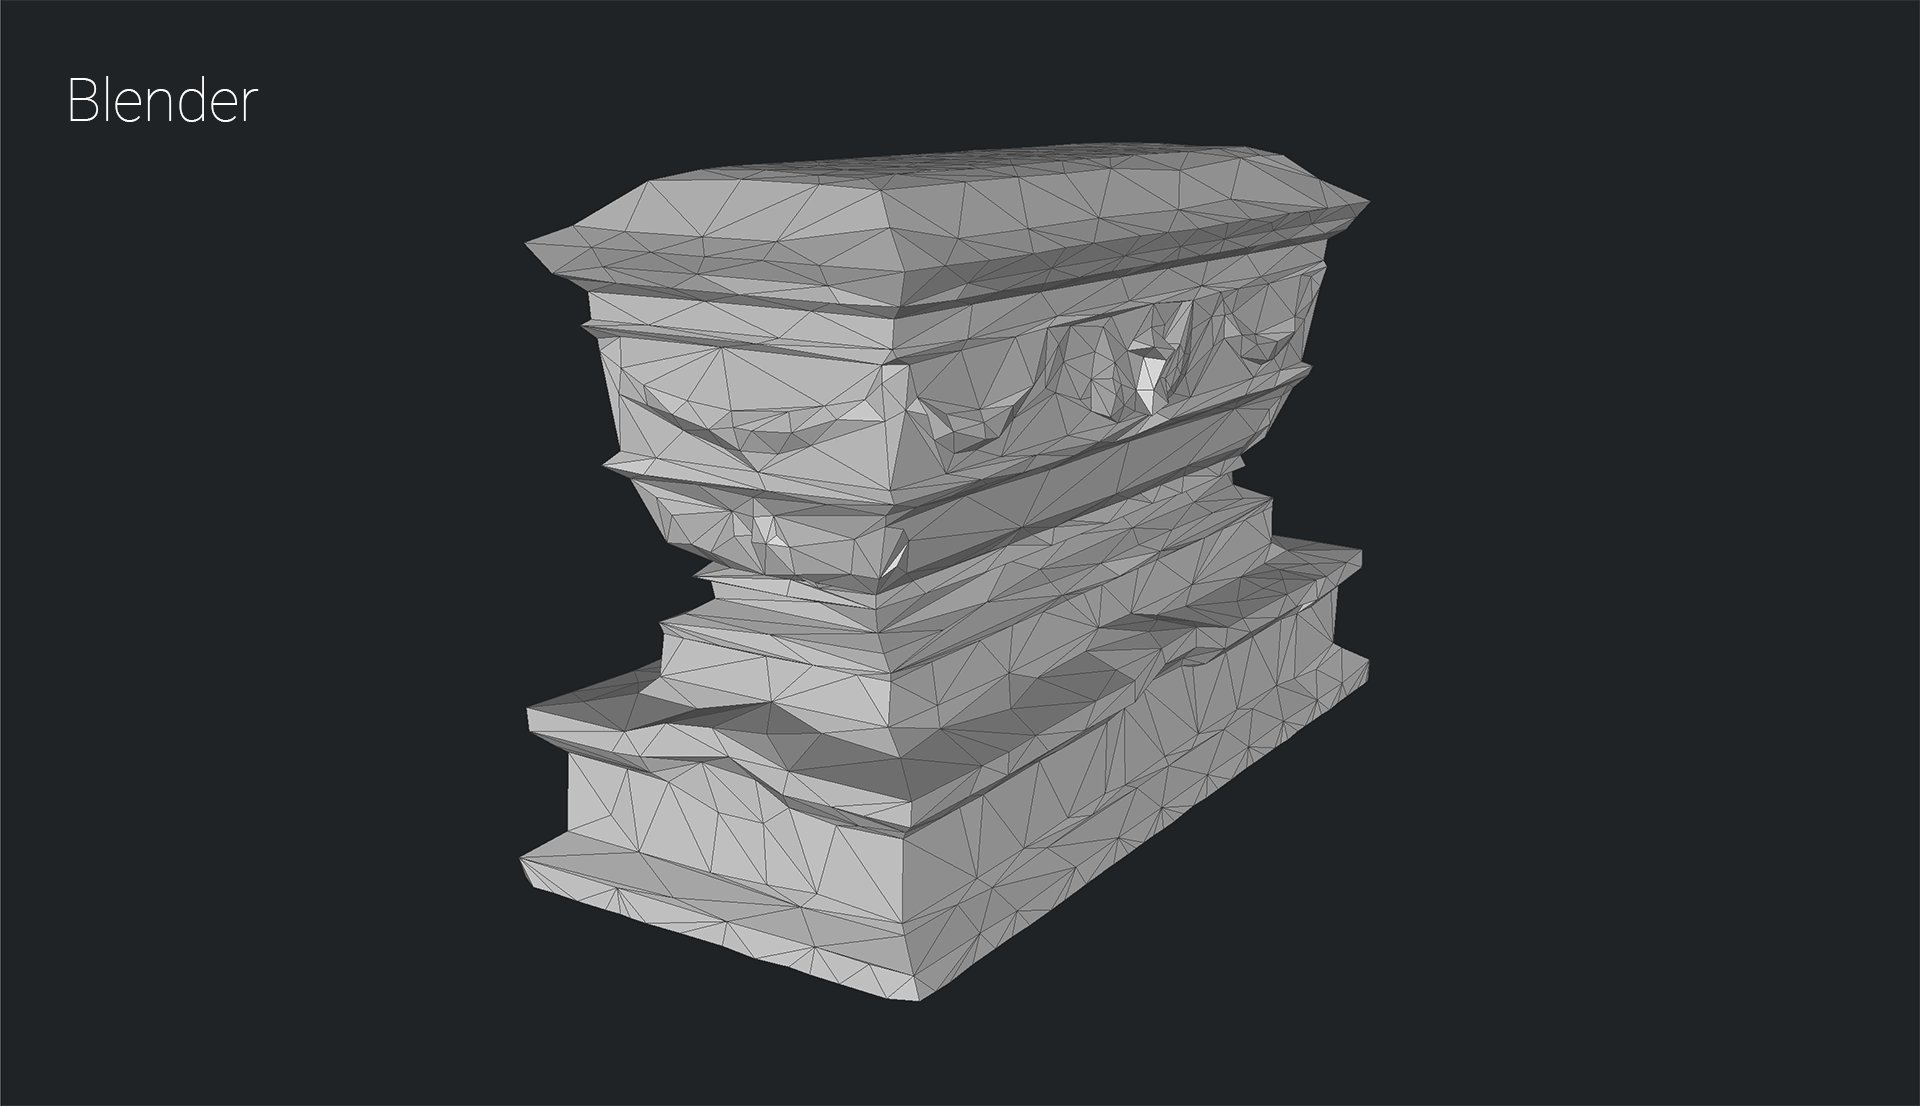
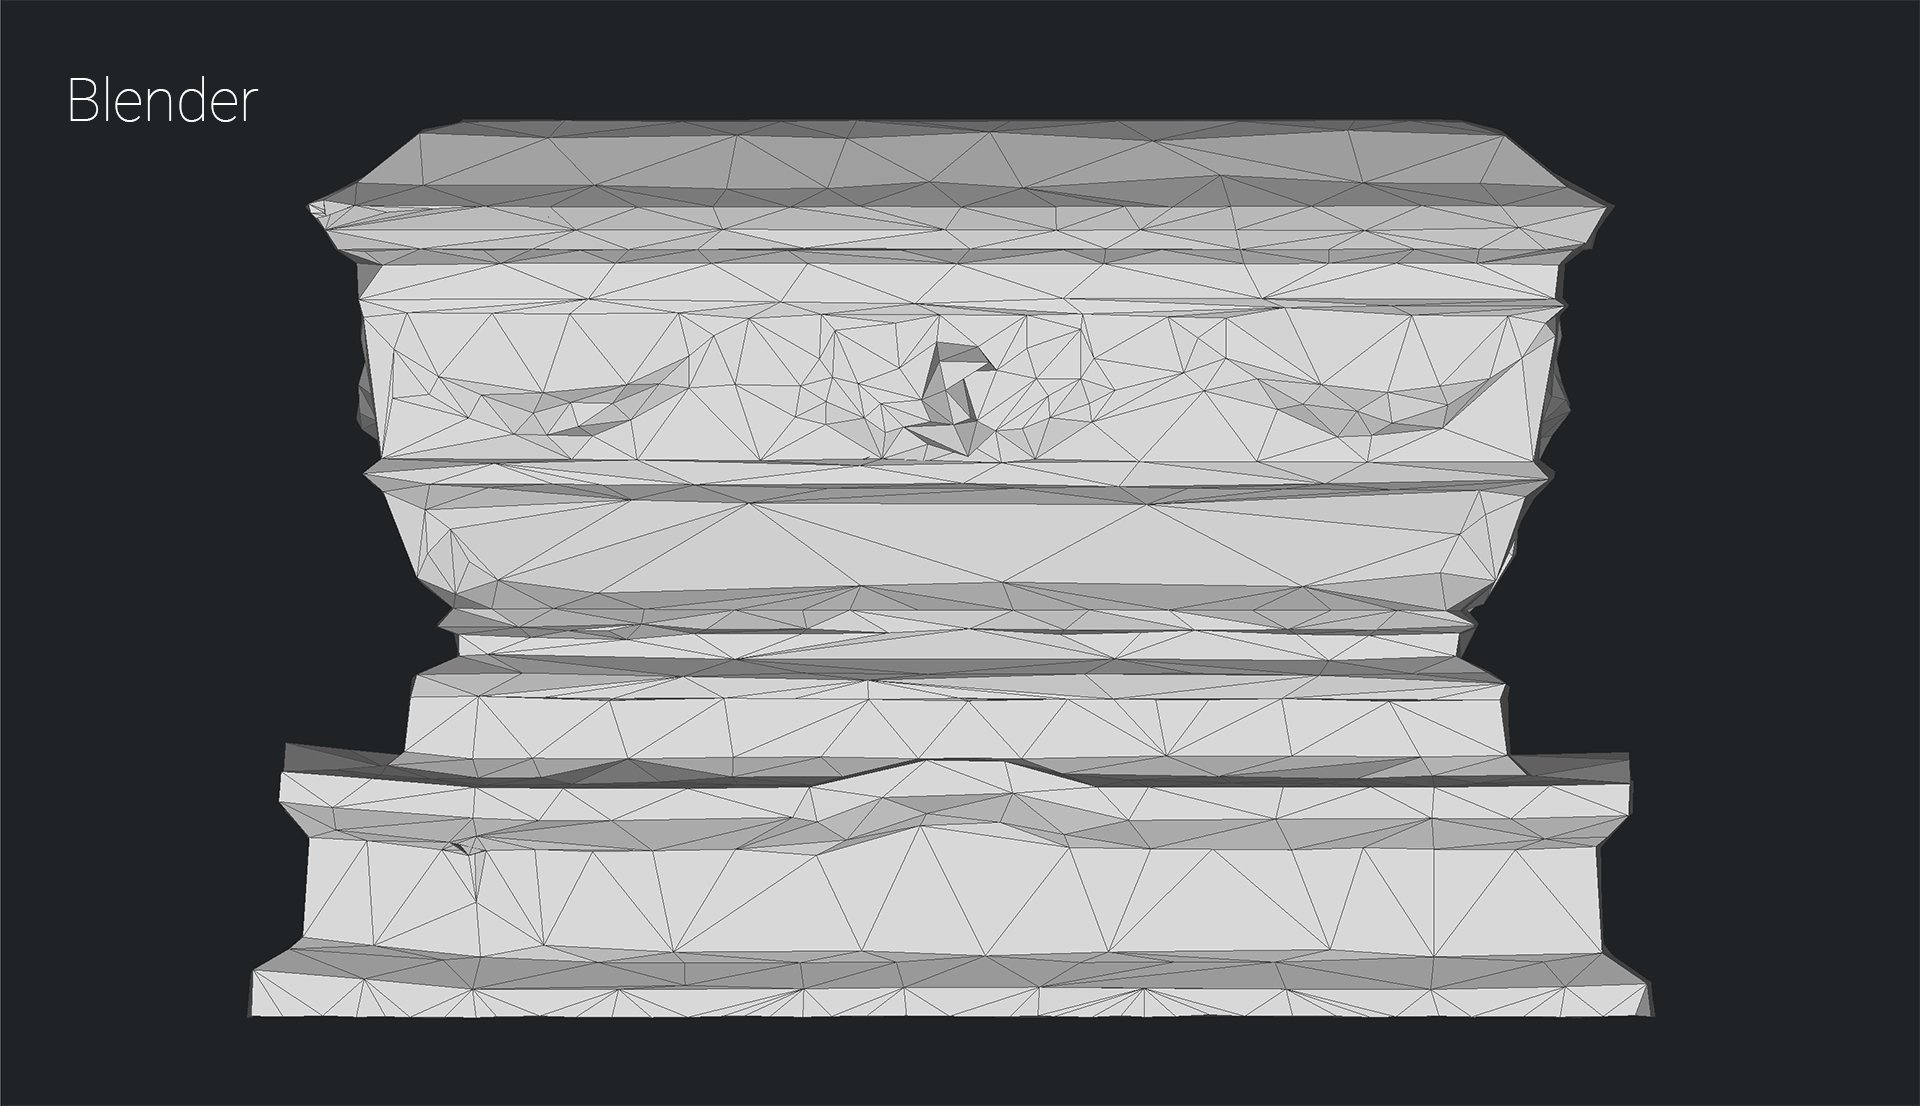
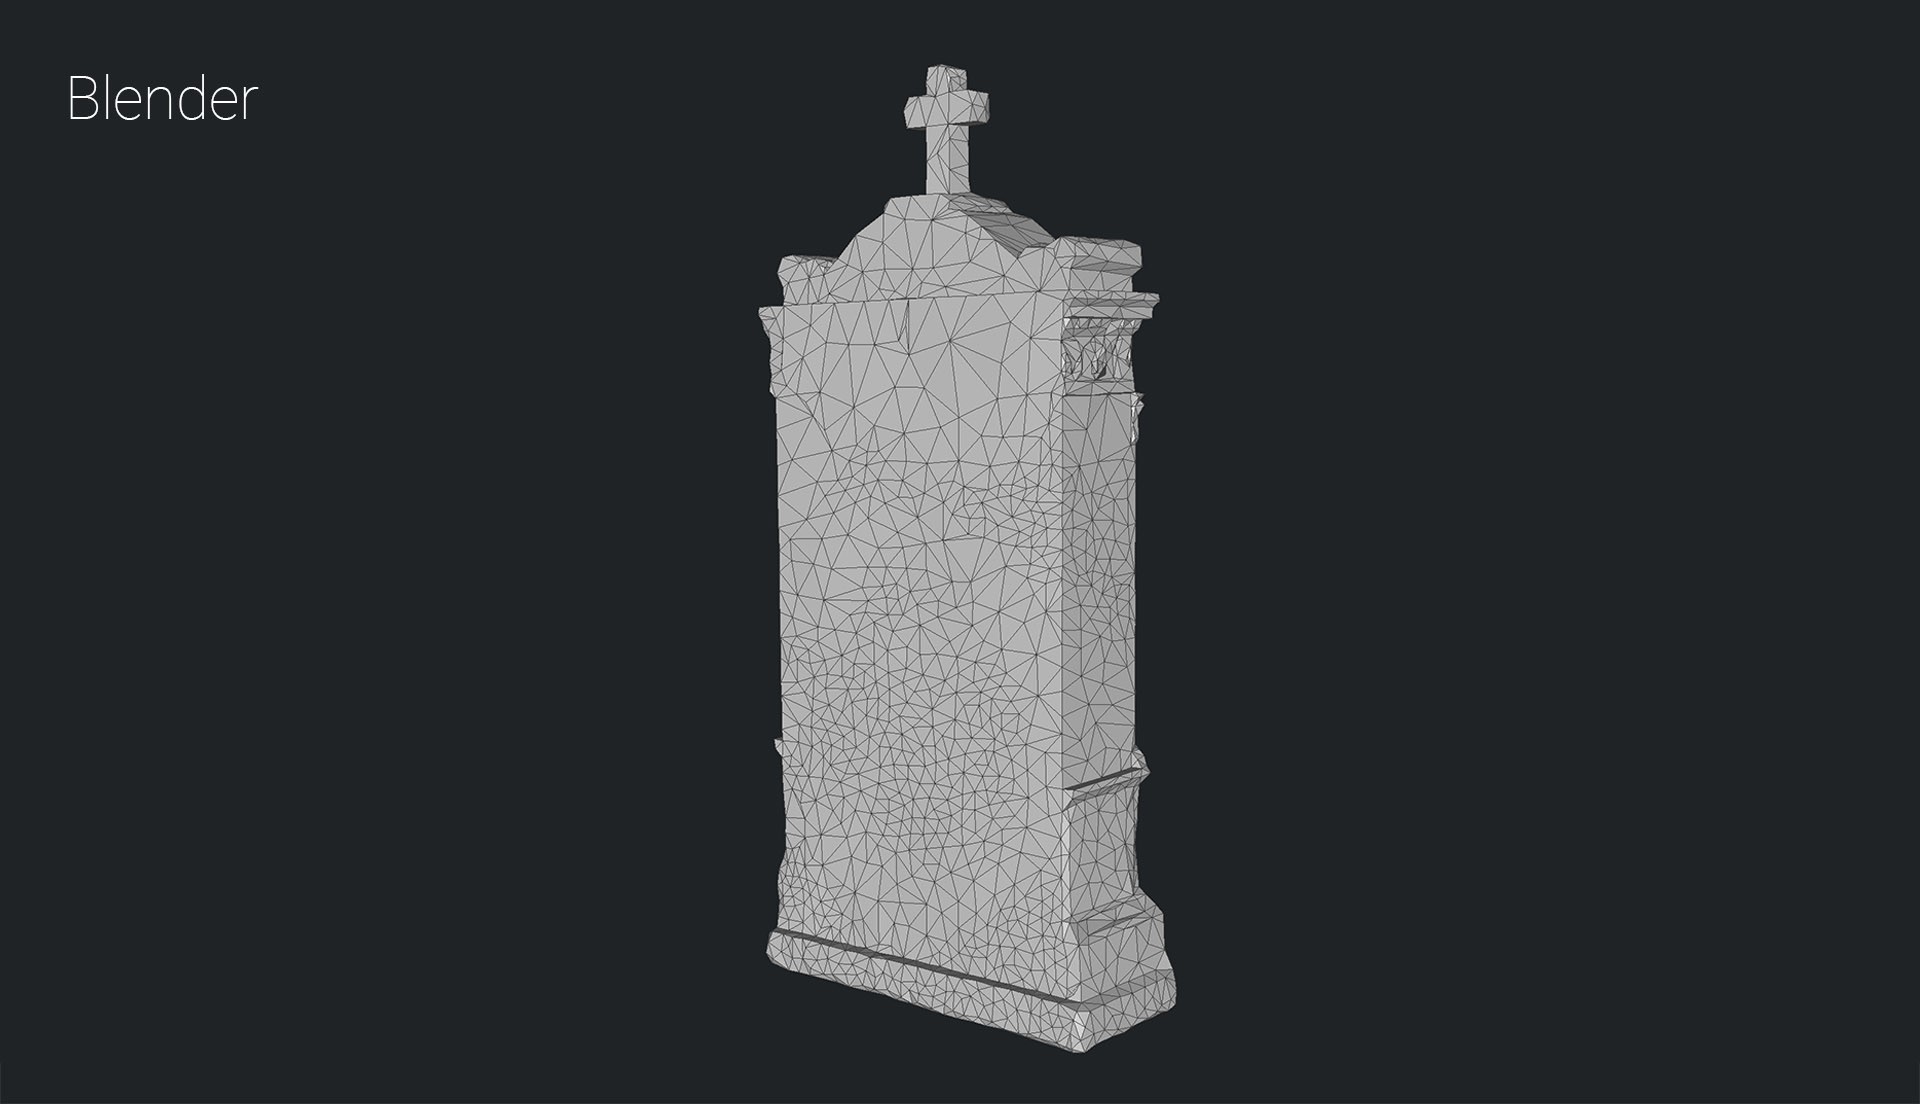
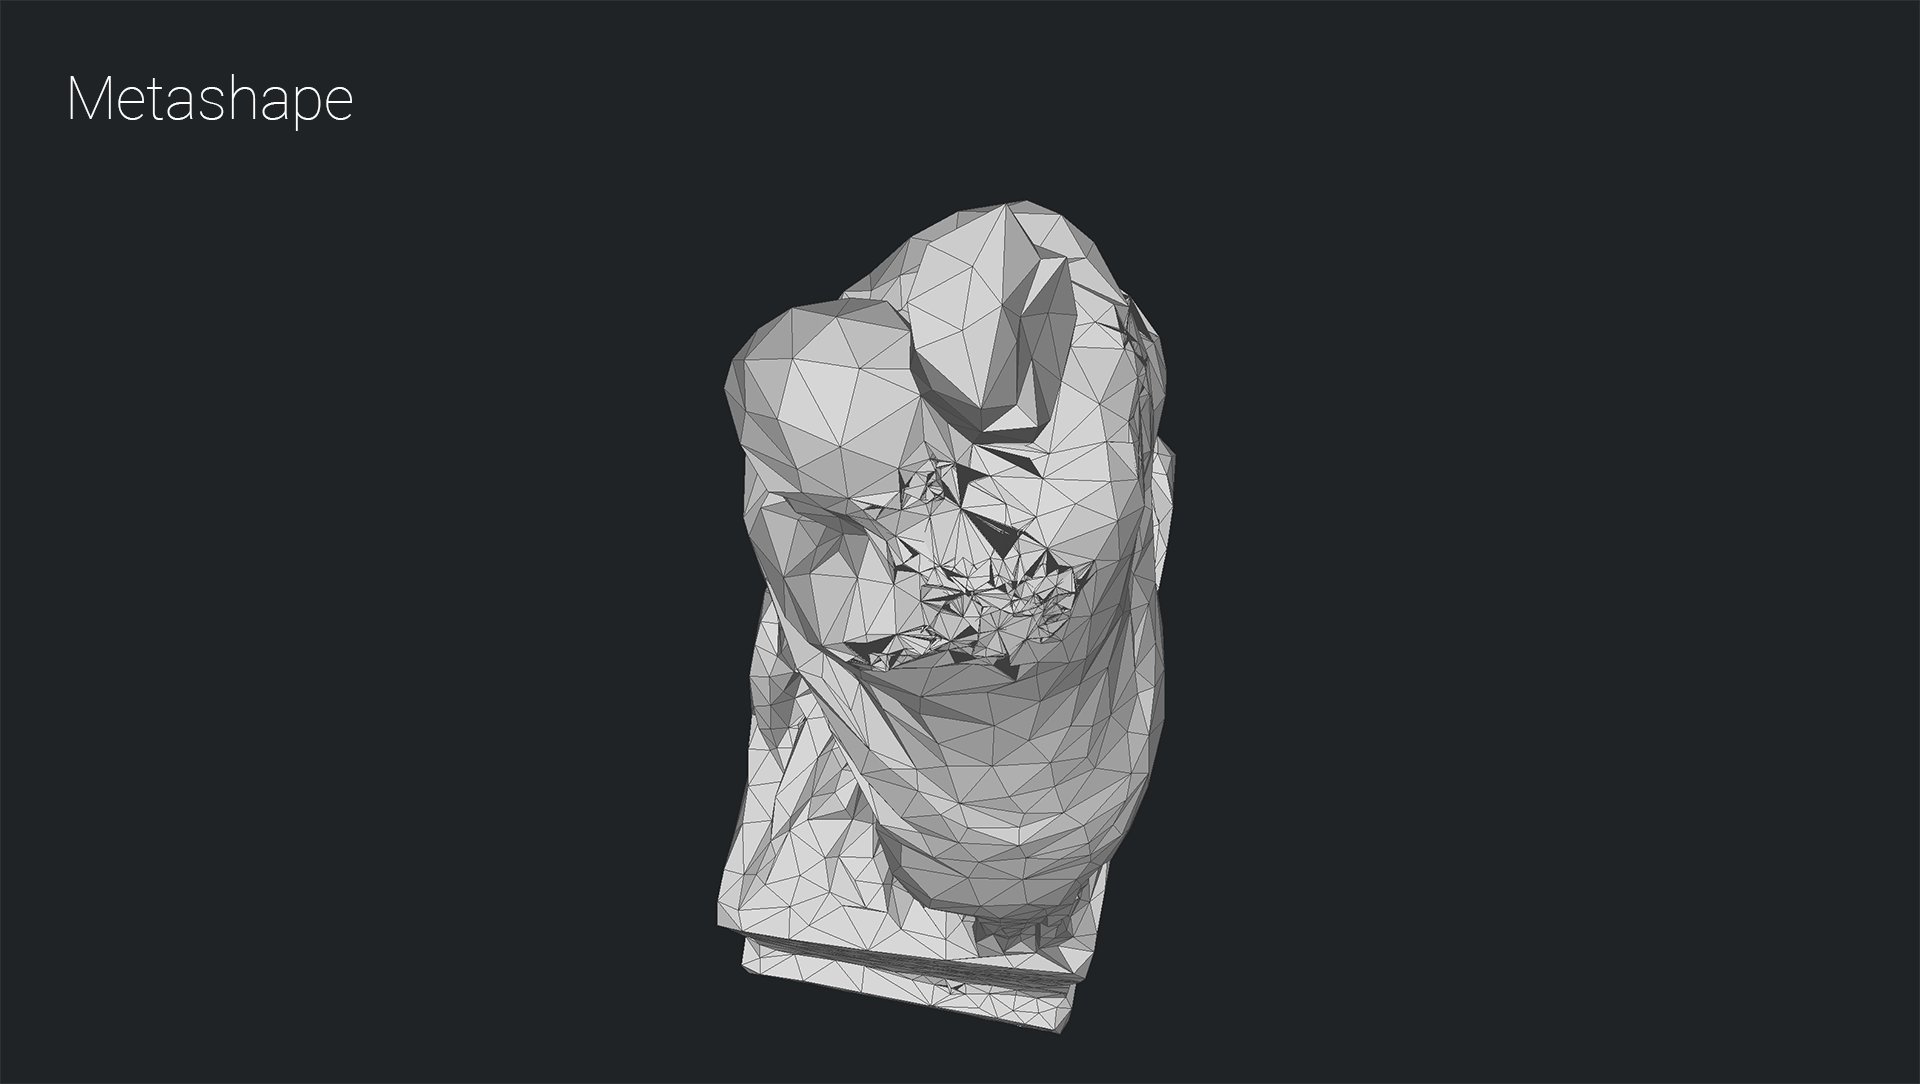
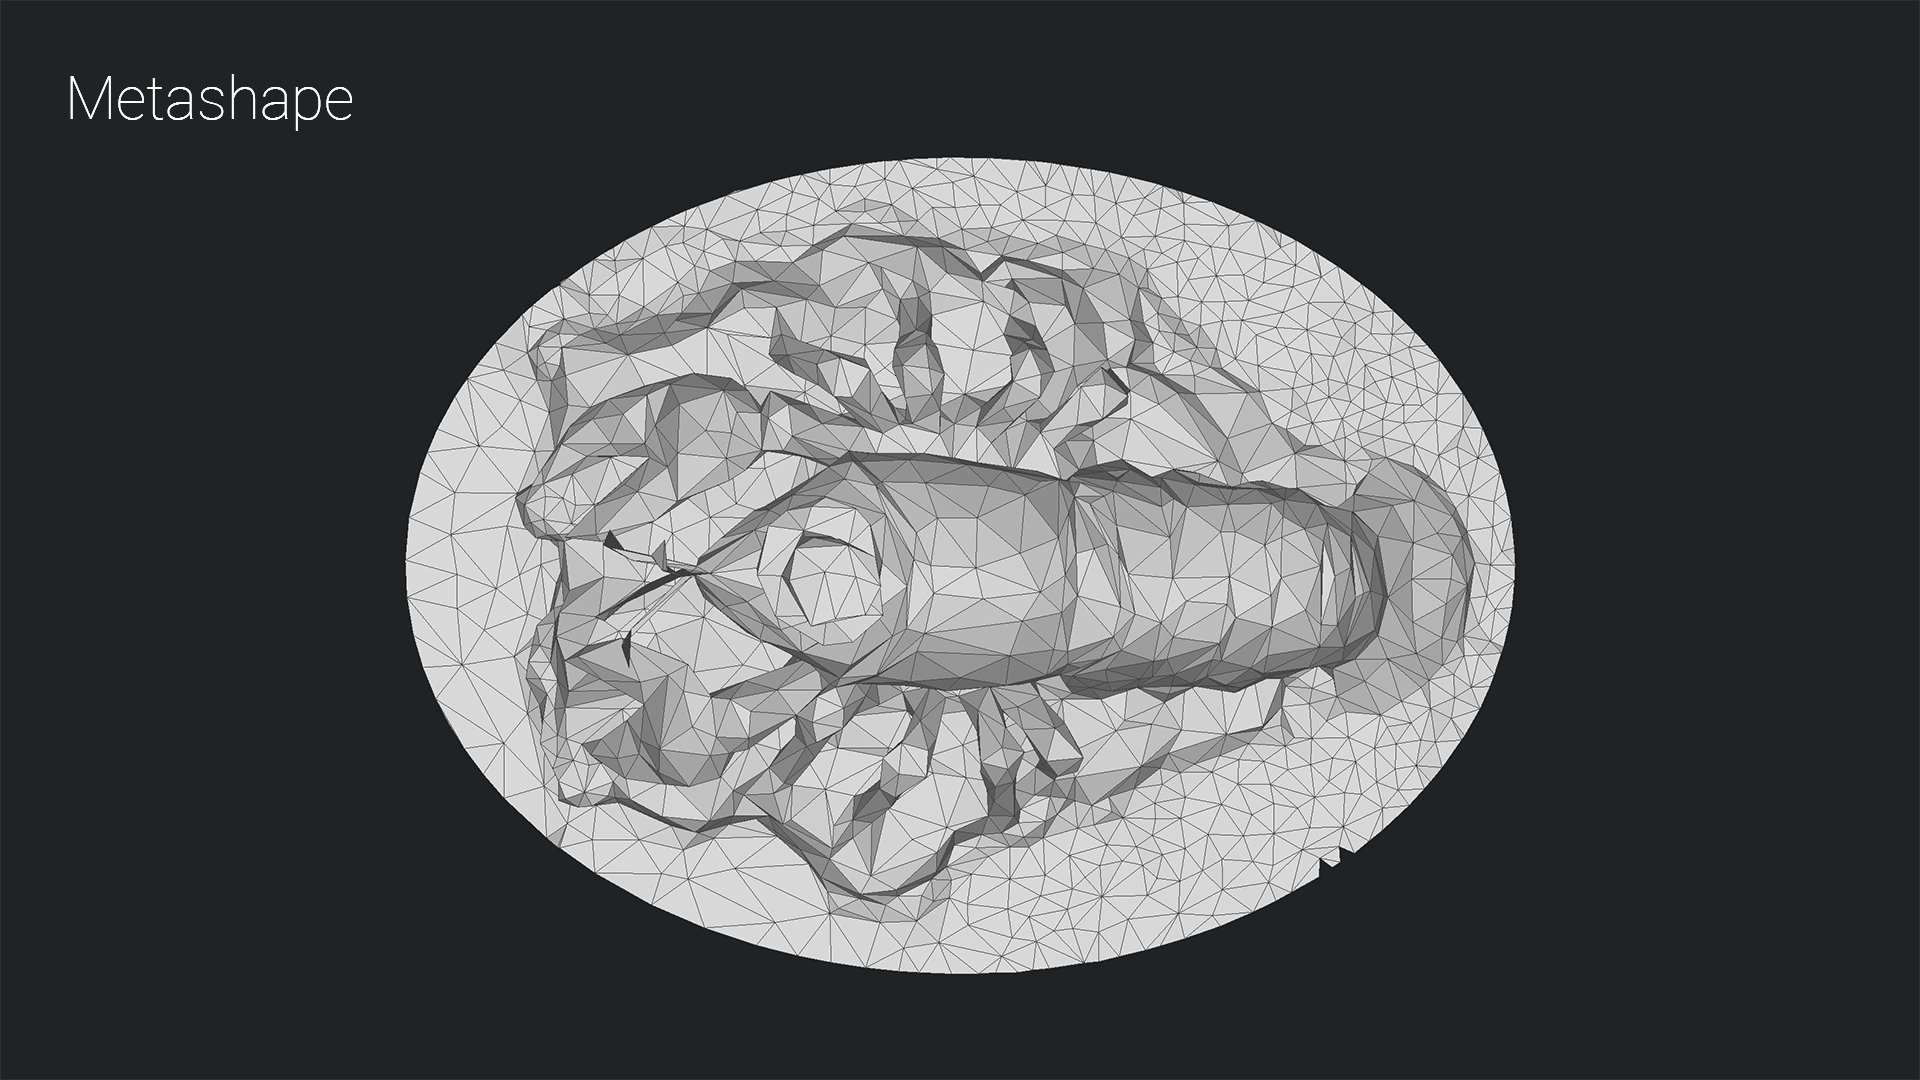
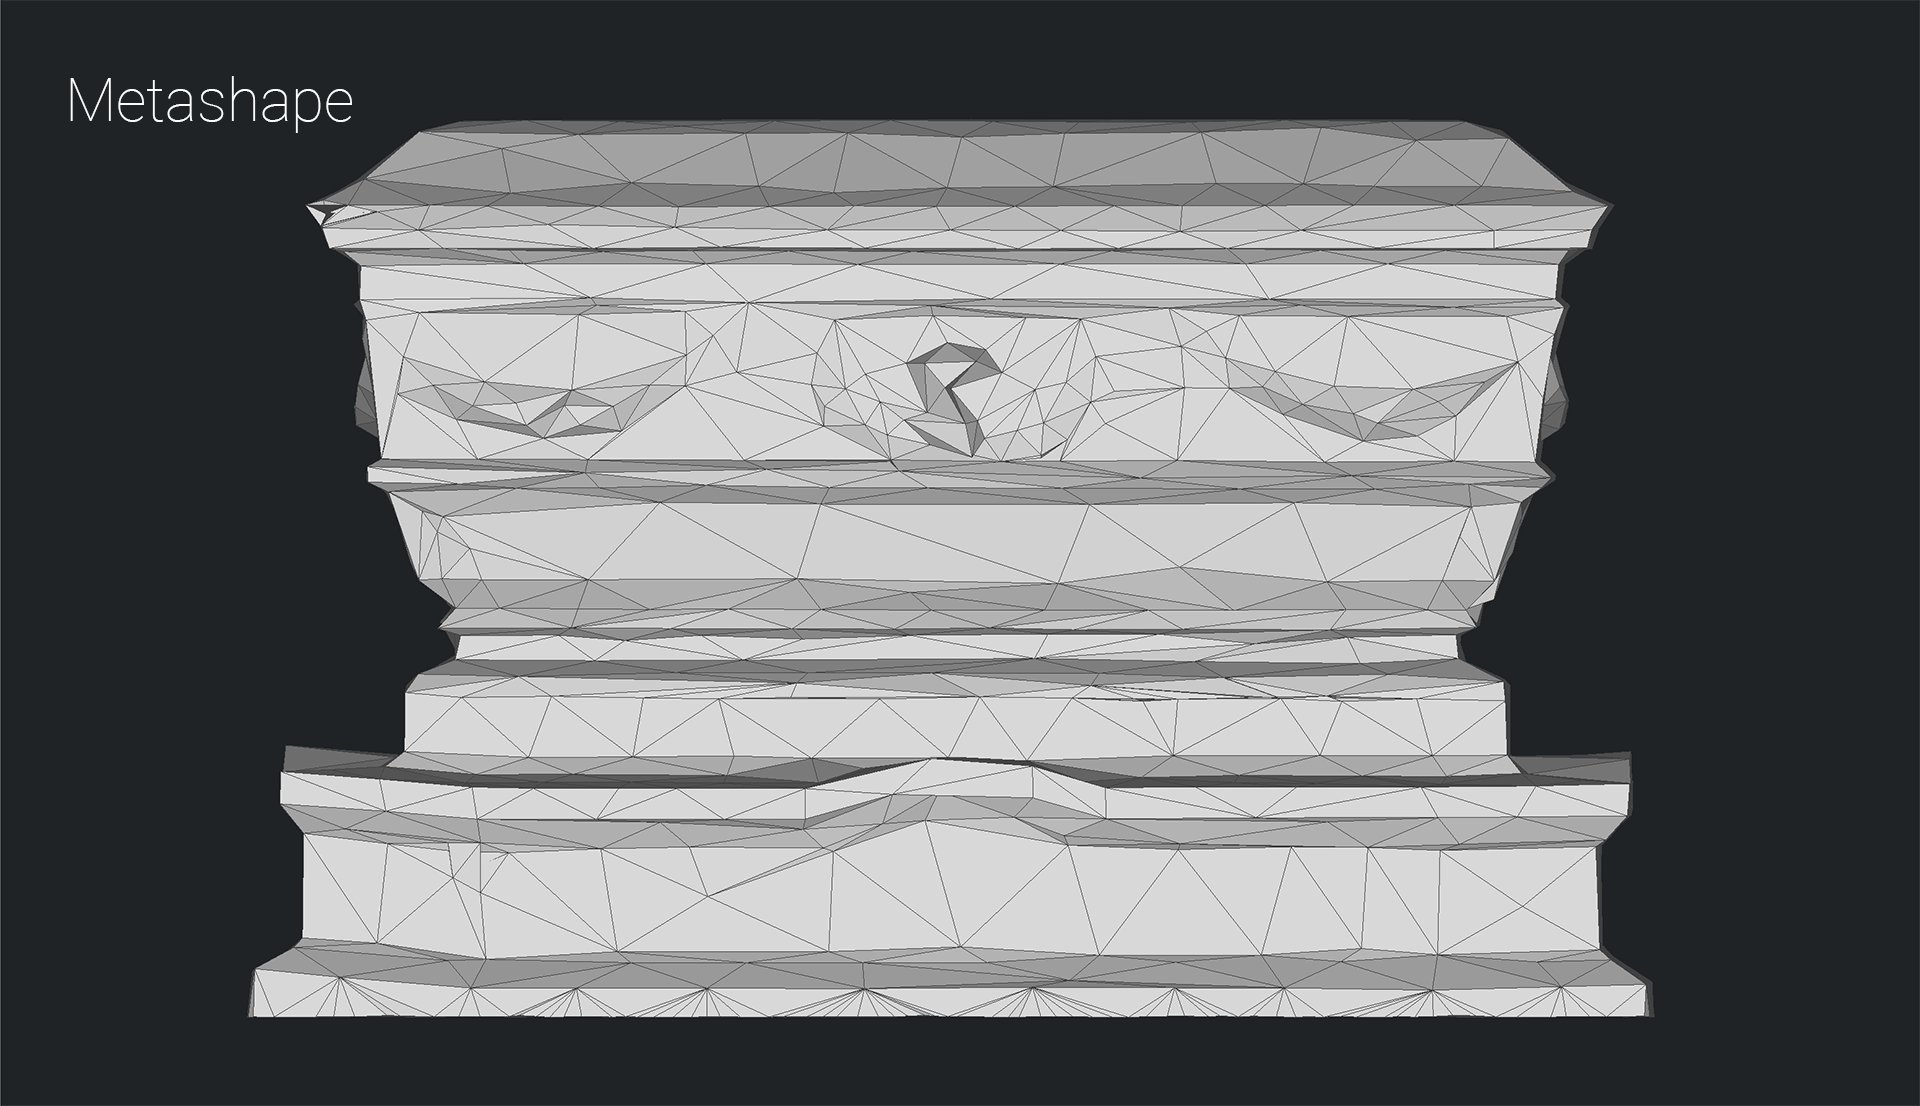
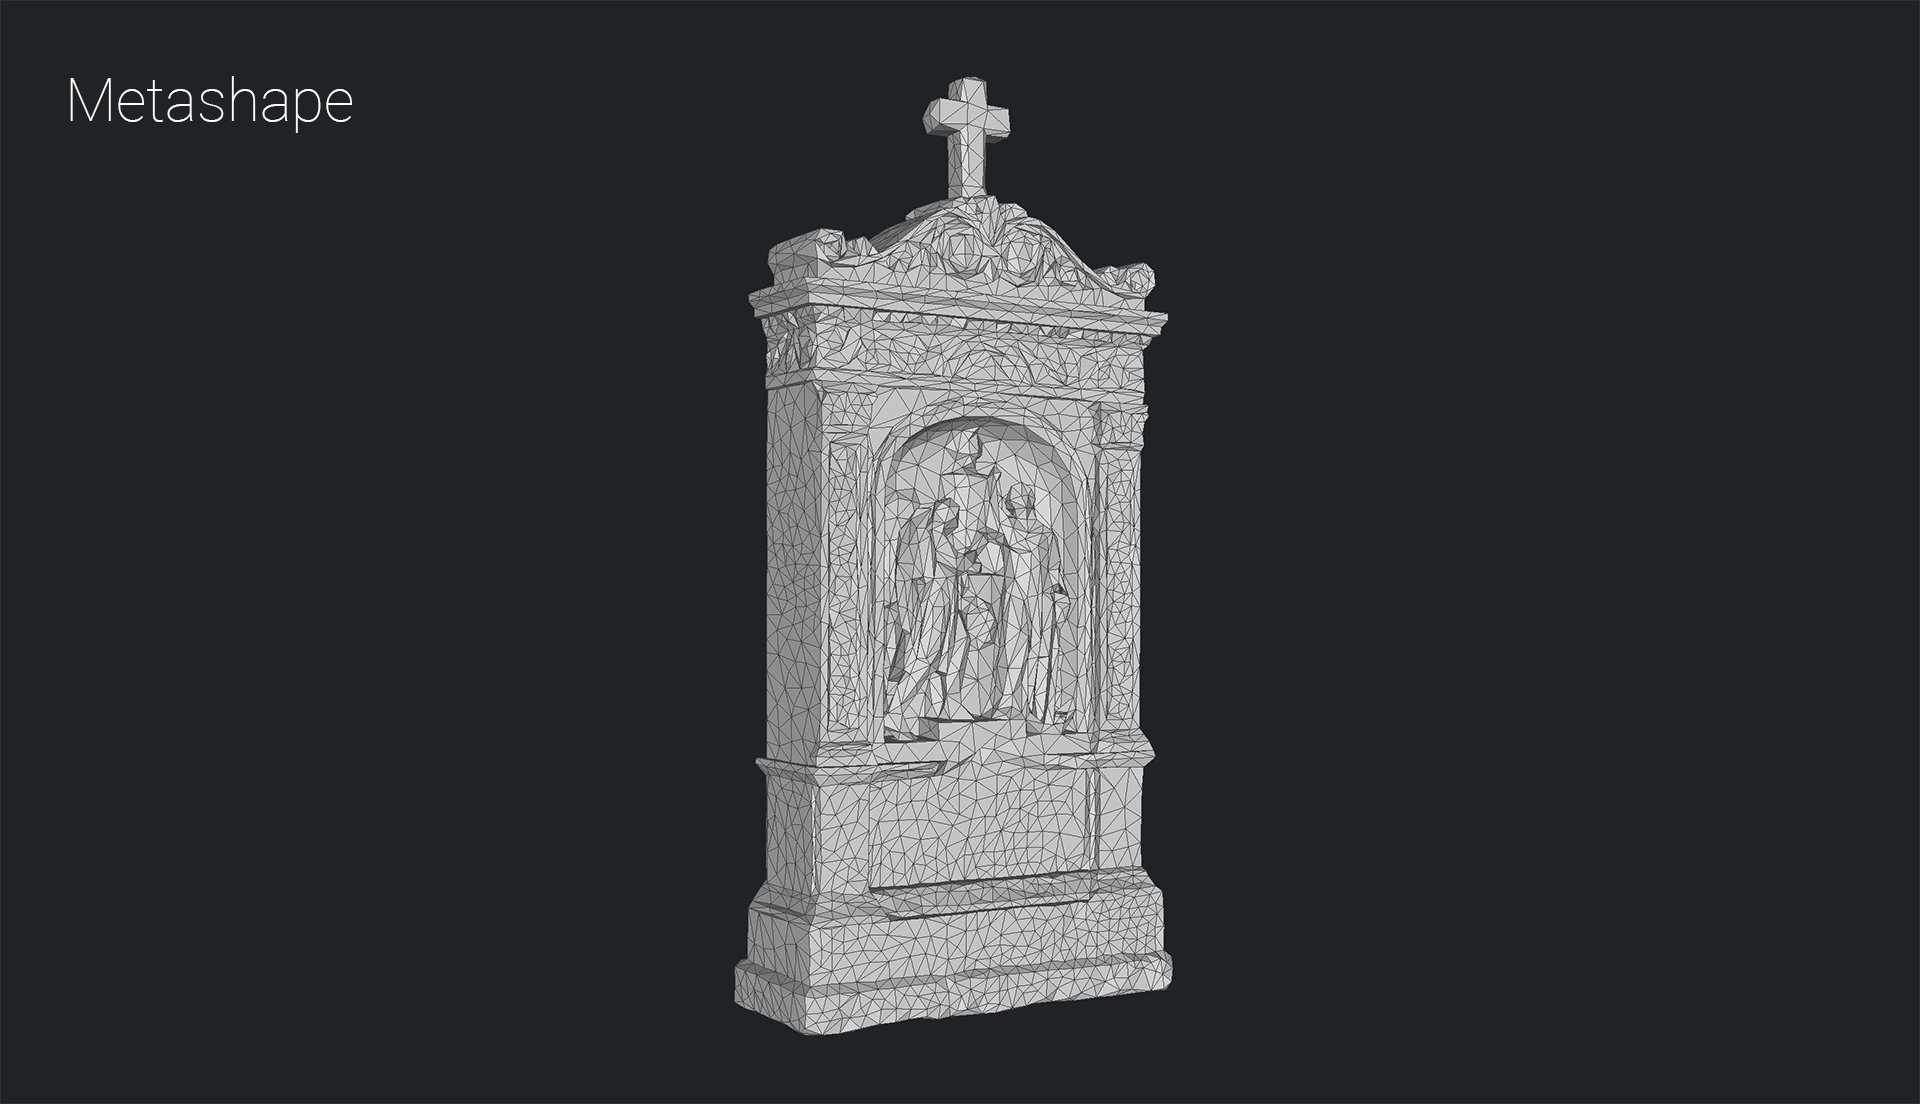
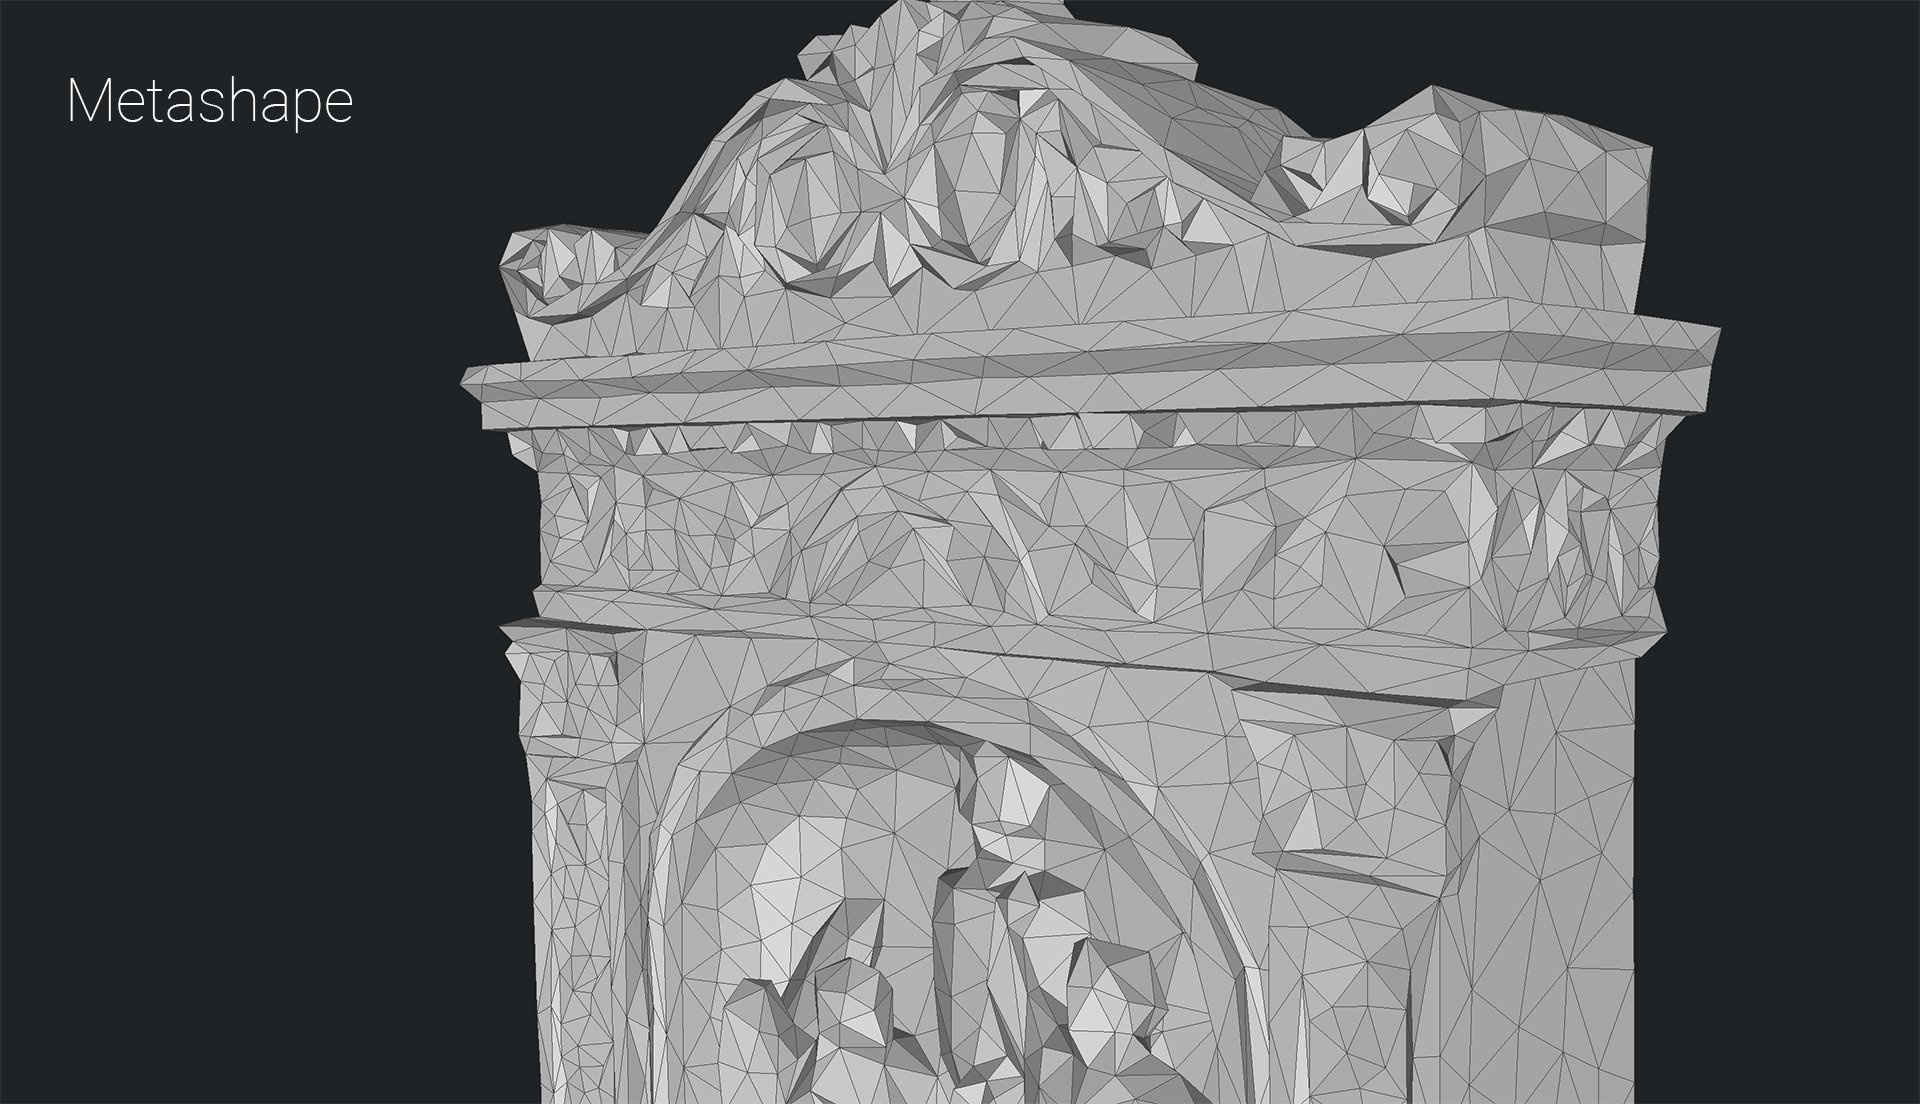
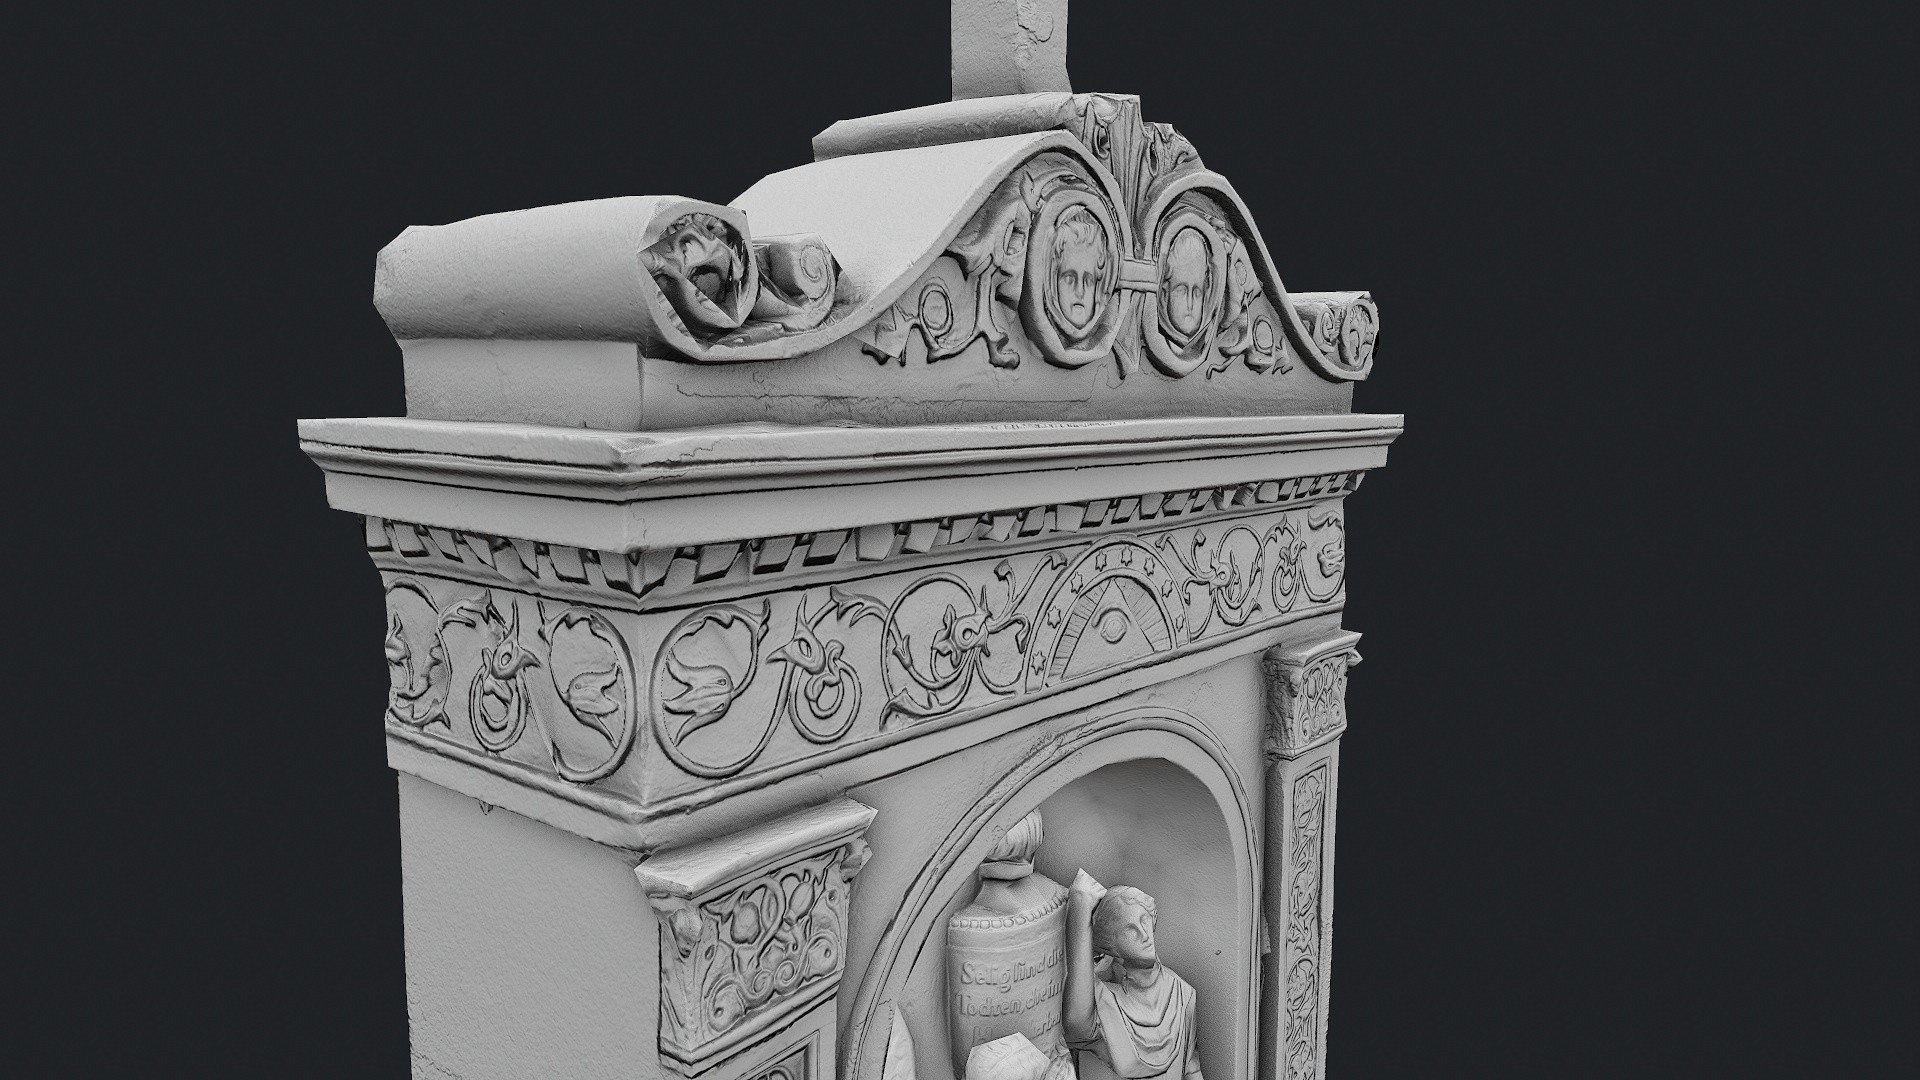
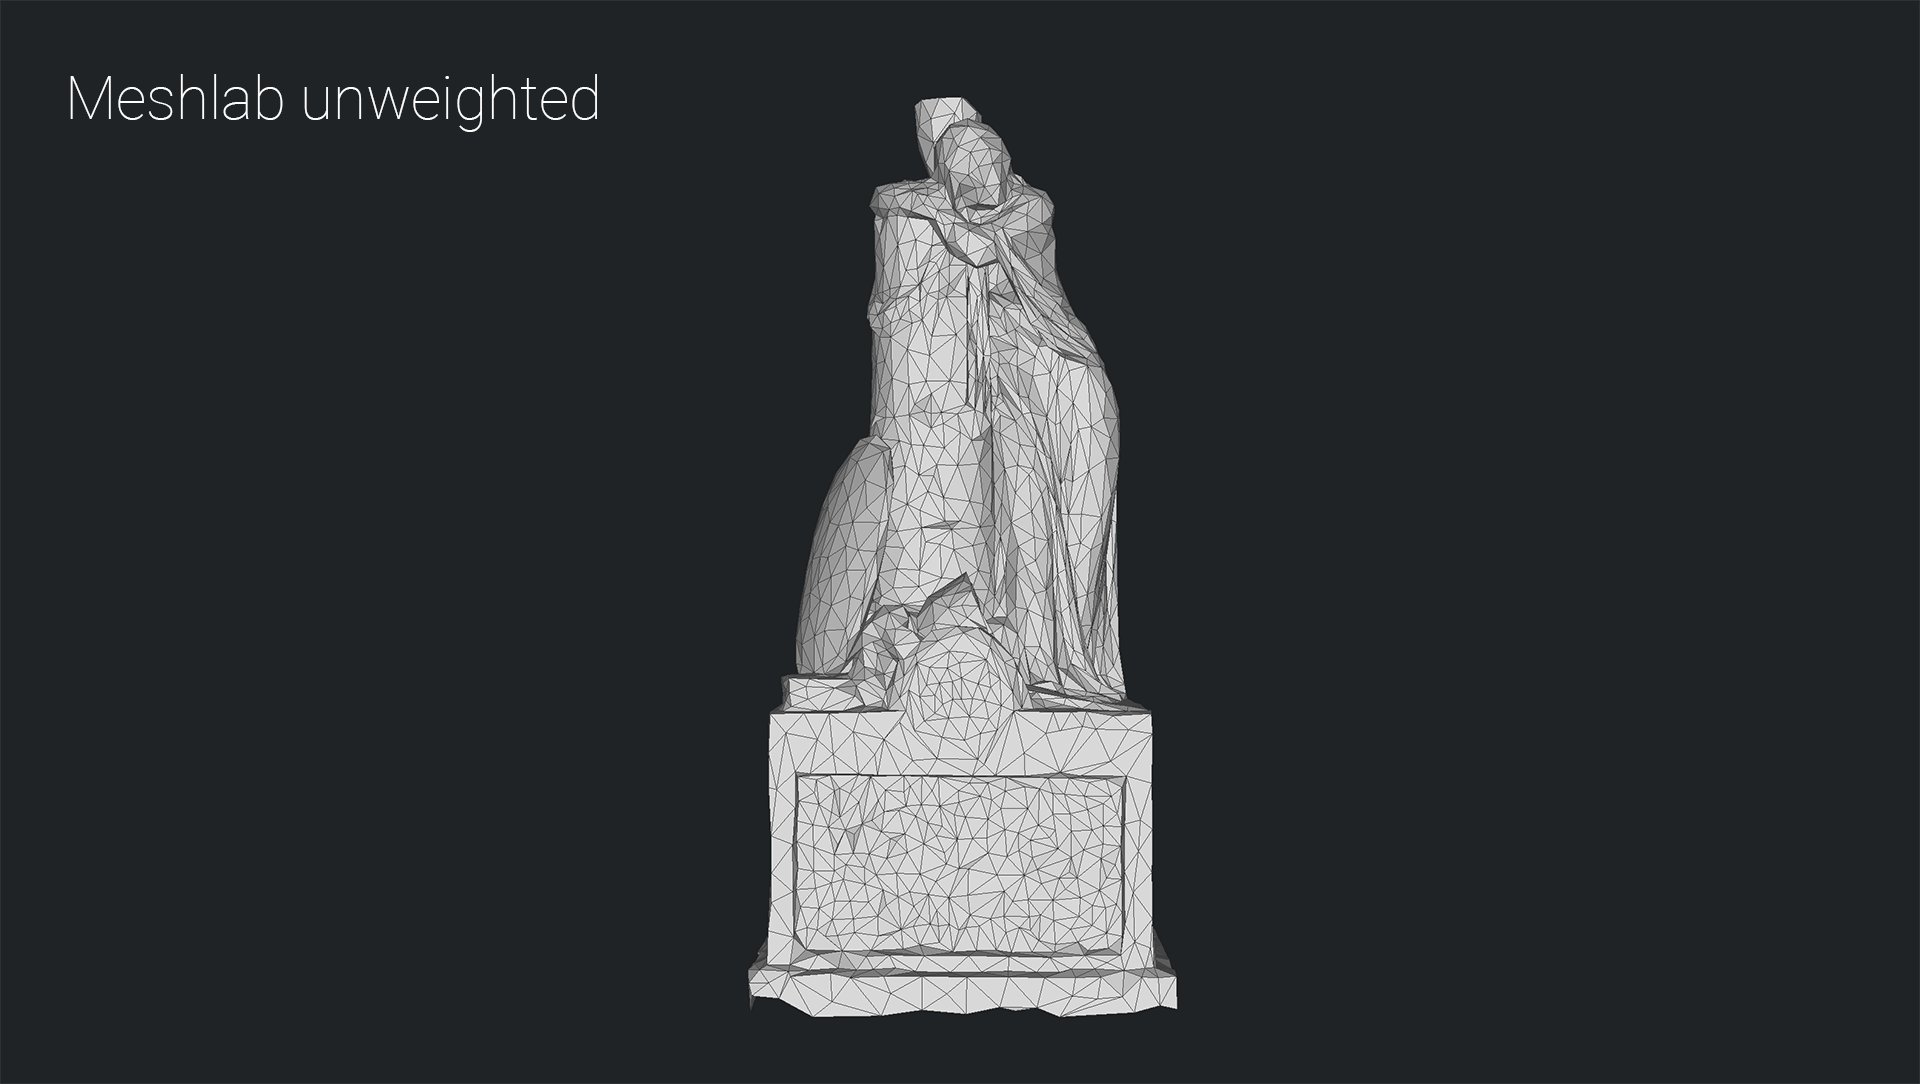
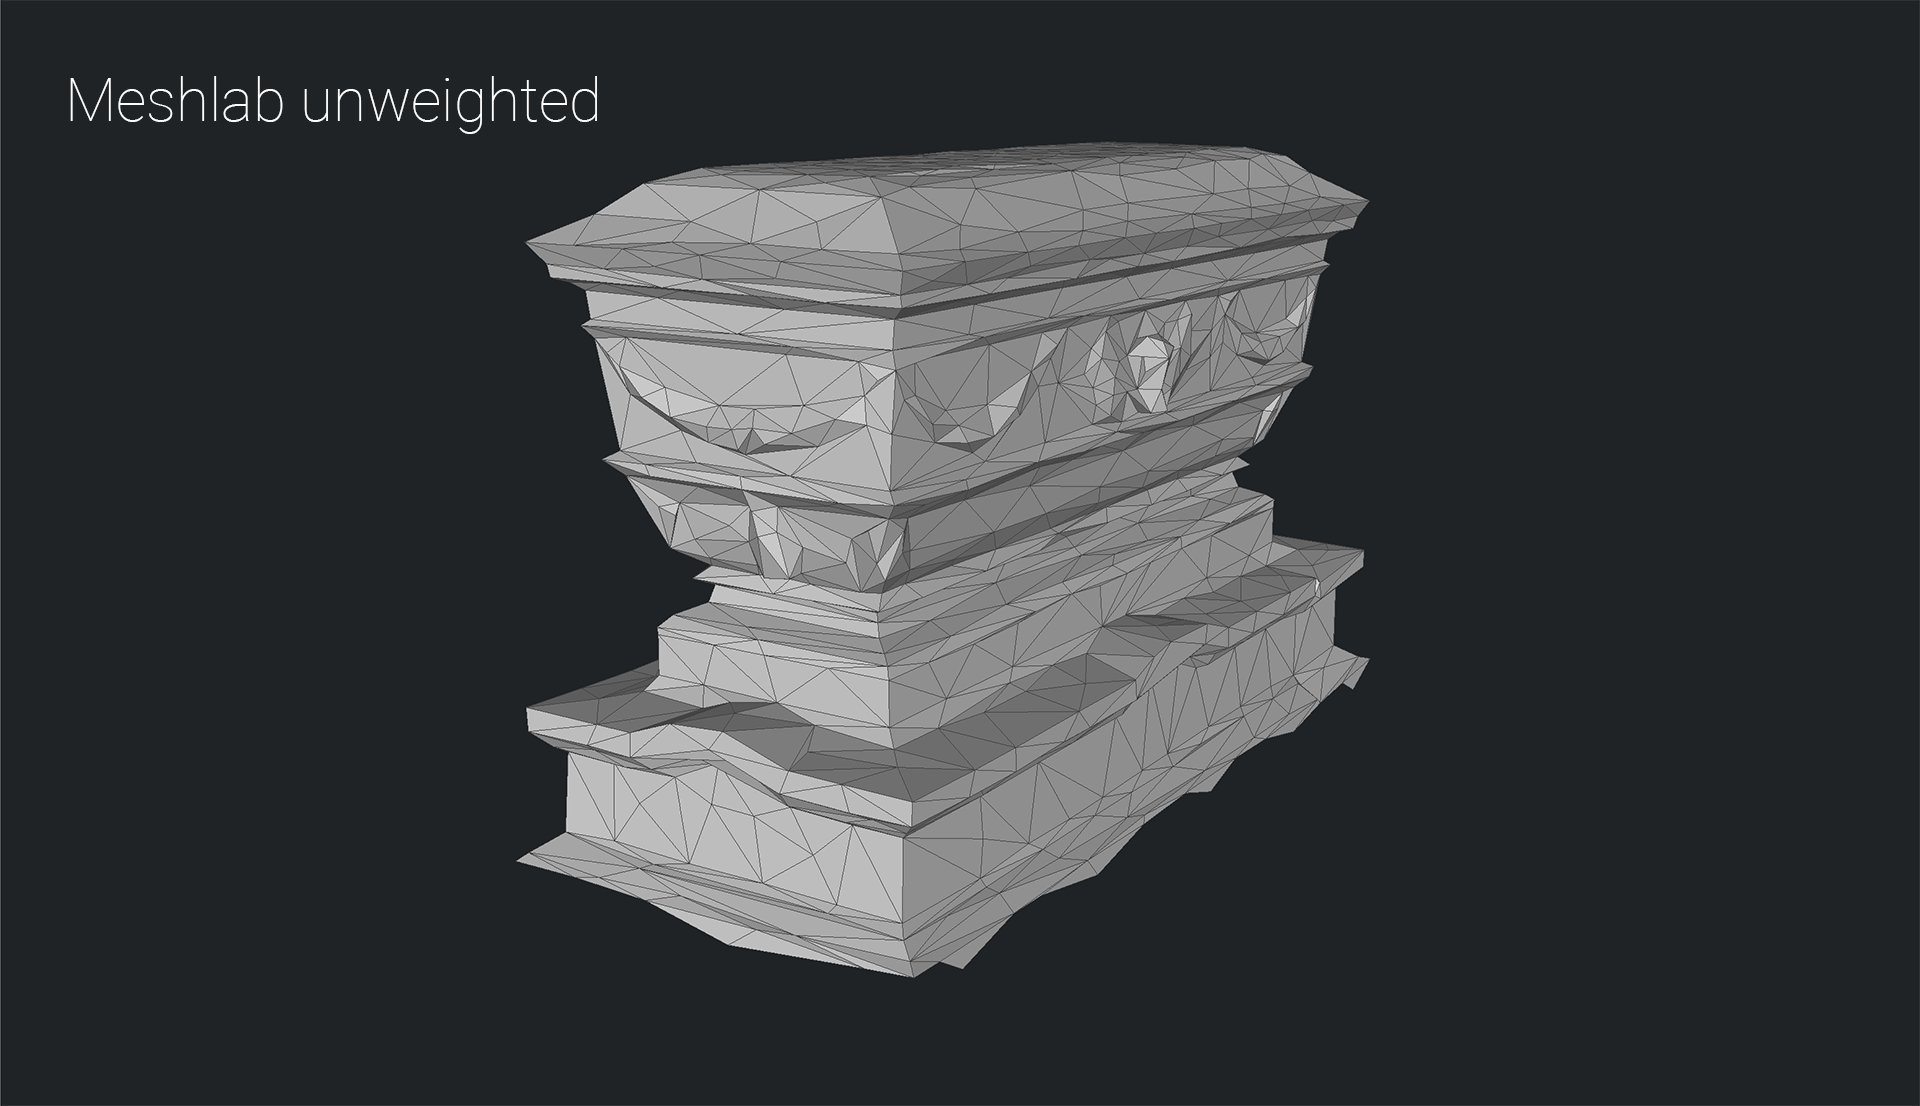
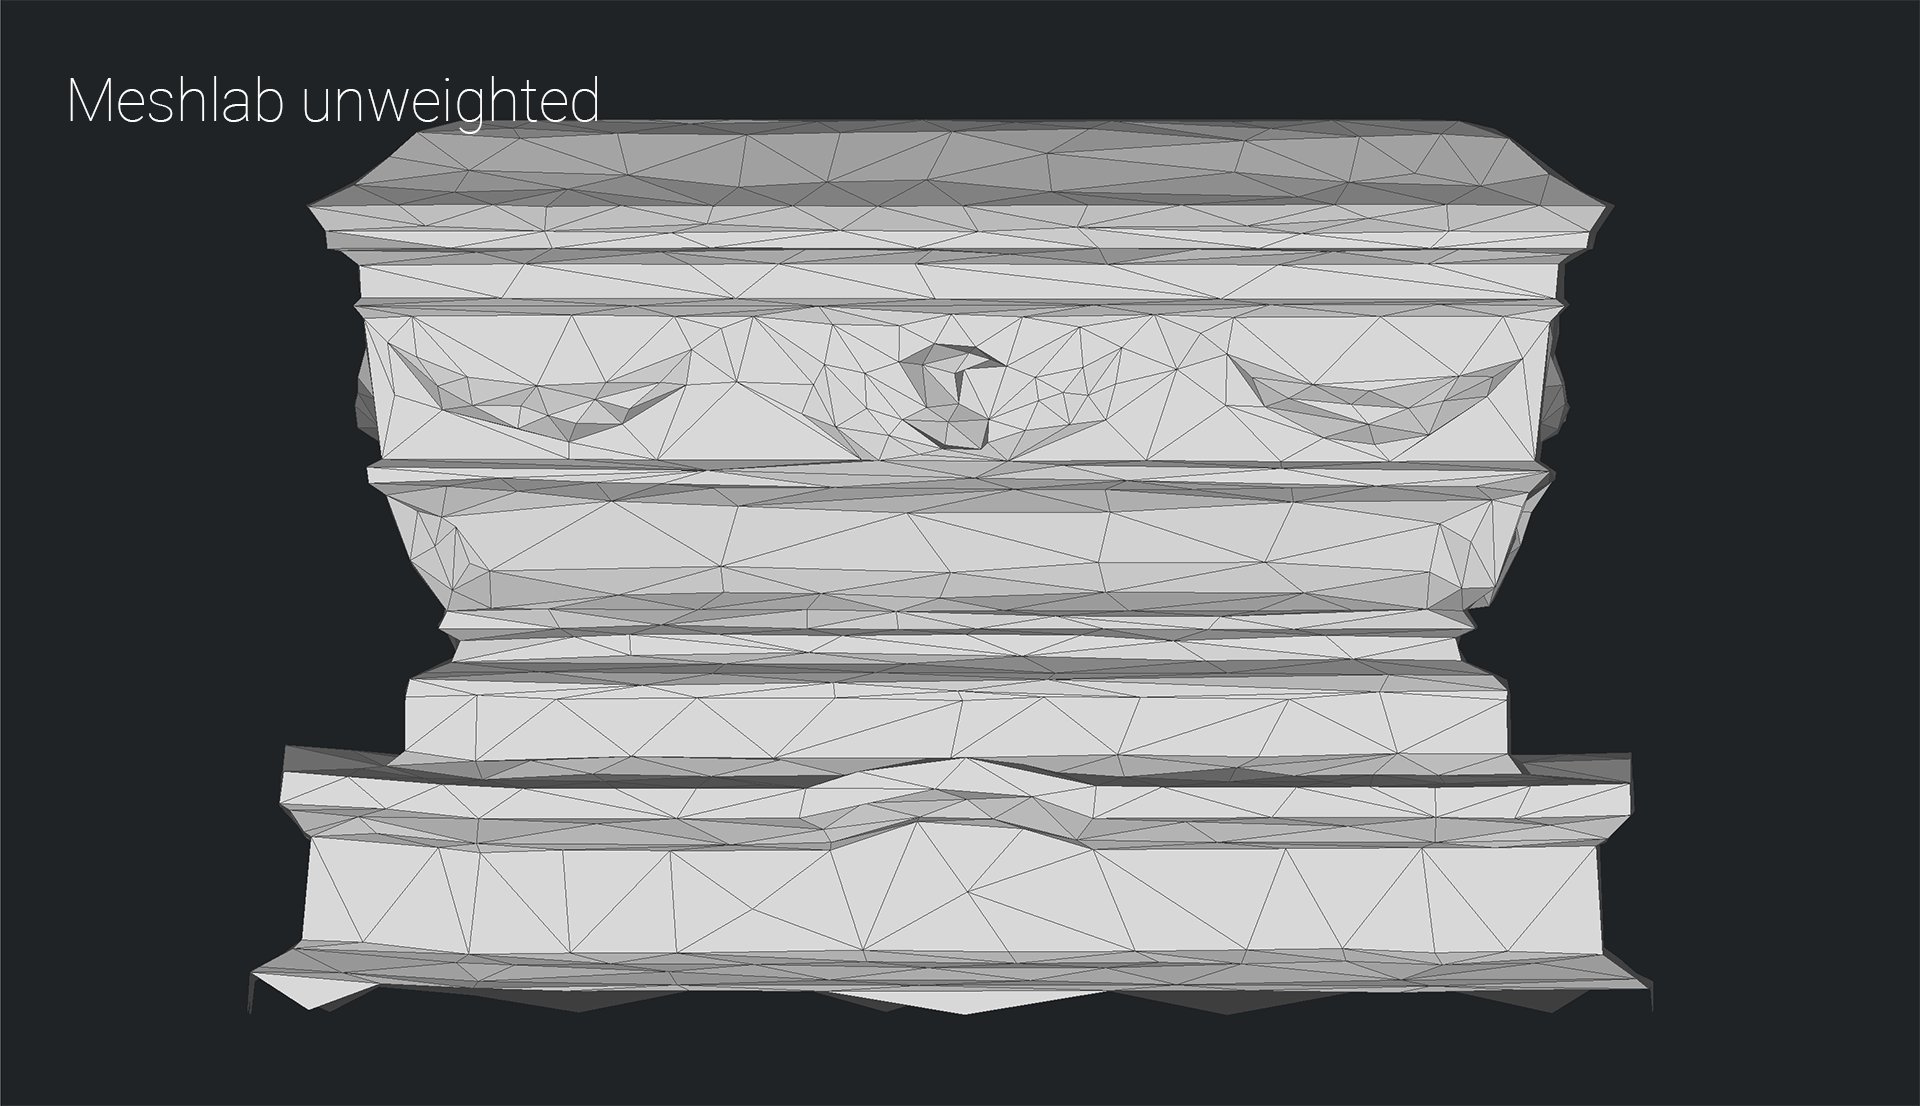
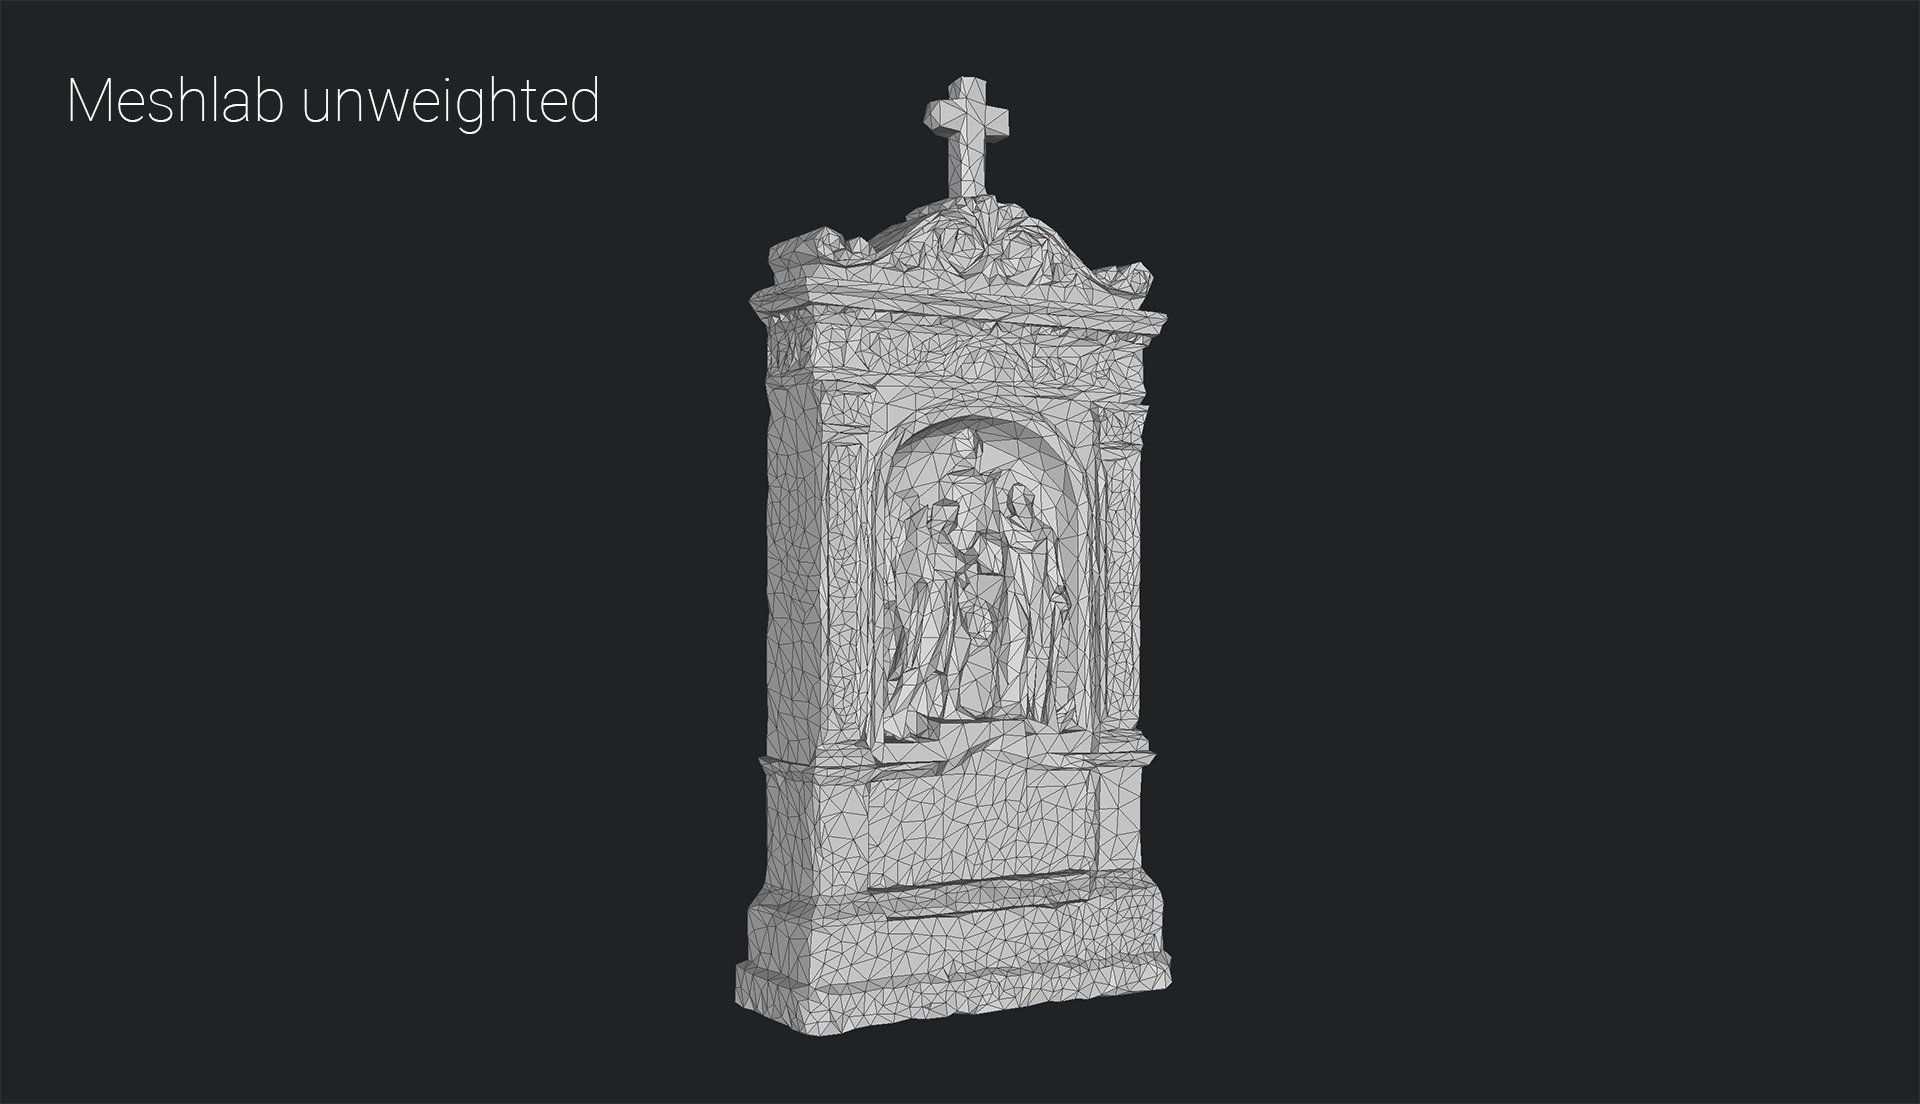
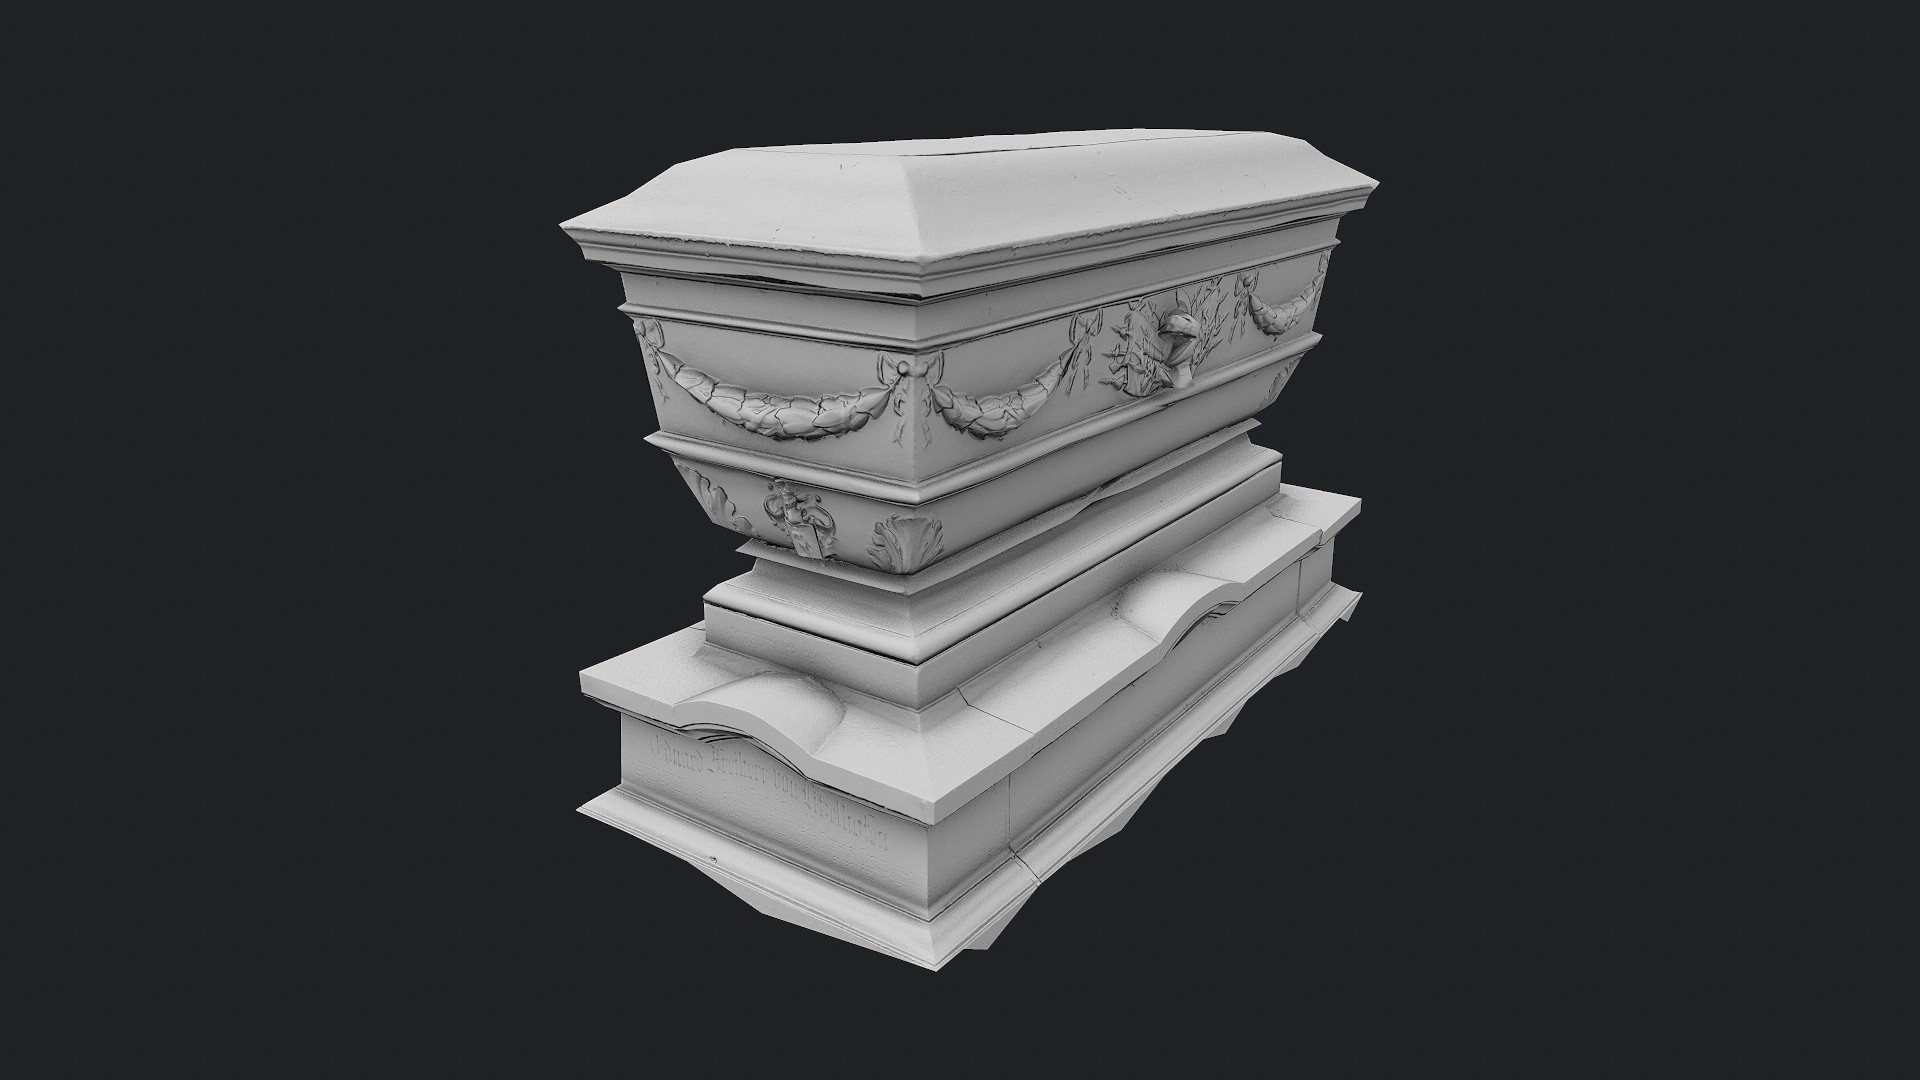
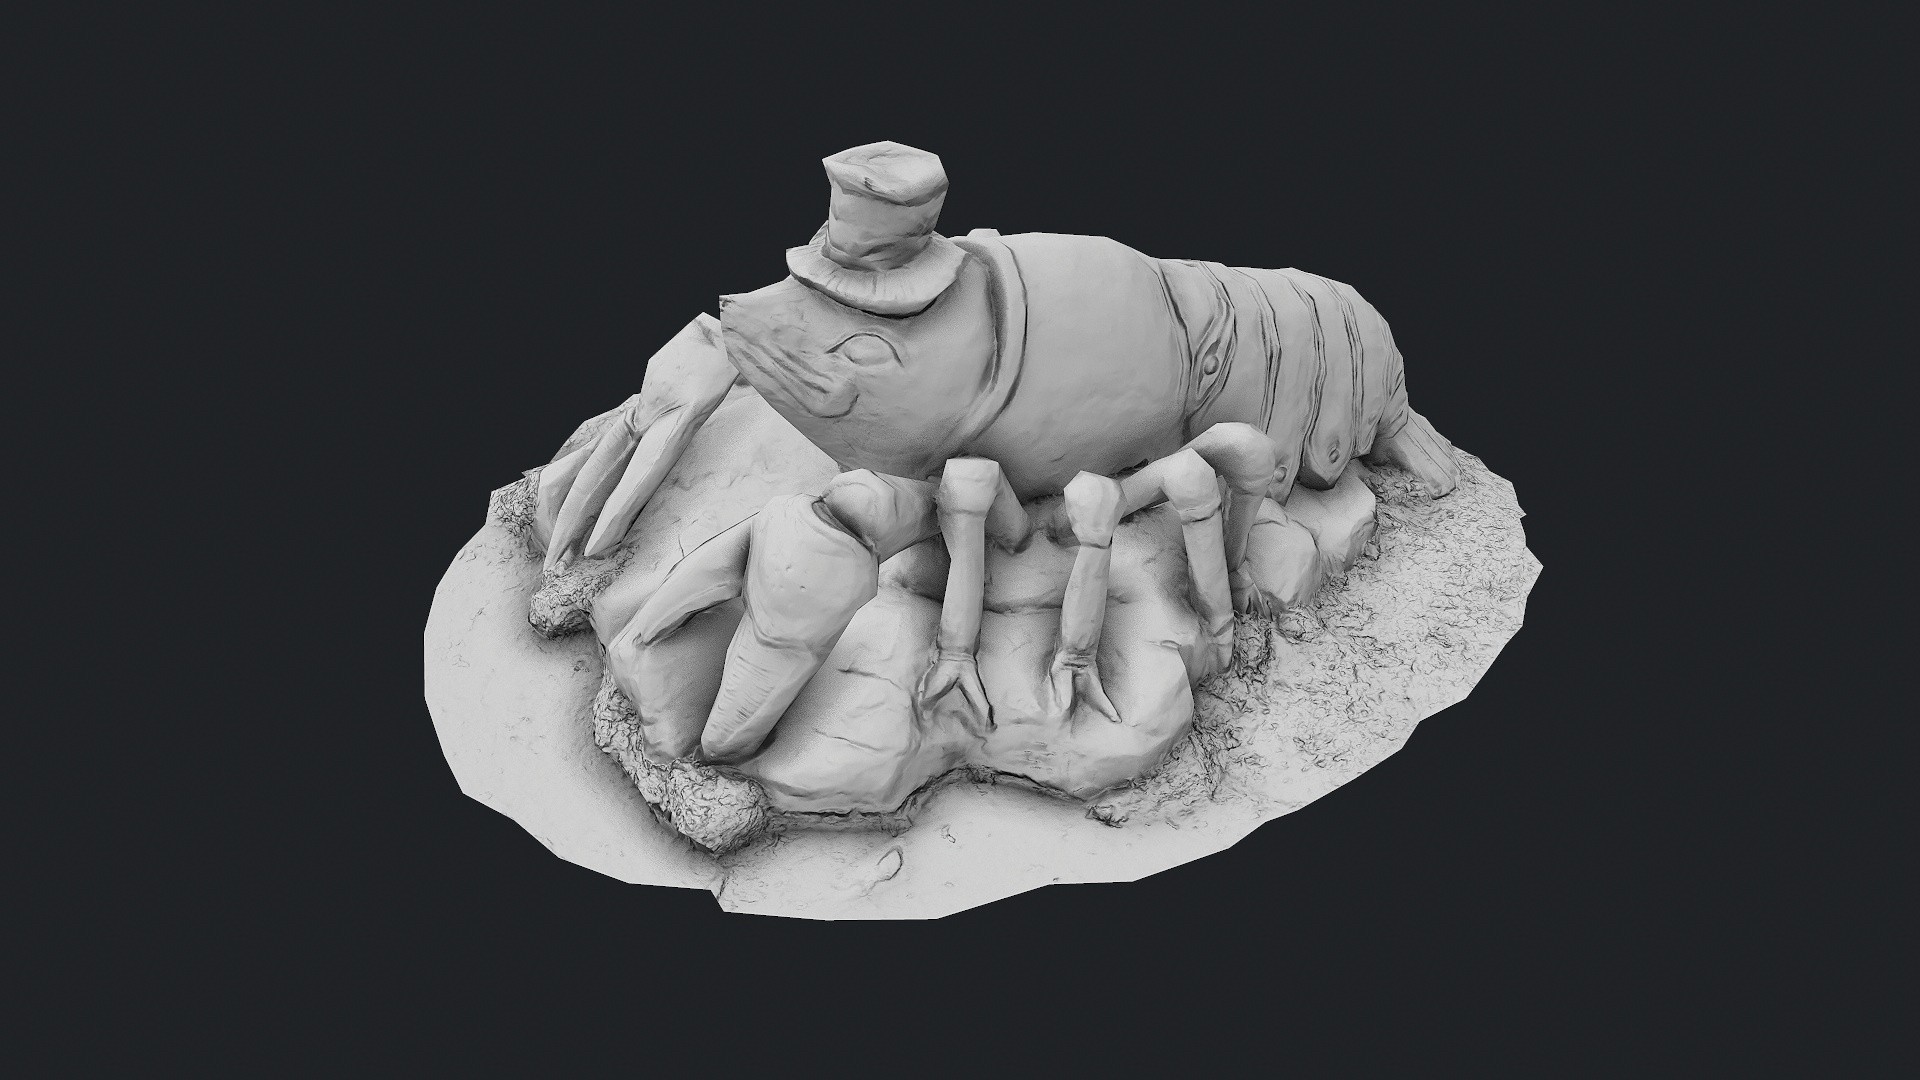
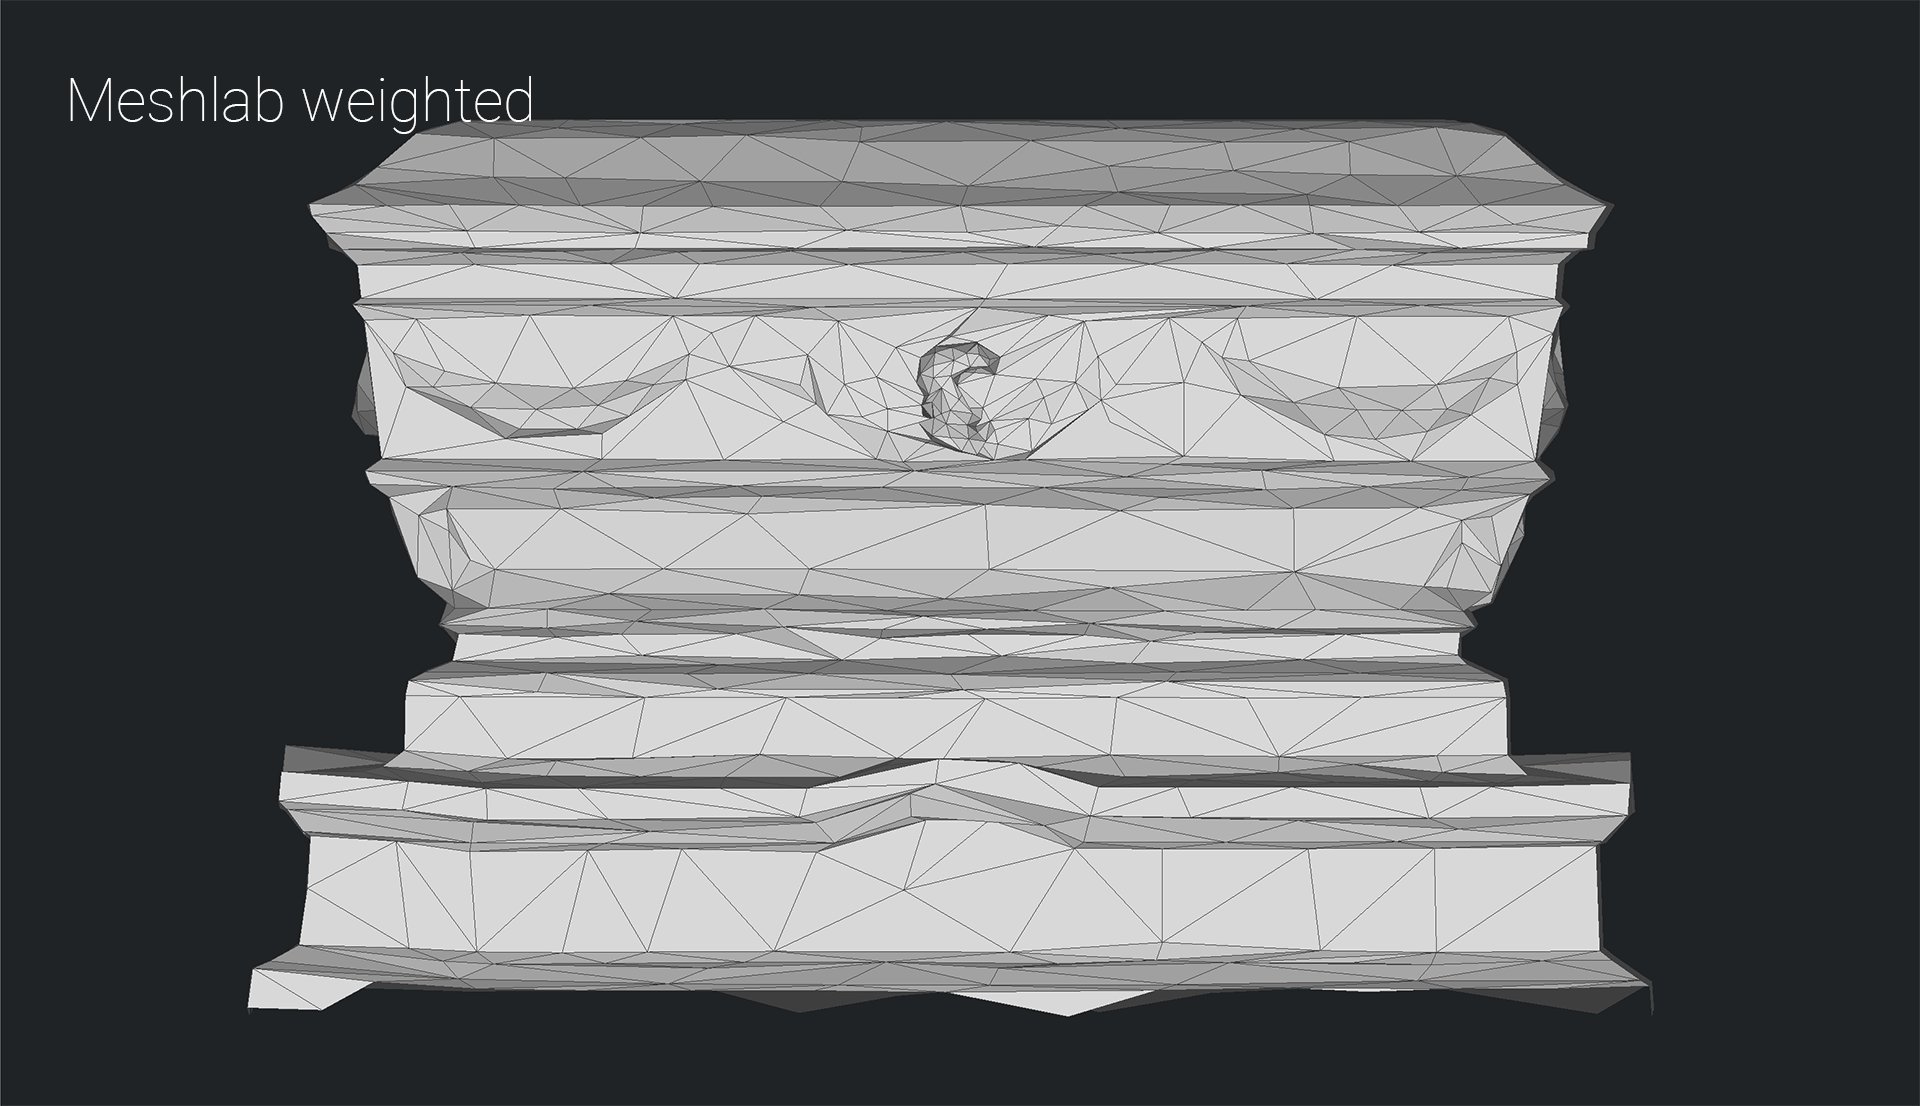
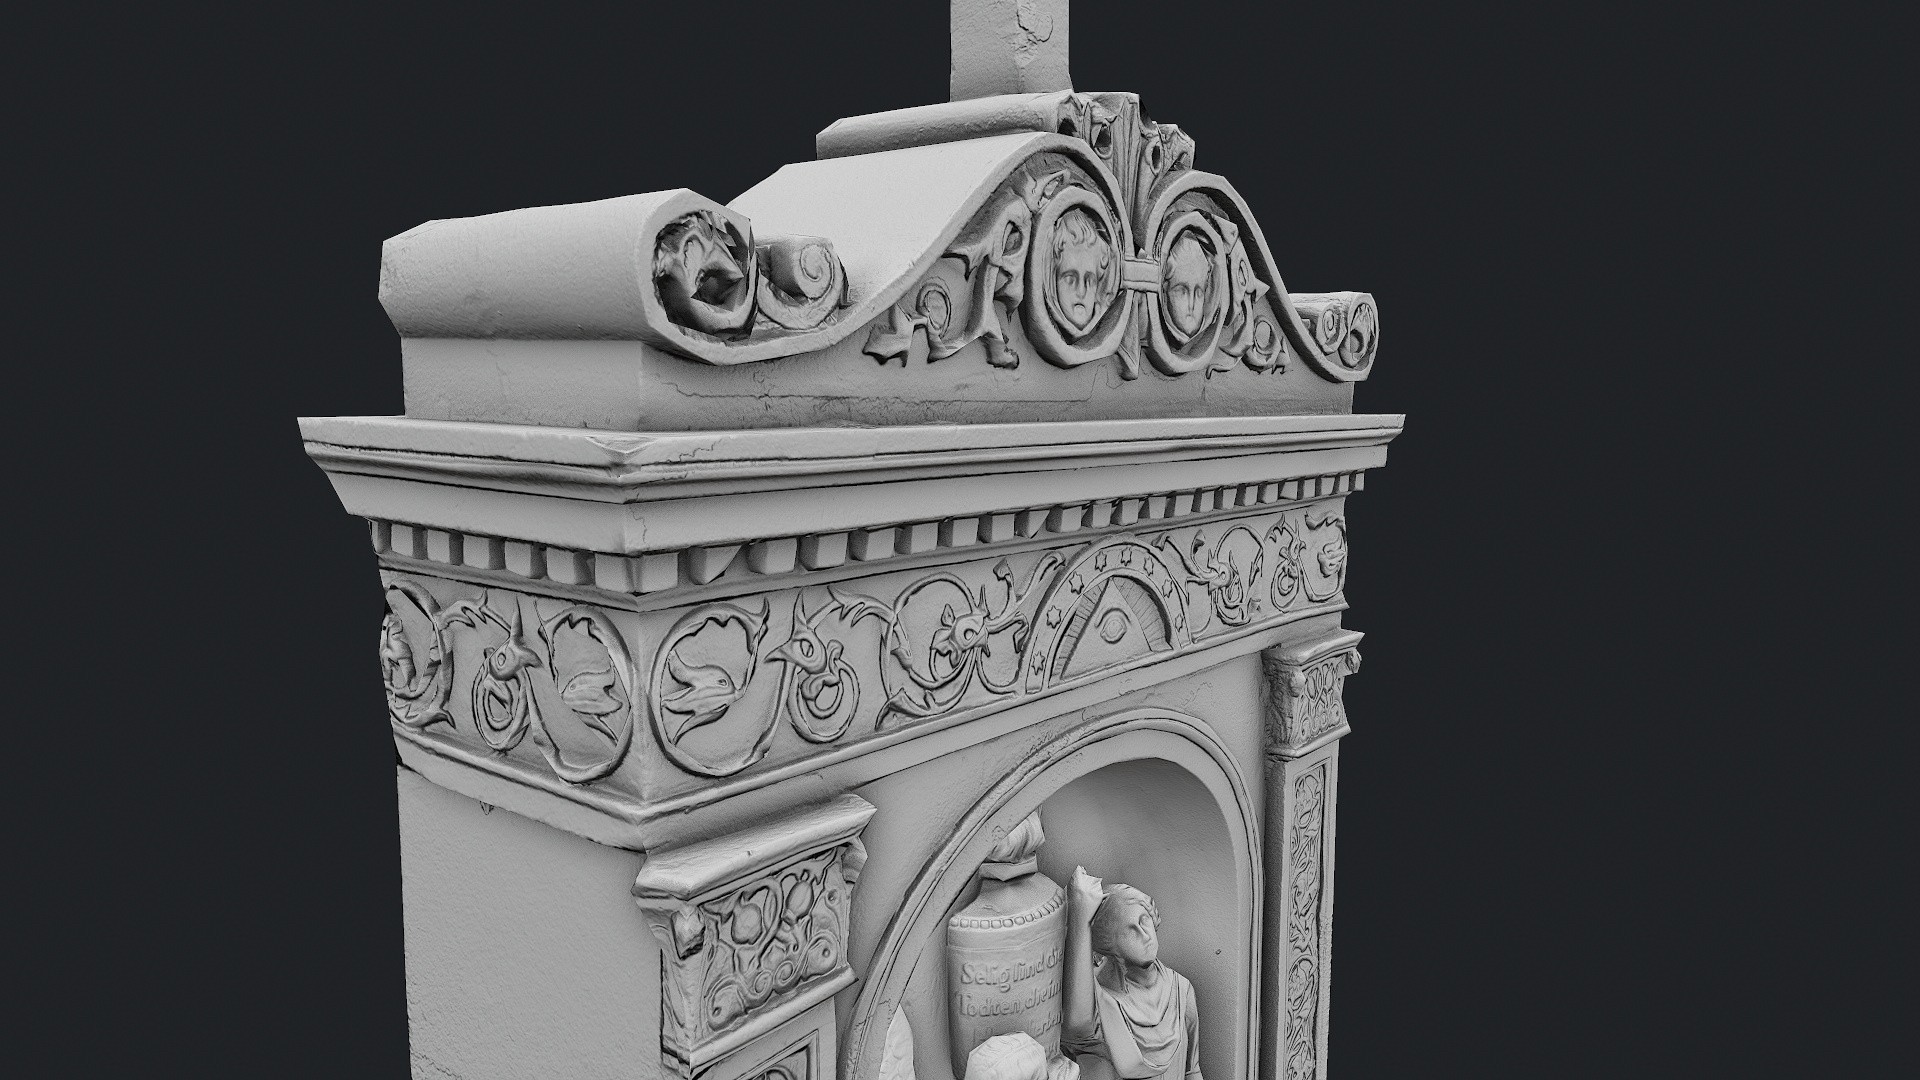
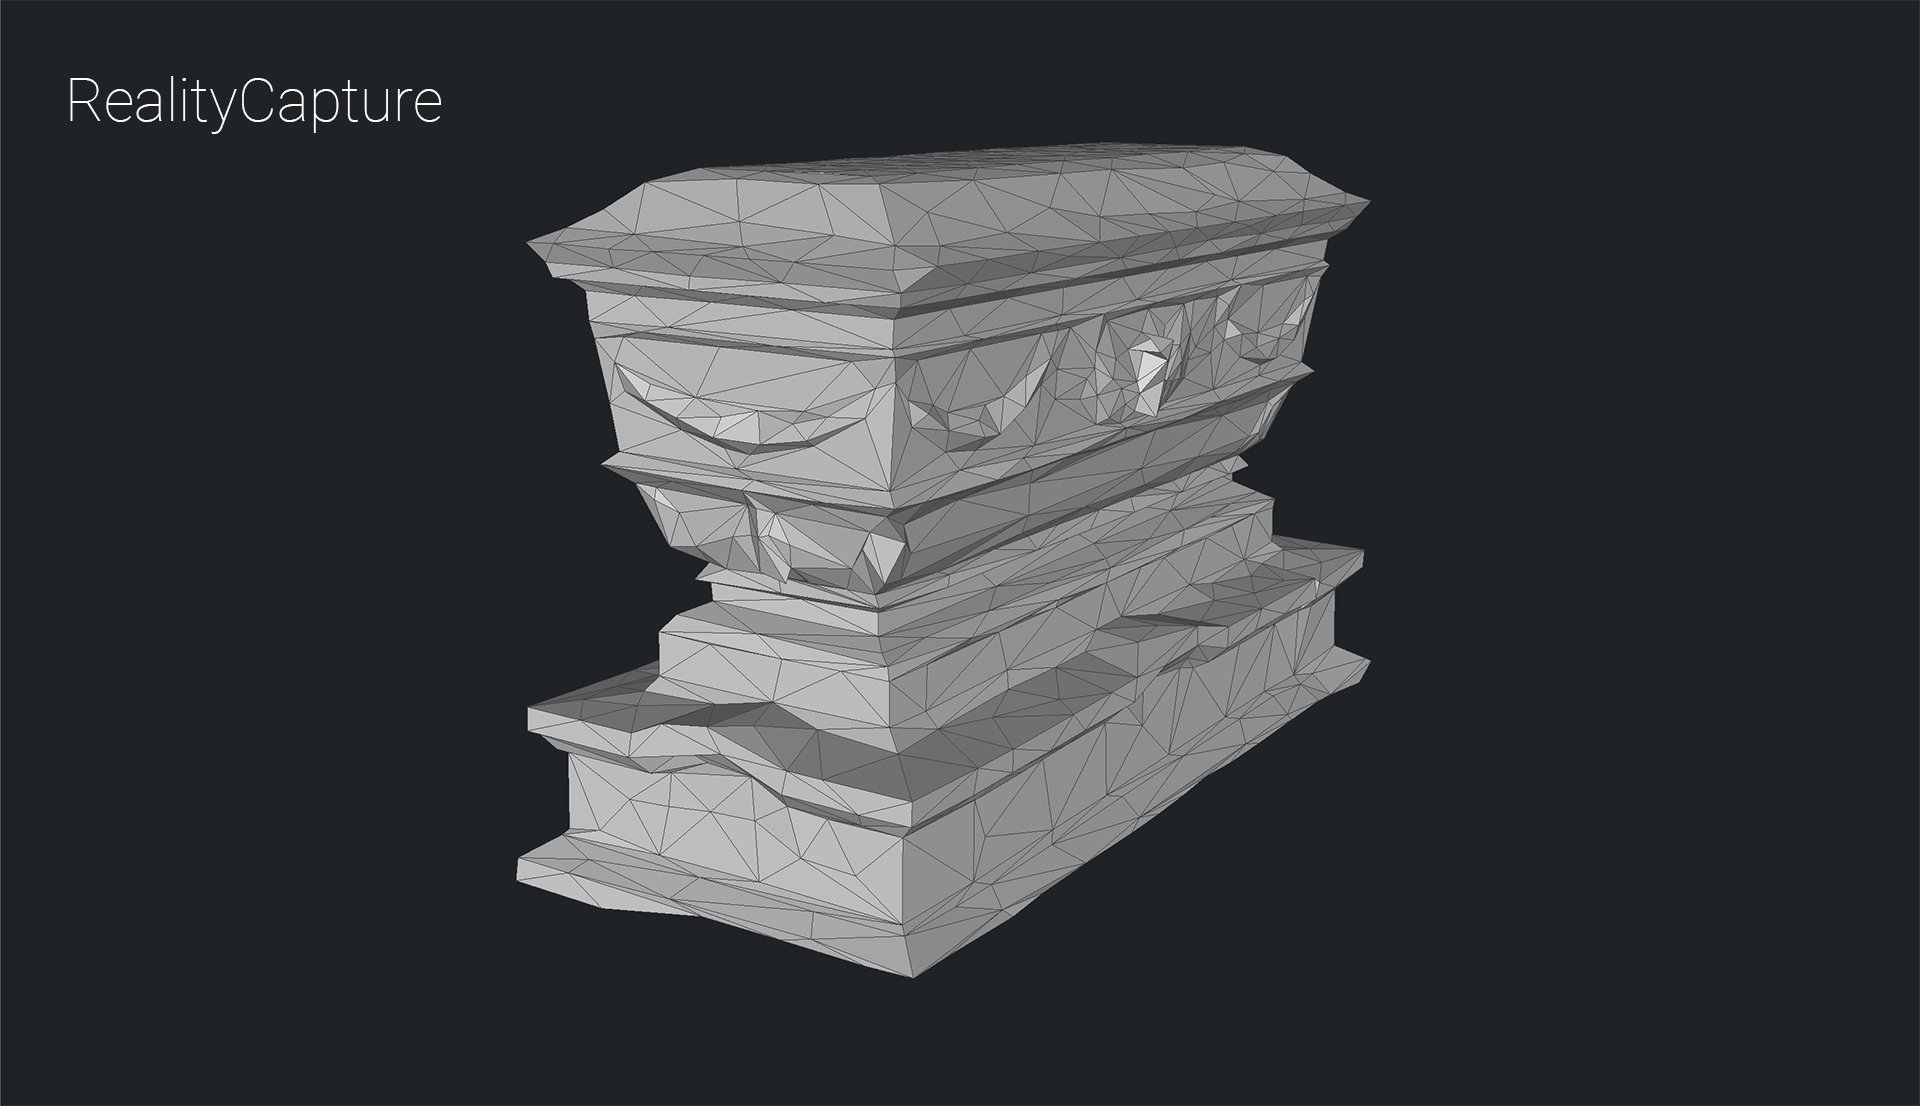
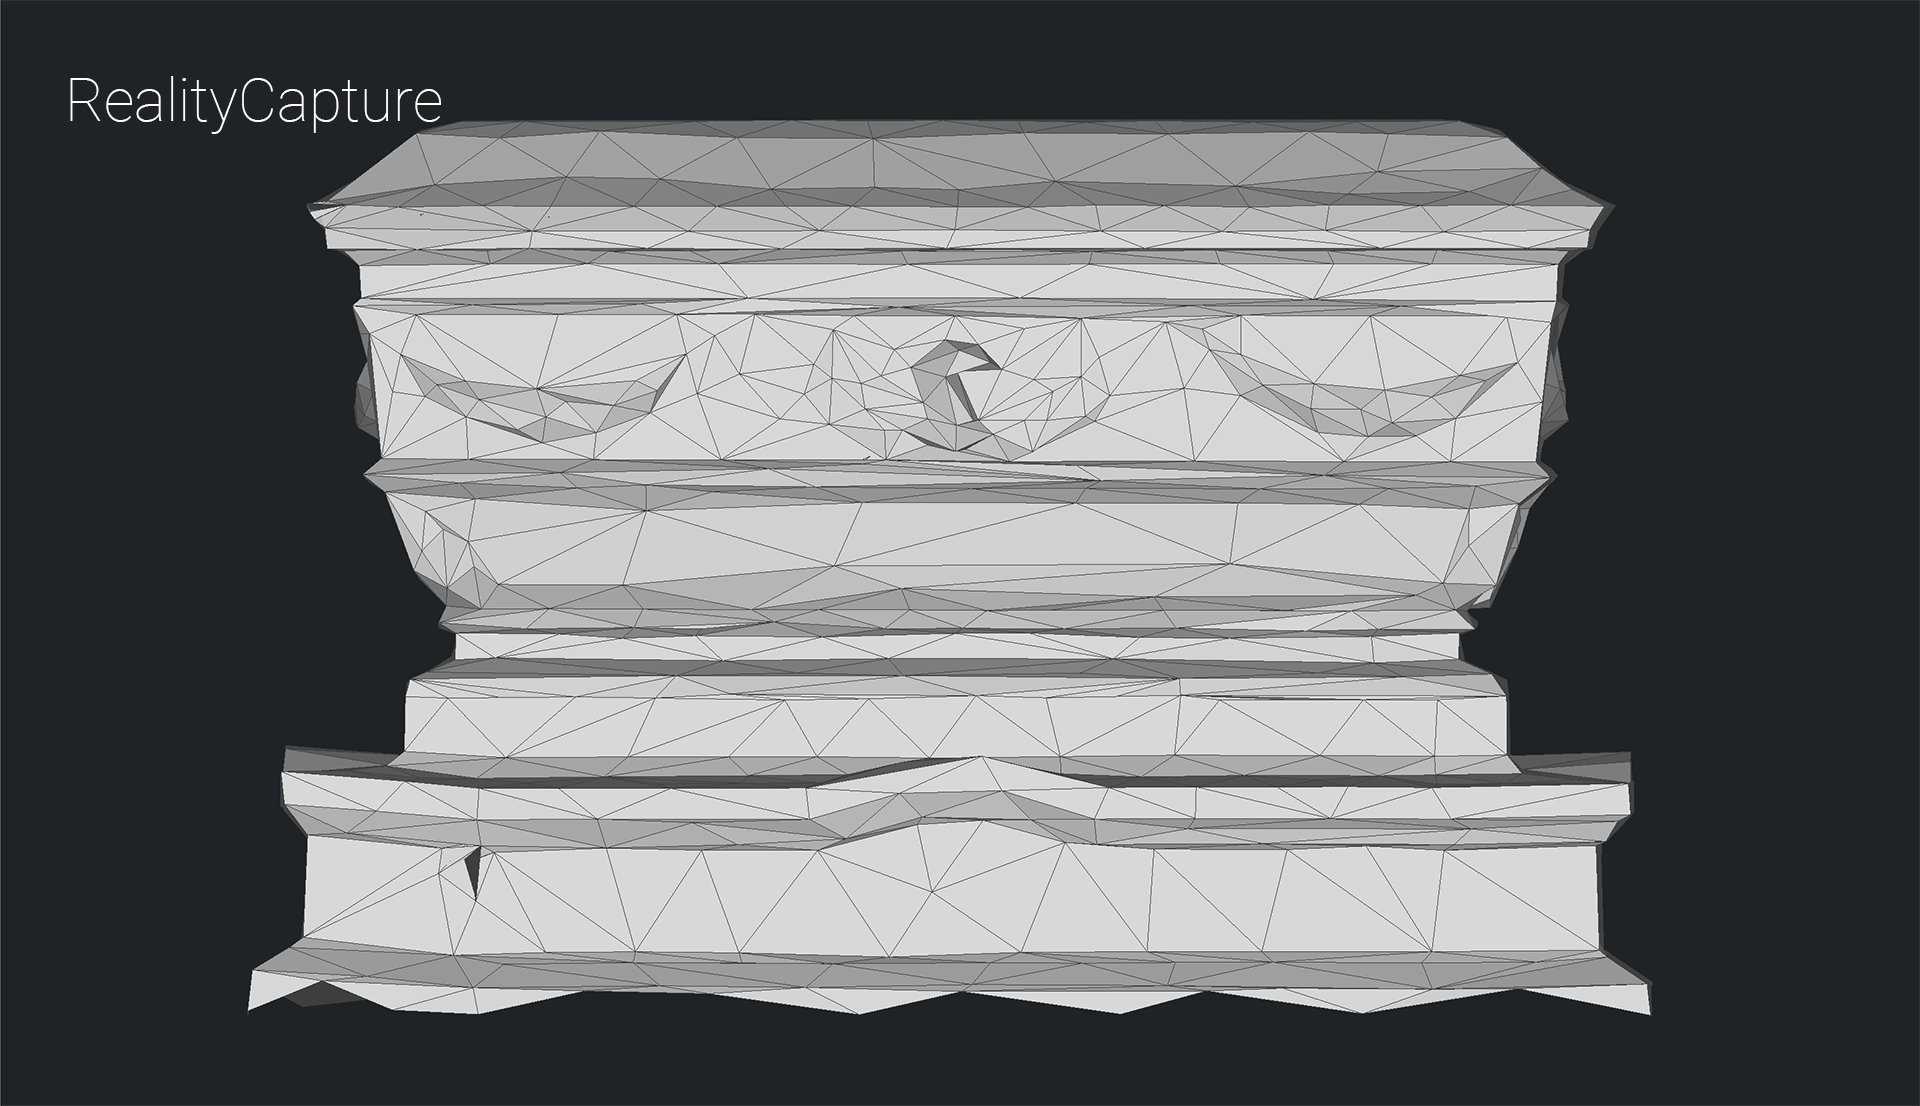
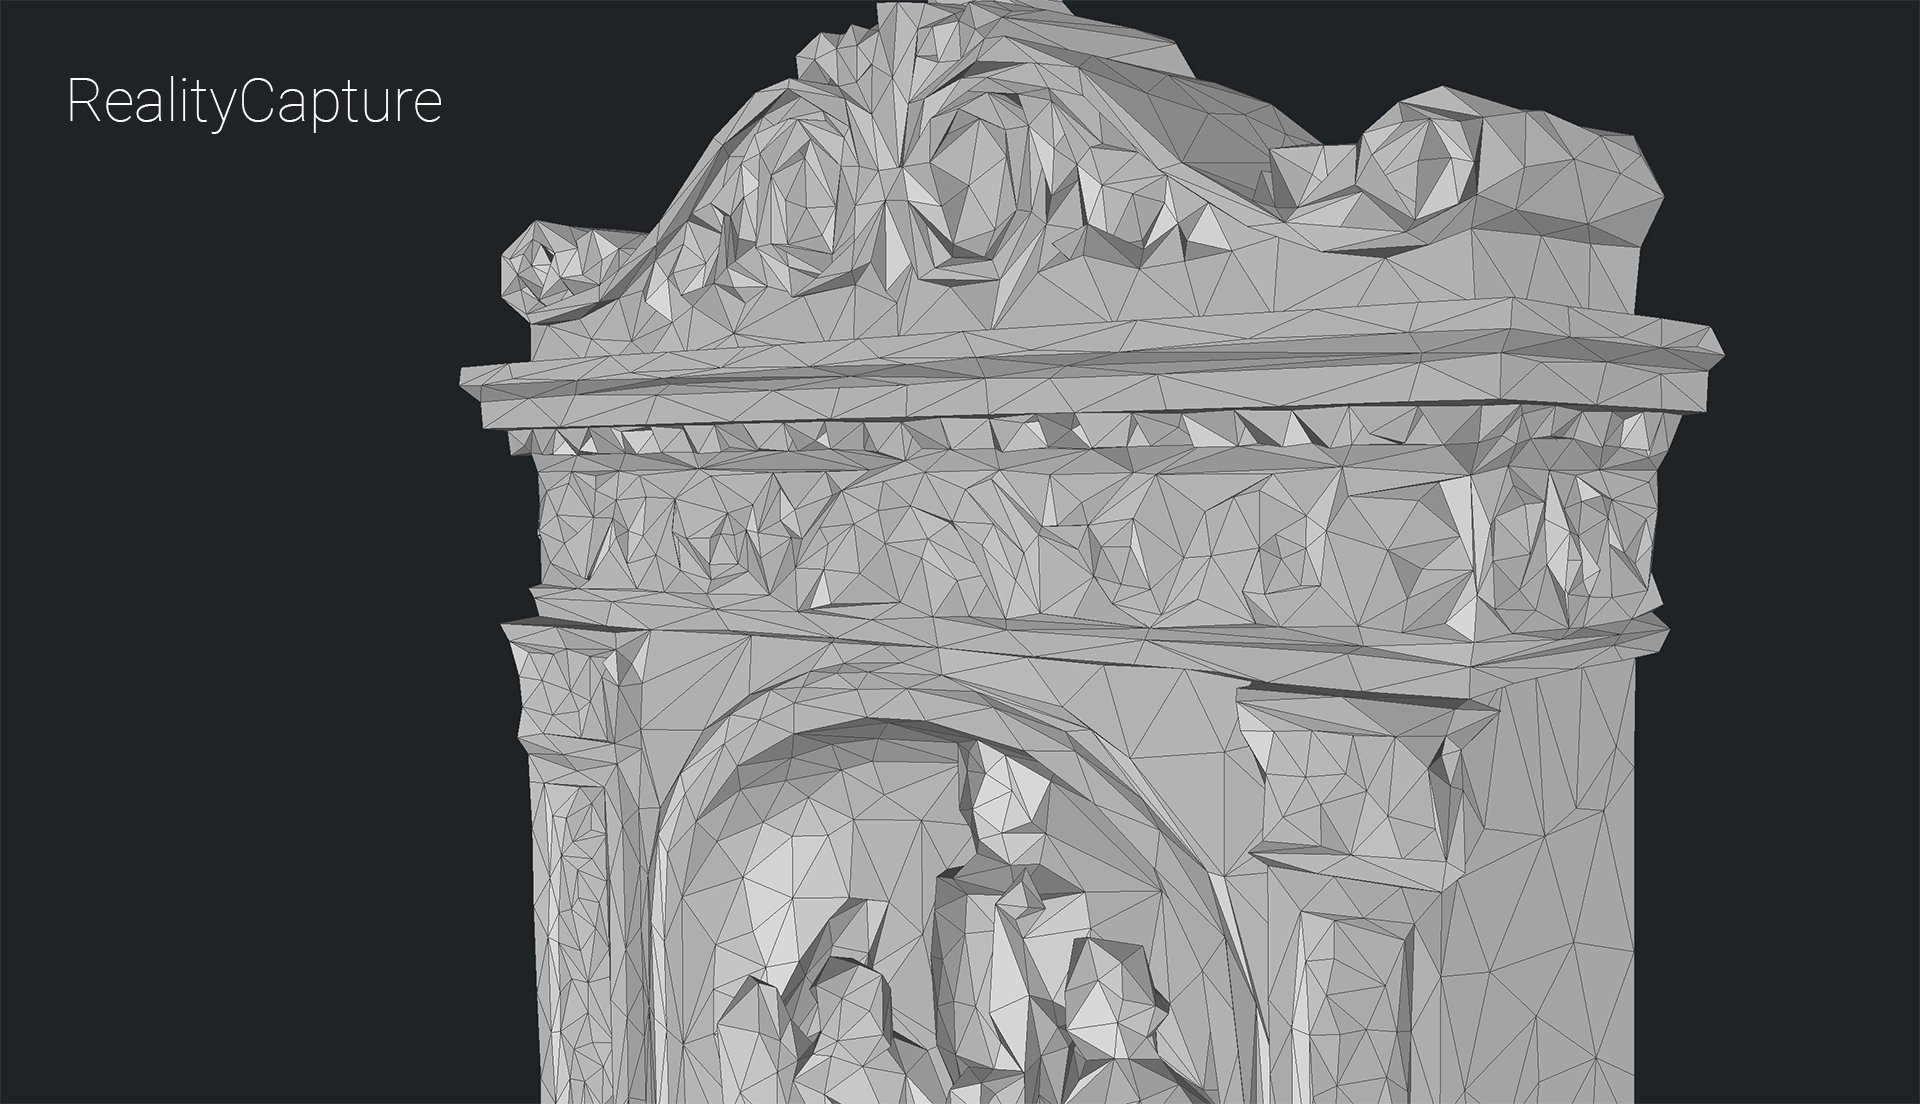
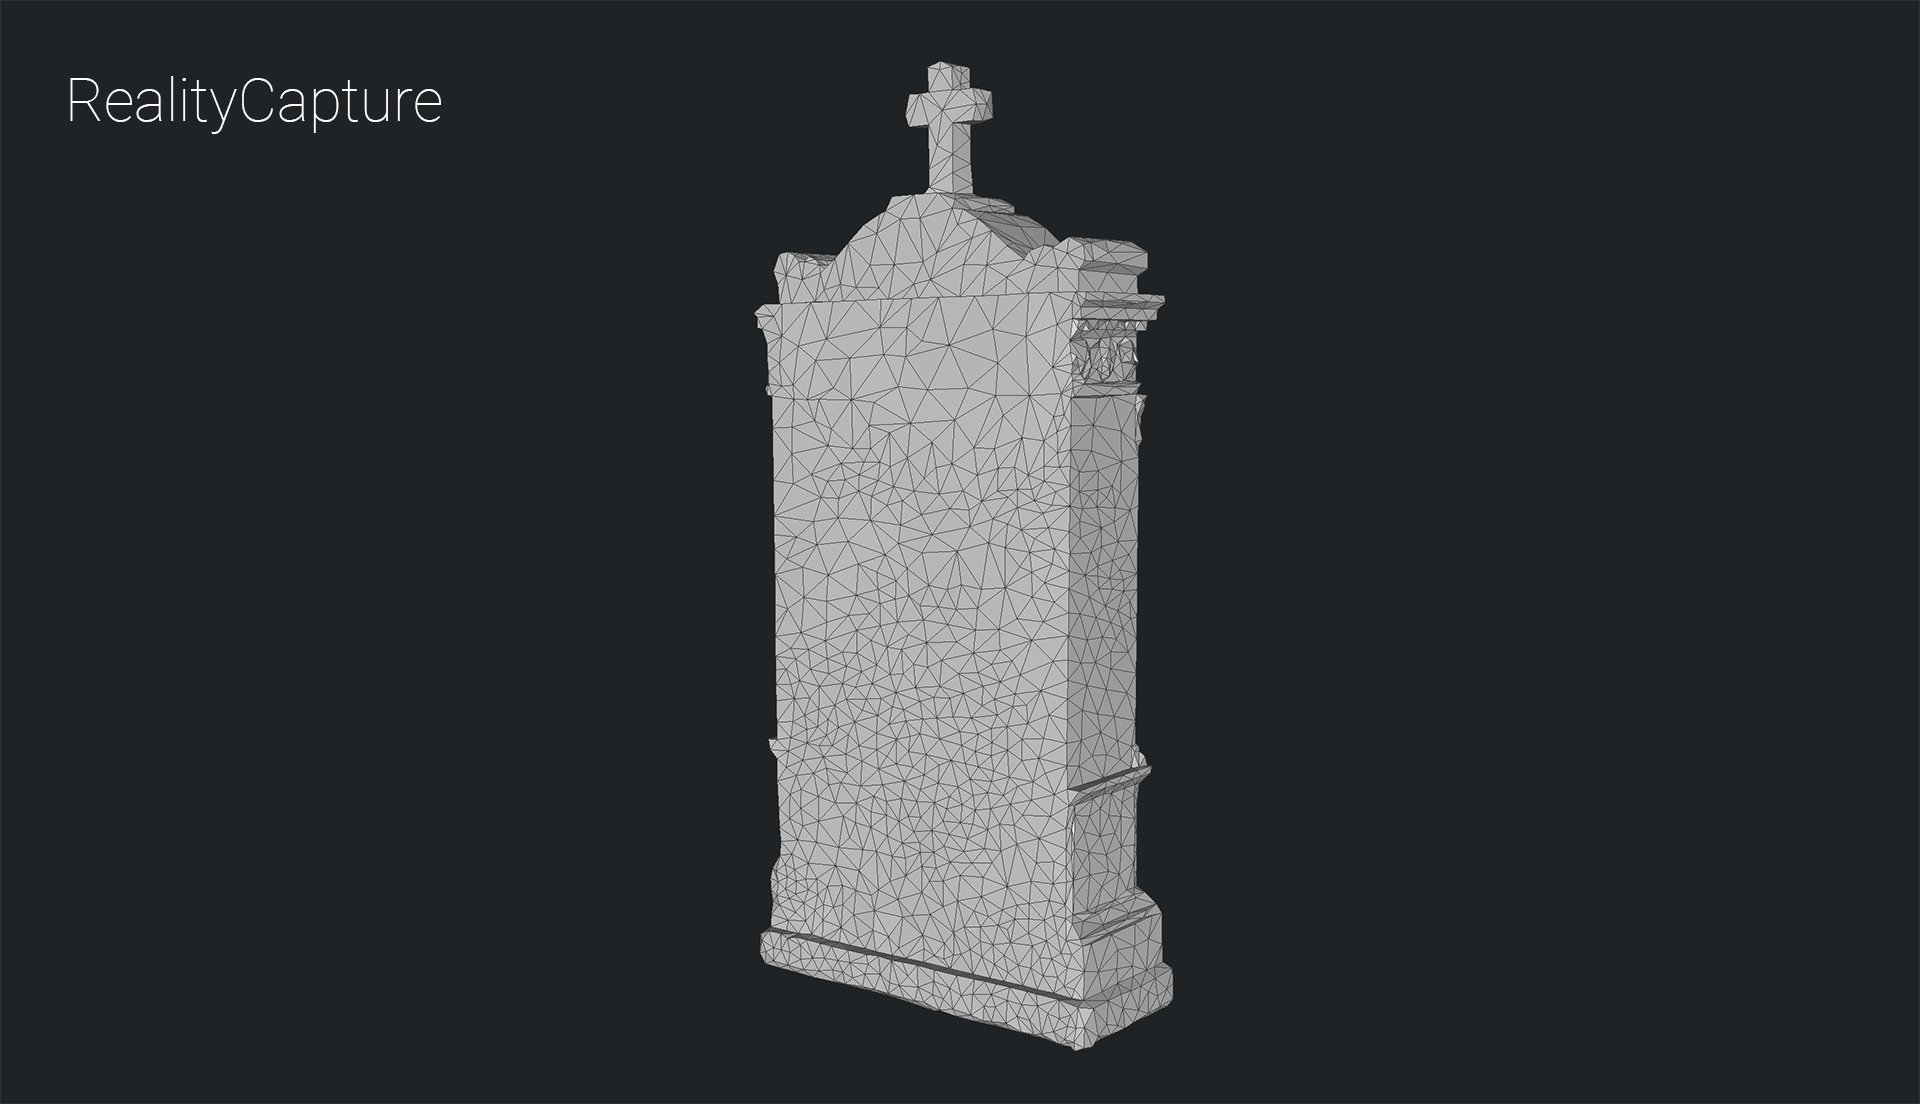
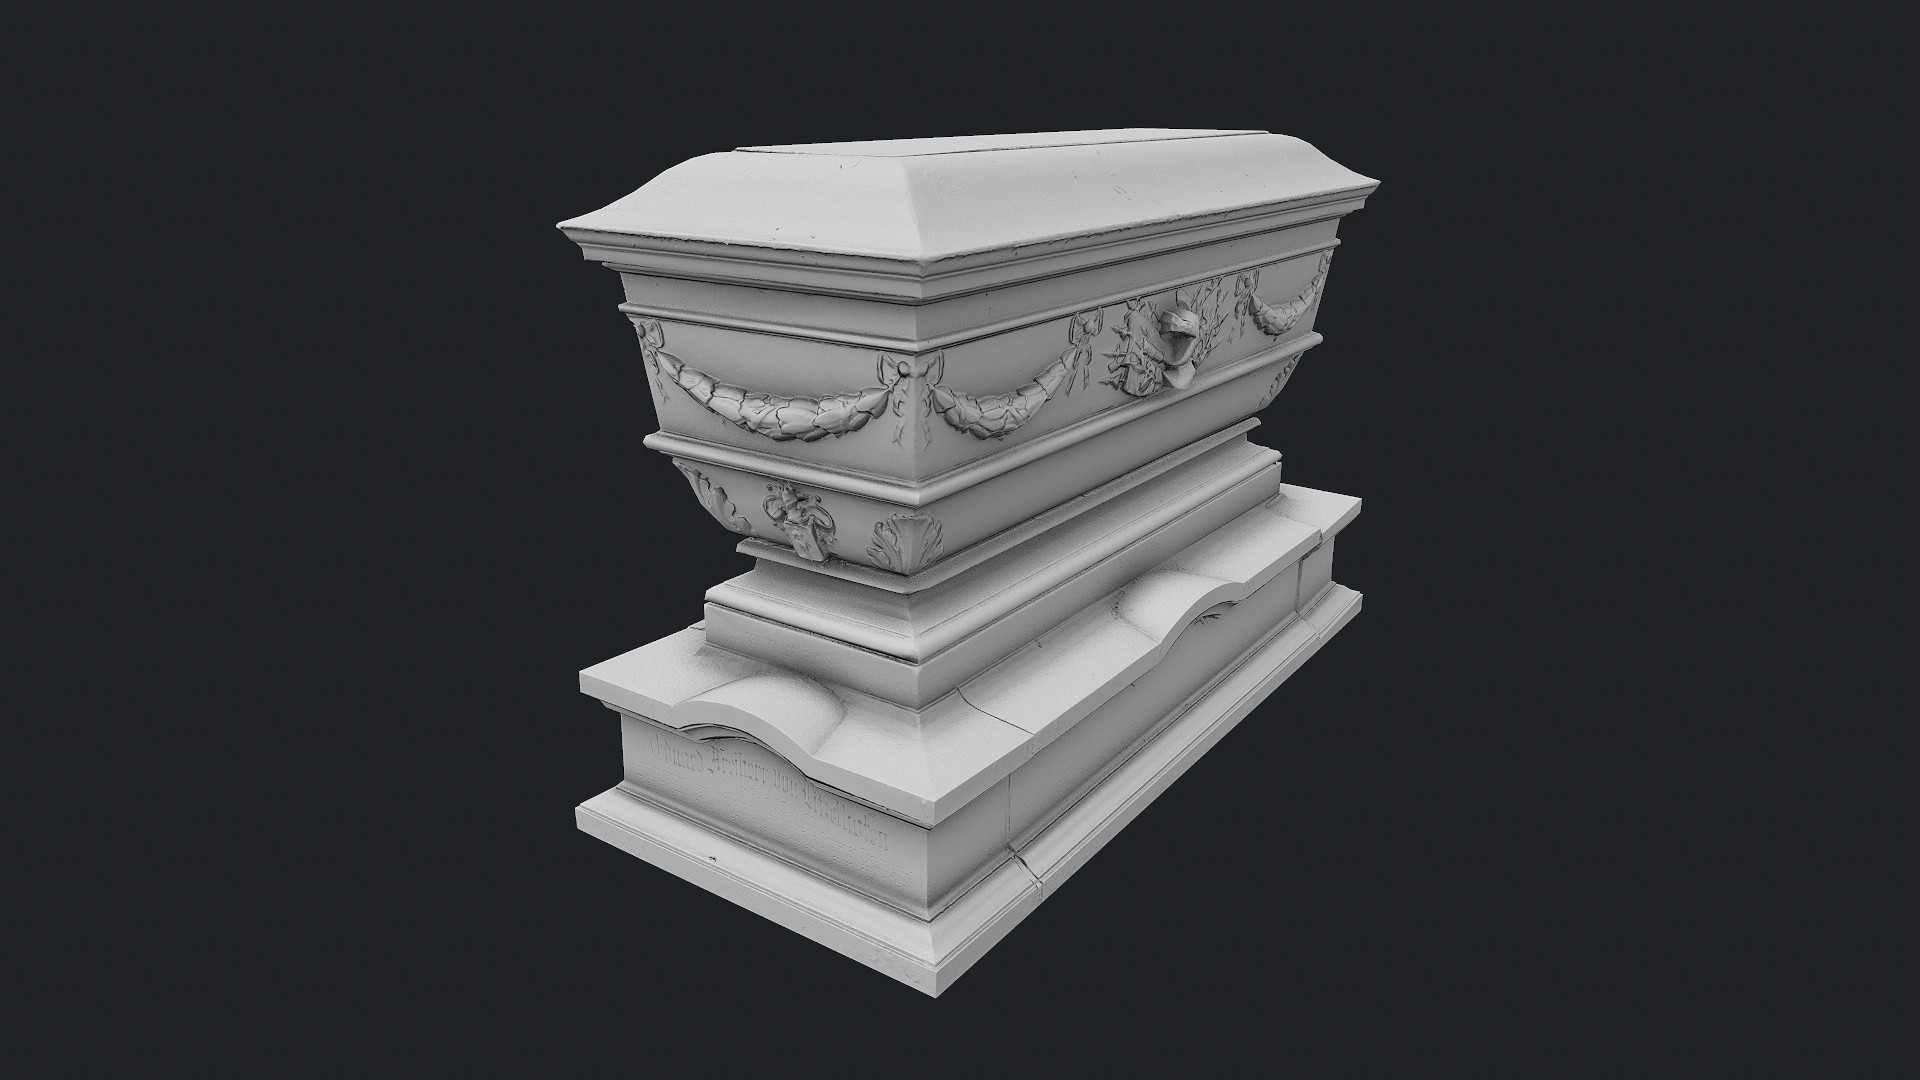
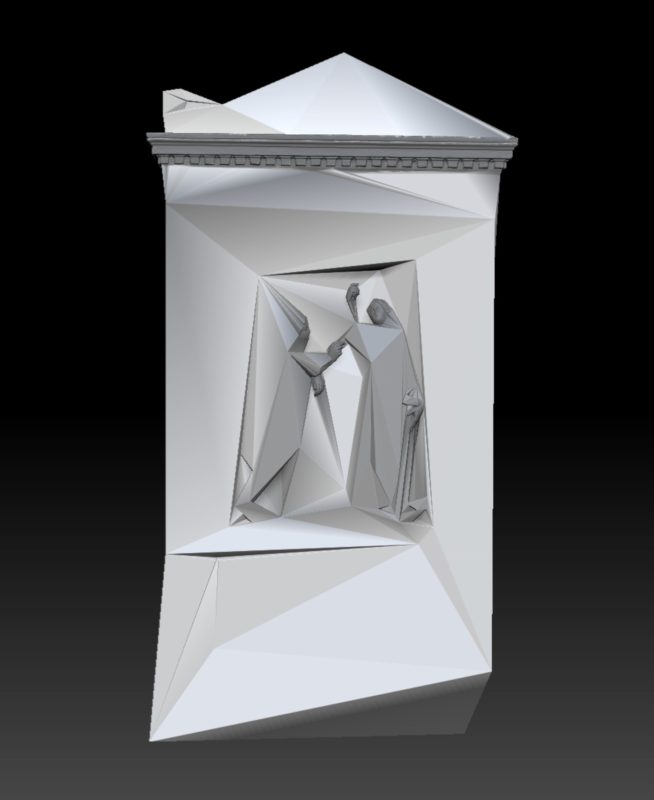
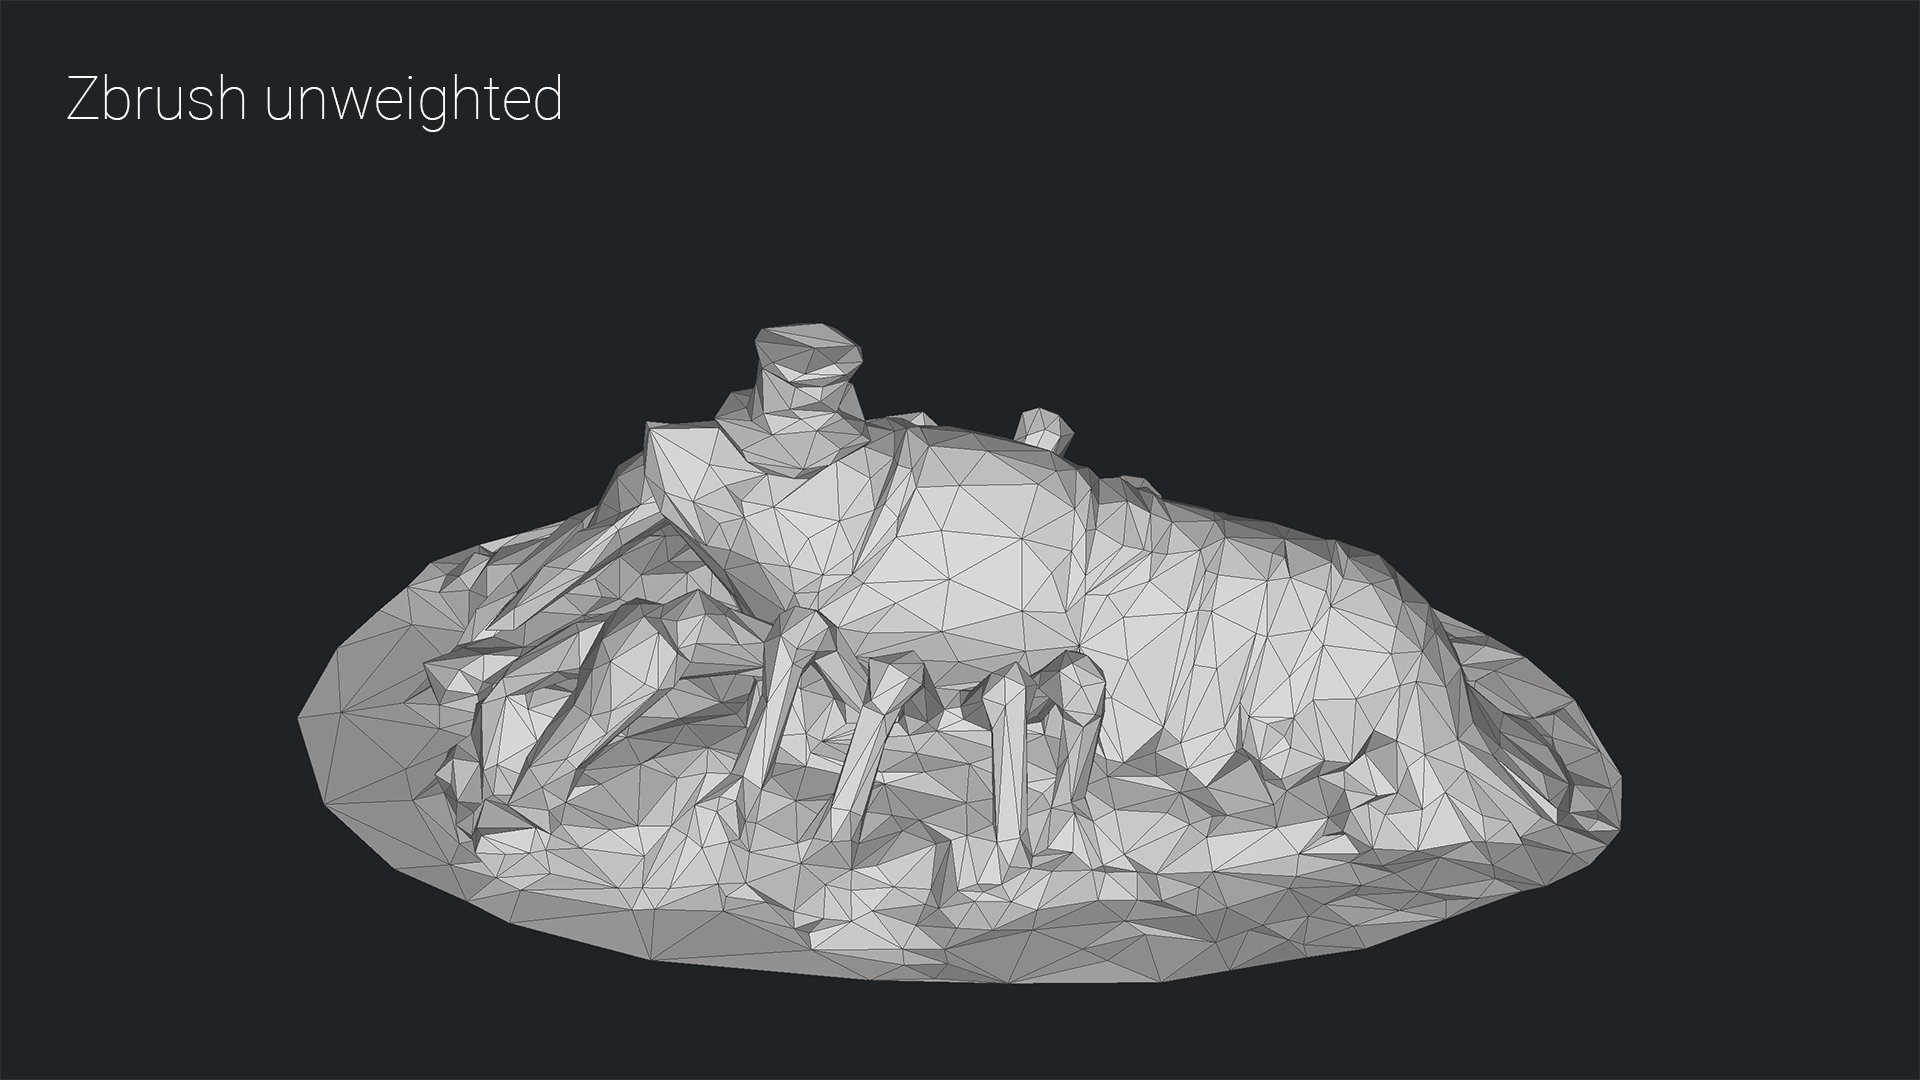
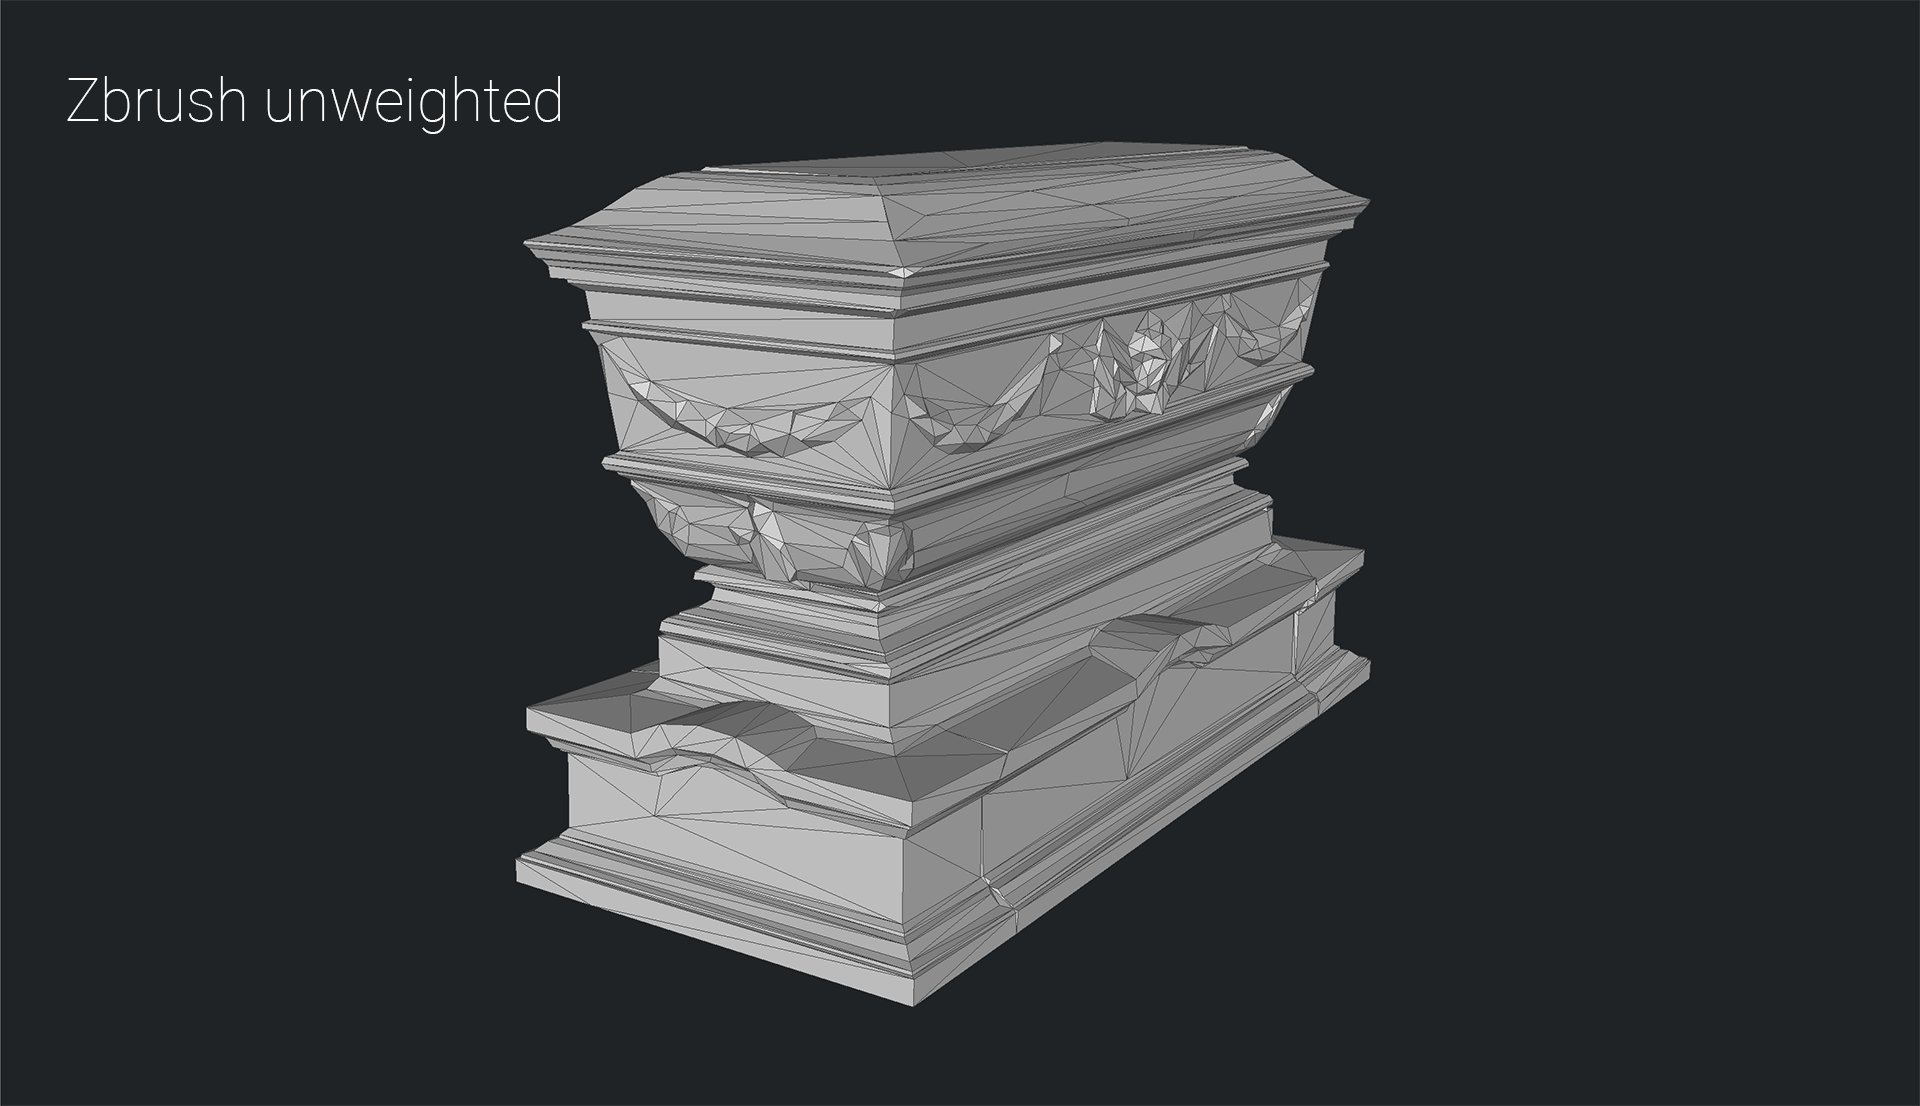
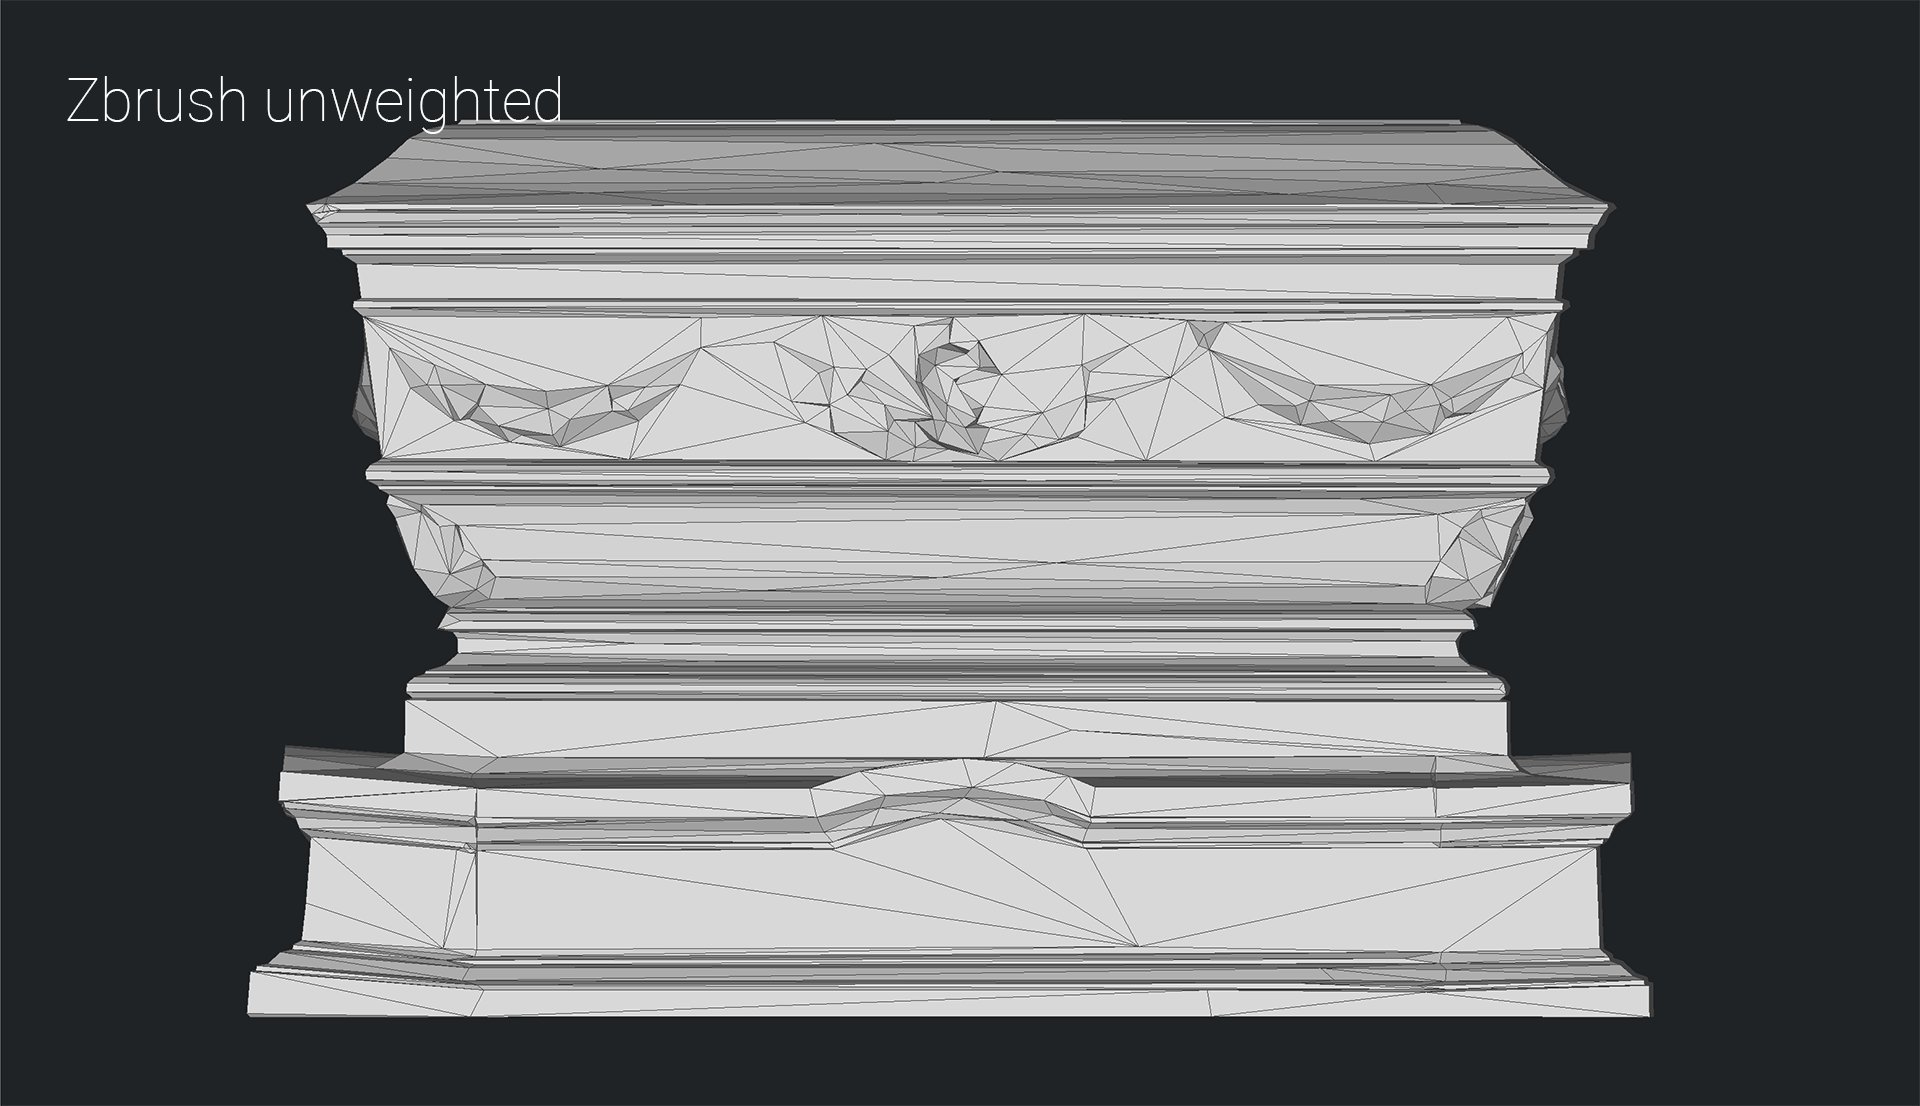
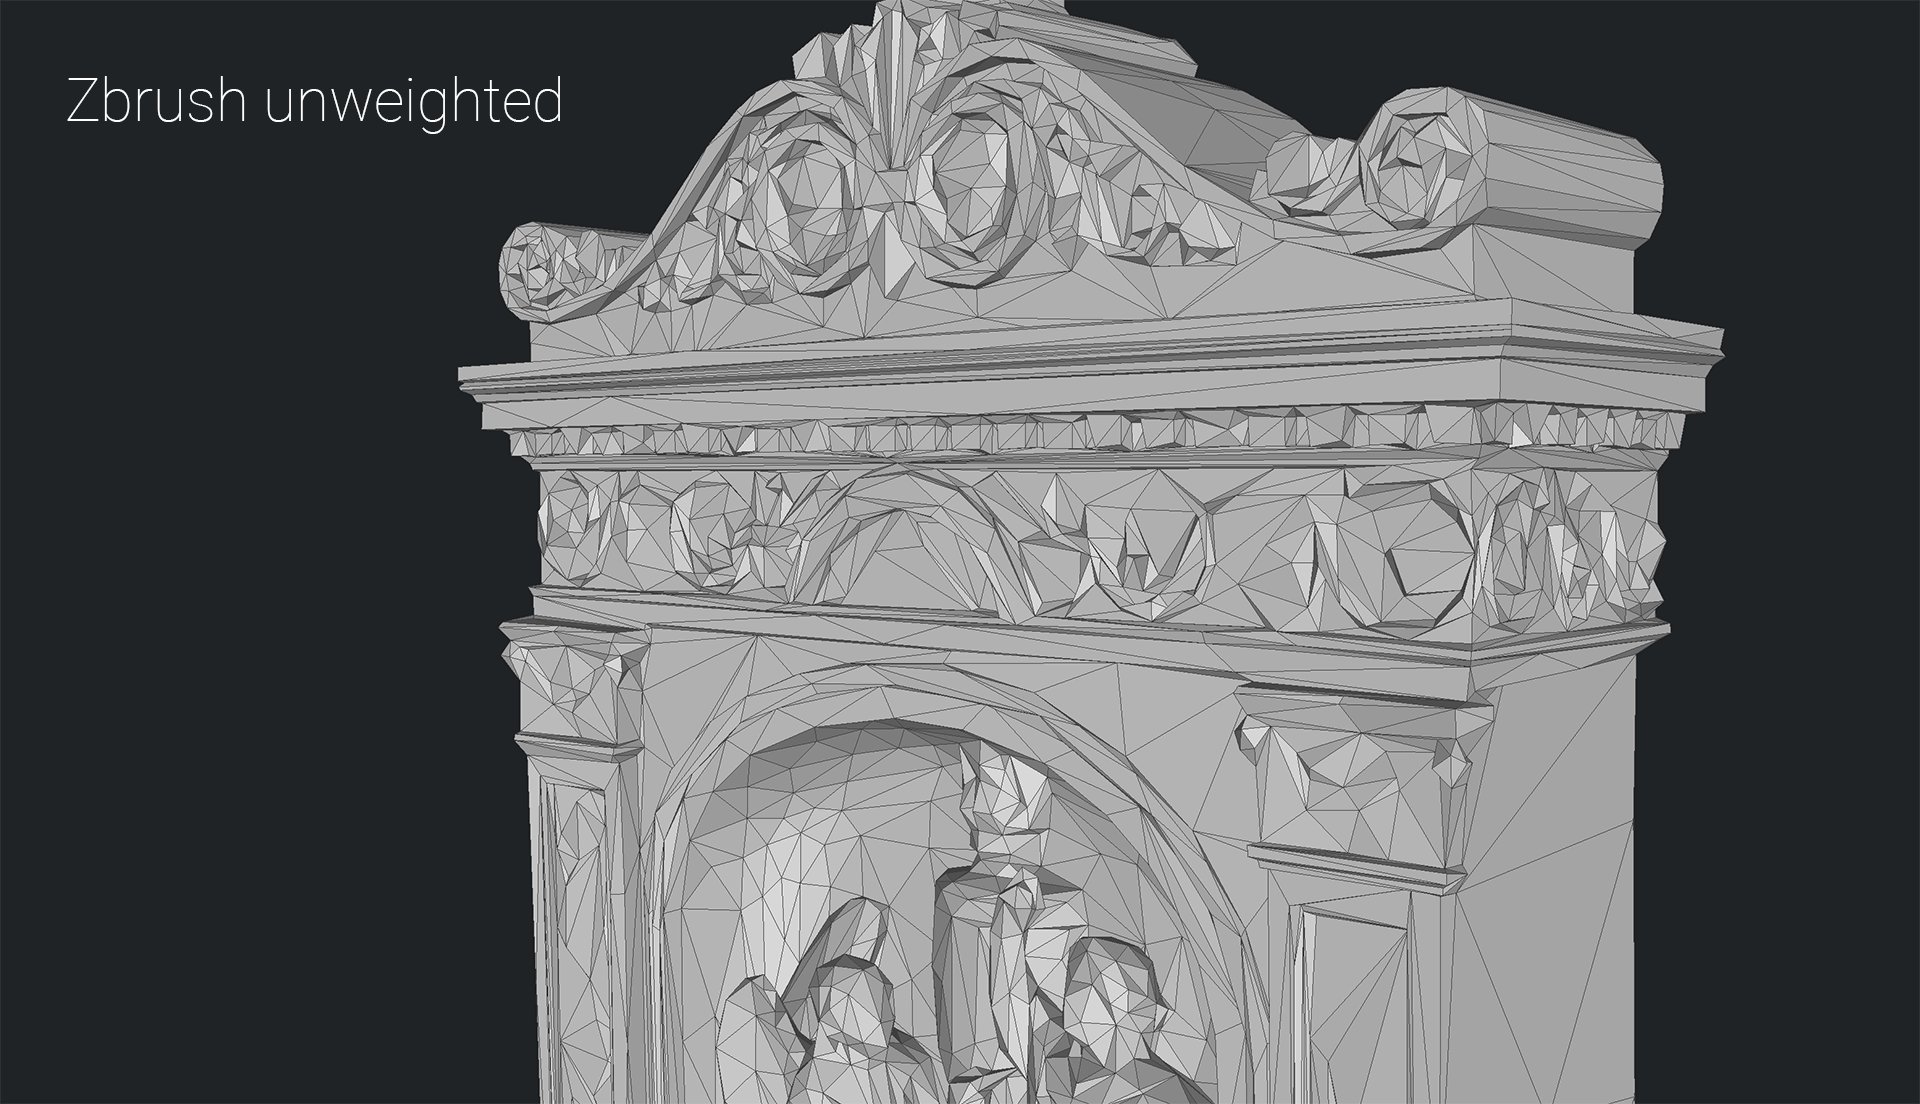
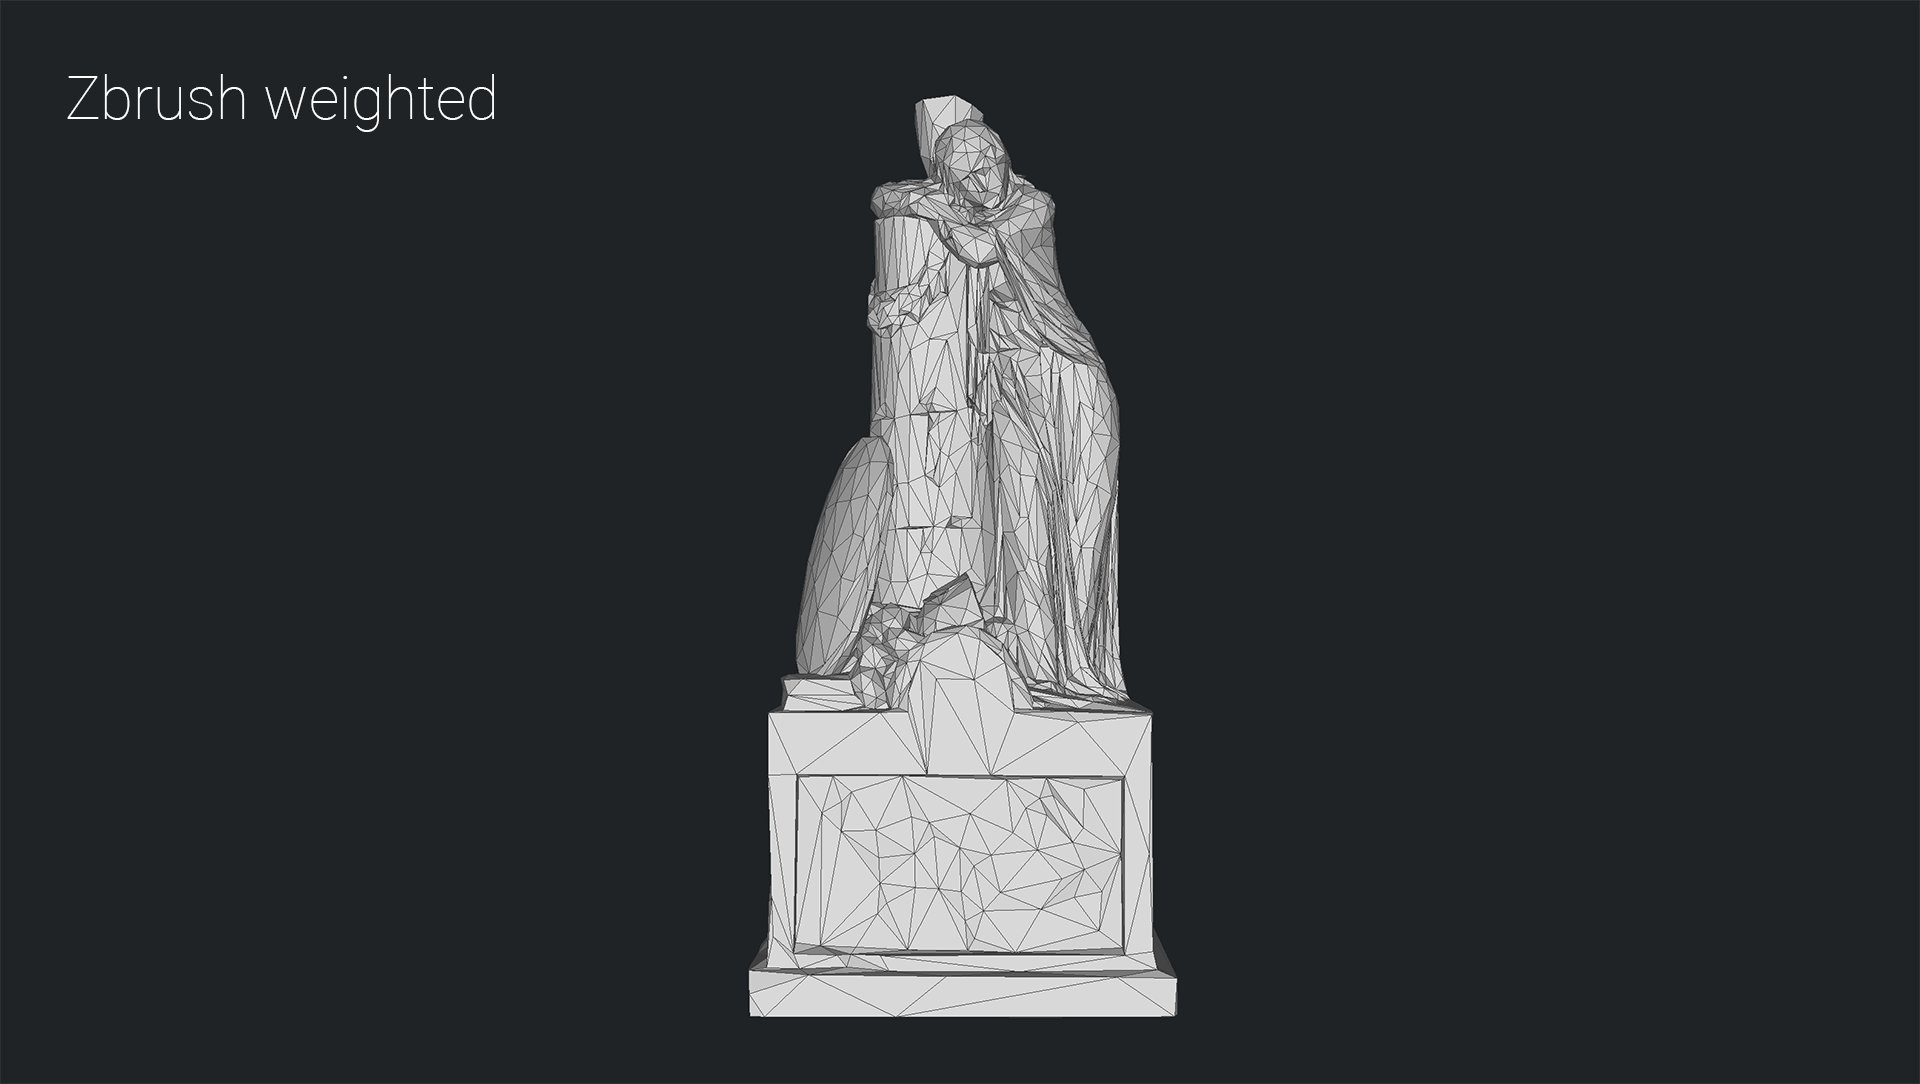
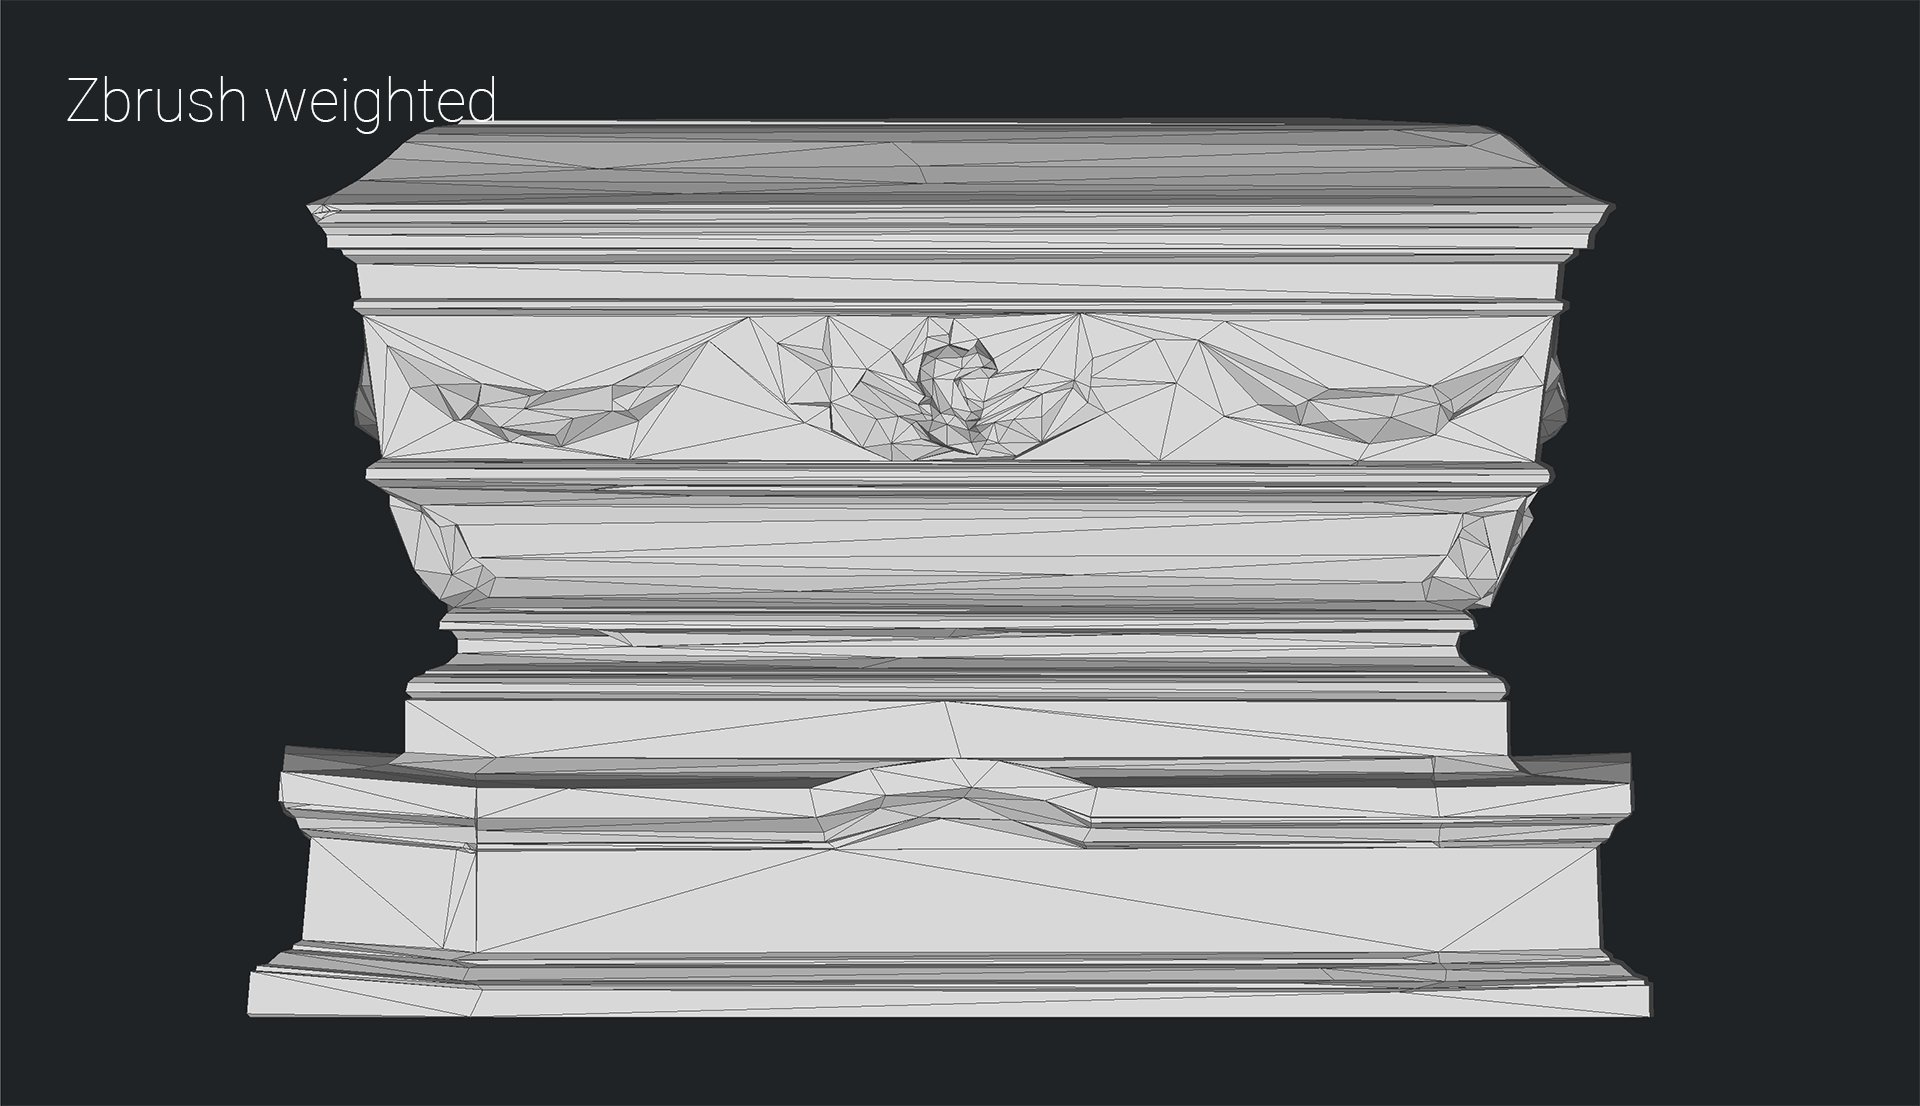
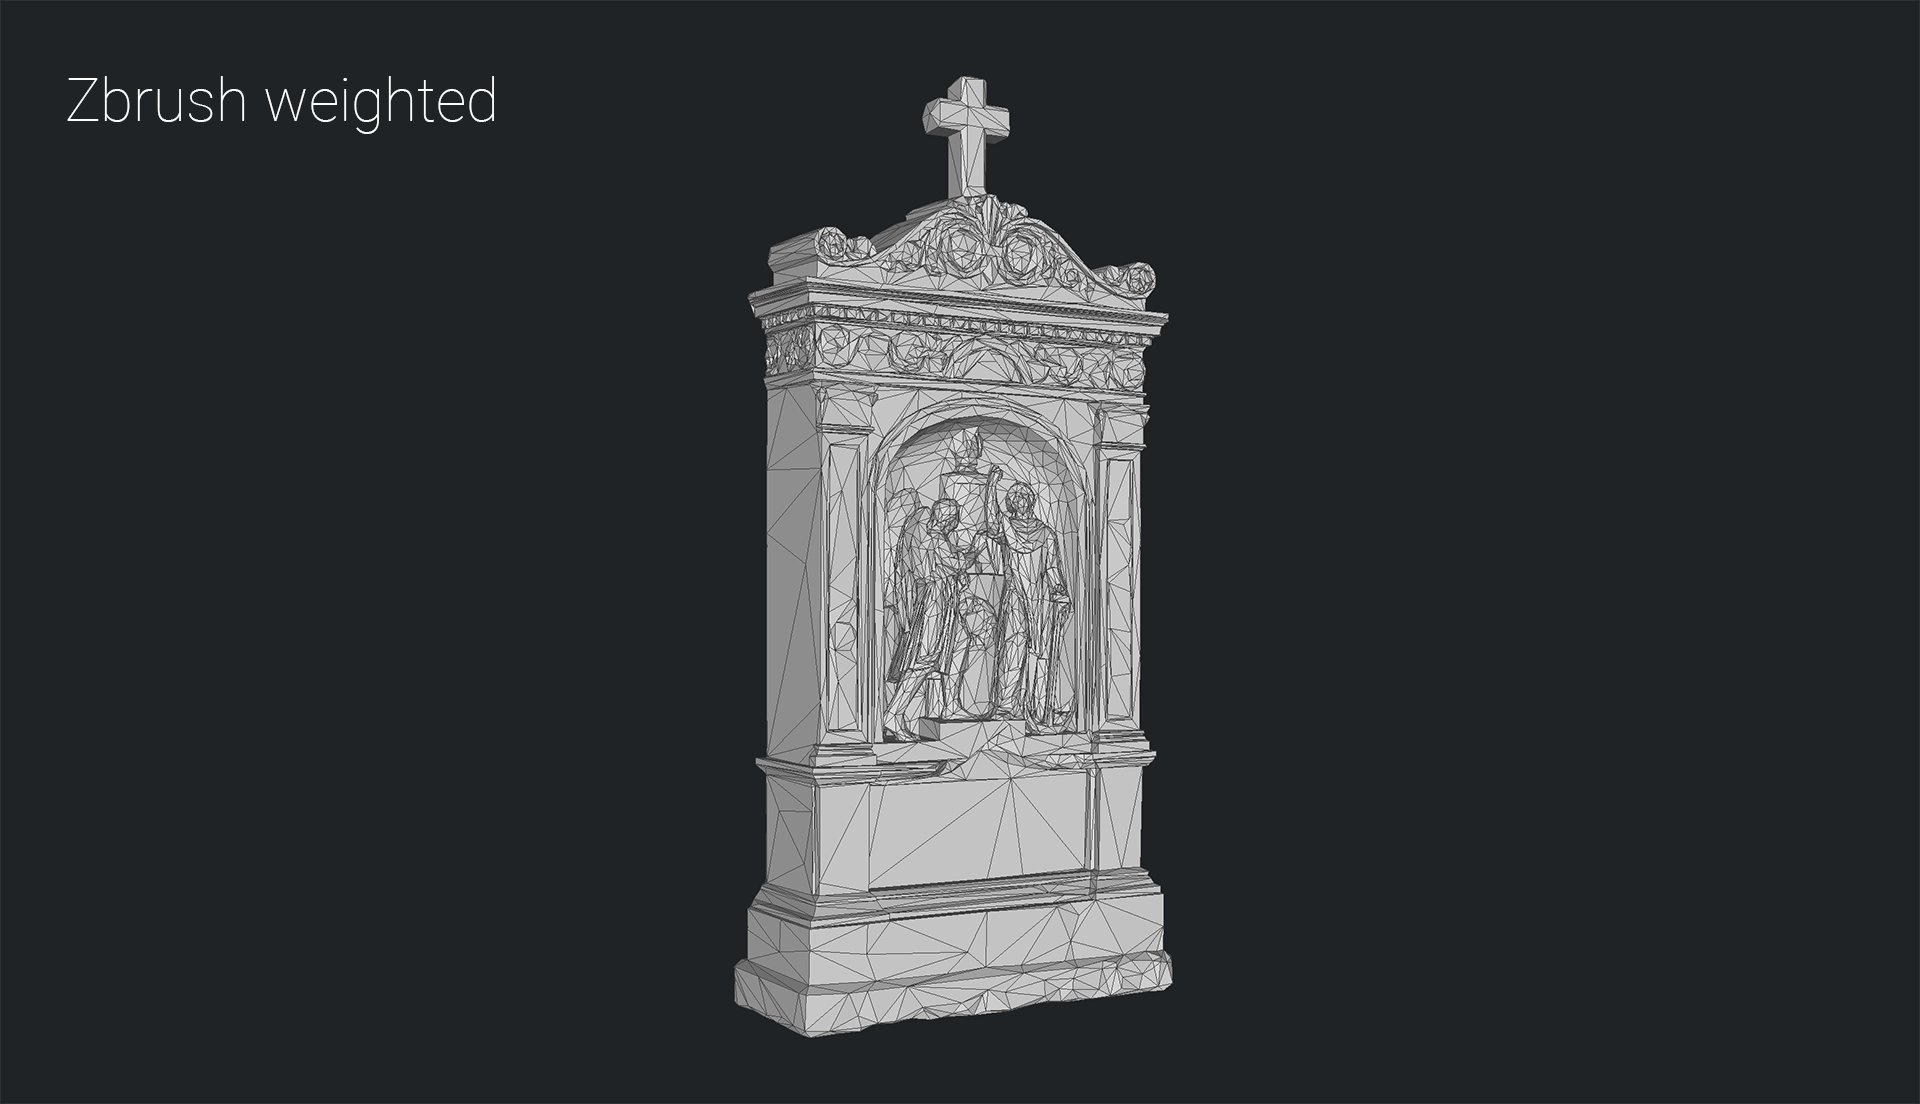
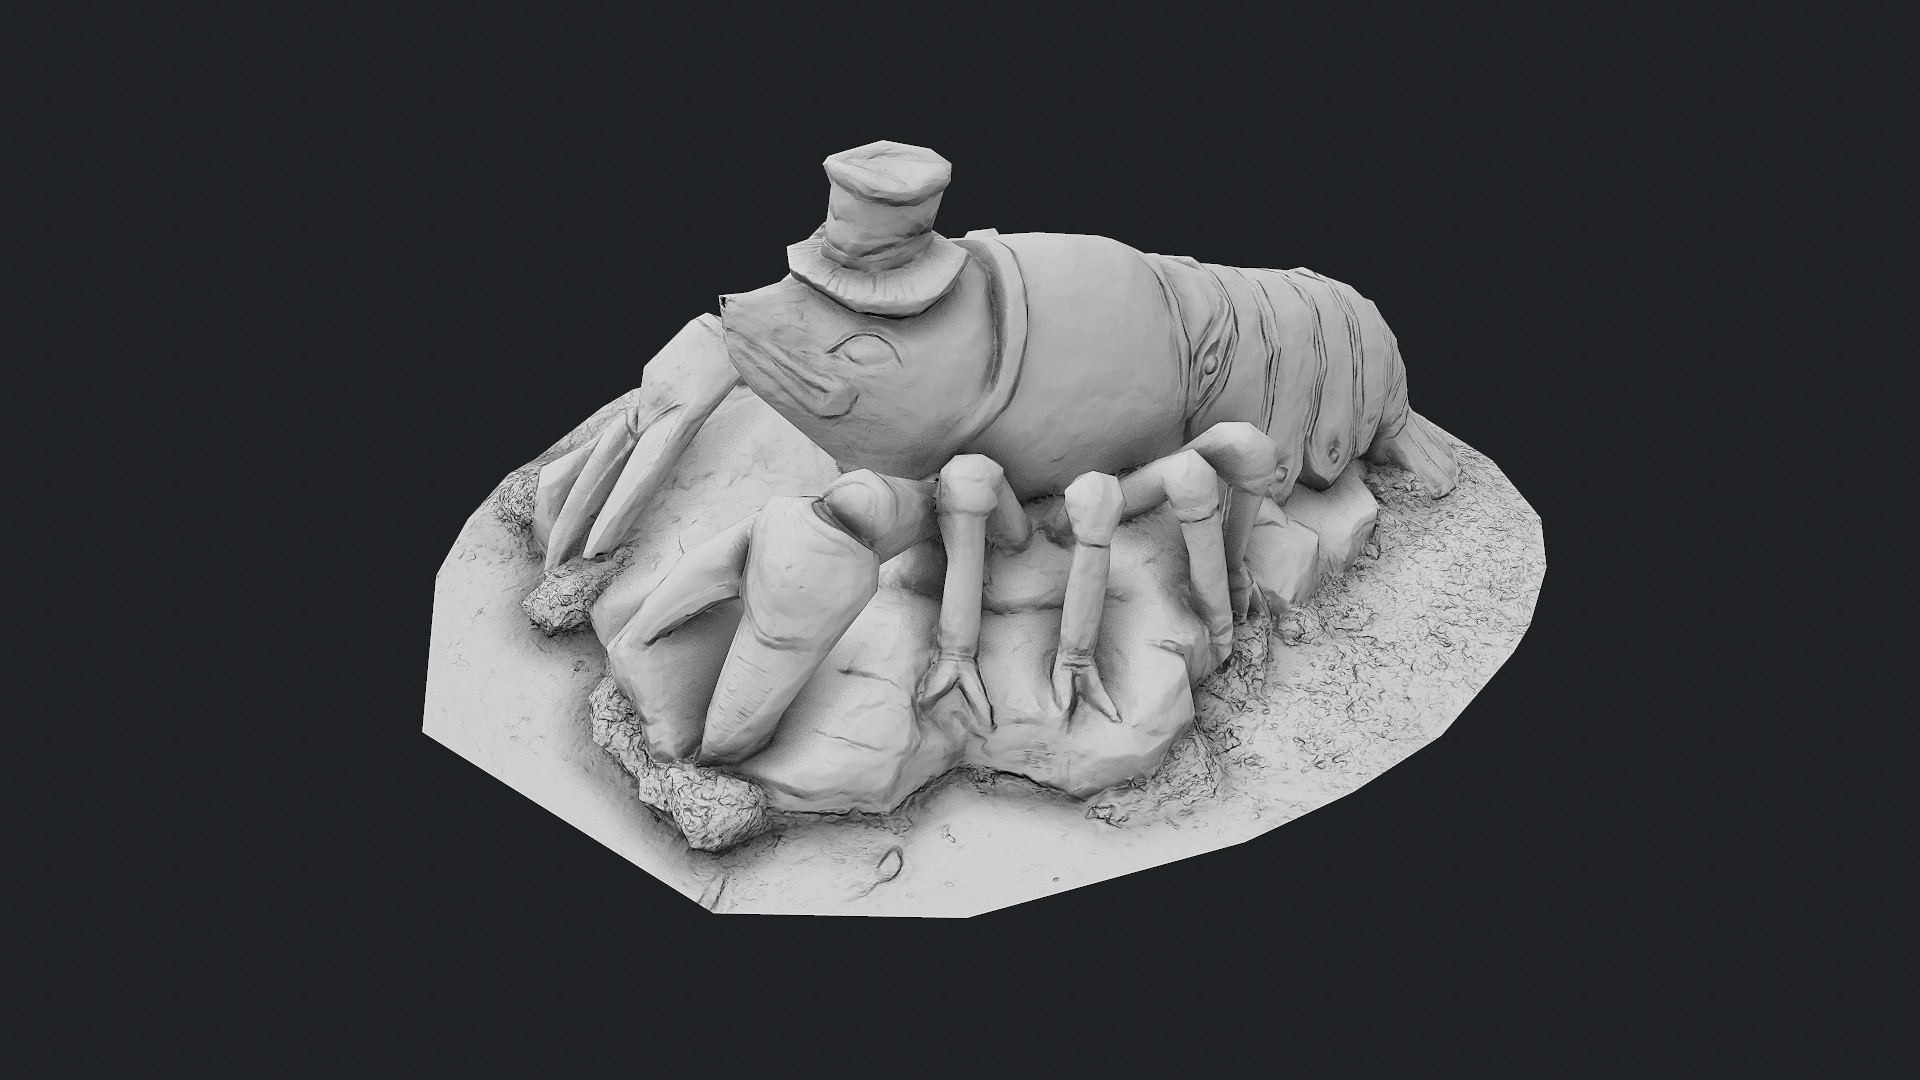
info@vr3d.cz​ |  (+420) 606 555 848​

3D model decimation comparison

From 3D scan to game ready model

Main motivation of creating this comparison was to find out,  if there are better decimation methods than Decimation master in Zbrush, which does pretty nice job in overall, but has also some annoying problems, especially when decimating the models from pretty high poly to pretty low poly (like from 20 millions to 5000).

Those problems are probably not so common for people who are modelling their models manually, but in 3D scanning, they are present in almost every model and it’s really annoying to fix them manually, because they are usually very small and easy to overlook them.
The problems I mean are the creation of annoying crossed and differently inverted polygons in places where the scan is very rugged, like moss, cobwebs and etc.
These polygons then complicate the creation of UV maps, leading to the creation of various artifacts in the textures and in overall, they are just wasted polygons which should be used elsewhere.


Tested software

I know that probably every 3D modelling program has it’s own decimation tools, but I’ve focused only on those applications, which are commonly used in 3D scanning (at least by me :)). So i tested these 5 apps (all in their newest versions):

  • Agisoft Metashape 1.5.3
  • Blender 2.80
  • RealityCapture 1.0.3.6310 RC Release
  • Meshlab 2016.12
  • Zbrush 2019.1.2

Testing methodology

For the tests, i have chosen those 4 scans: lady gravestone, statue of cancer and sarcophagus-like gravestone and te last one which I didn’t know how to name it, so it’s just Gravestone 4 :). All models was created in Reality Capture and predecimated here to 20 millions polys (i really didn’t want to decimate original models with hunderds of millions polys).
The models was not chosen randomly, but because I had problems with their decimation in the past.

Testing models

Sad lady gravestone

Expected most problematic parts:

  • wrong polygons on her back, where the moss is present
  • losing detials on the face and fingers
  • open border on the bottom

Decimated to 5 000 polygons.

Cancer

Expected most problematic parts:

  • losing antennae, which is pretty important detail in this model and should be kept

Decimated to 3 000 polys.


Sarcophagus-like gravestone

Expected most problematic parts:

  • various small “clumps” of crossed and flipped polygons

Decimated to 2 500 polys.


Gravestone 4

Expected most problematic parts:

  • this one is very complicated in overall, especially the upper part with those “teeth” will be most problematic, probably will be necessary to fix them manually

Decimated to 8 000 polygons.

Overall

Most important criteria was decimation quality of course, but i’ve also focused on the other things, especially:

  • possibility to paint weights on the model to identify, which parts of the model are more important and should be less decimated
  • presence of errors in the model (which was actually main reason, why I started with this)
  • how effectively the polygons are spread across the model – program should not waste polygons on flat surfaces where they are not necessary

Results

BakeMyScan

This program si actually very new for me. I found it just before I began to write this article when I was searching if there is some free software I could try too. It’s actually not a program, it’s just a toolkit for Blender 2.79. Author describes it as “an open source toolbox for asset optimization”, which is exactly what I want, so I’ll give it a chance.
It has it’s own decimation method based on an iterative sequence of blender modifiers, so we will see, what we get. It allows you to do much more, like remeshing or texture baking, but I’m testing only this iterative decimation.
 

Wireframe

How it looks with normal map


Conclusion

Well, this didn’t go much well :(. This method is obviusly does not like hard surfaces…. any hard edges are really heavily distorted, especially that Sarcophagus-like gravestone is really badly damaged. It looks like this method is designed only for more organic shapes, because sad lady and cancer are not so bad, if you ignore what it did with the open edges of the models. Anyway, in overall I can’t recomend this method, definitely needs more developmnet.

  • Sad lady: the statue itself is not so bad, but has errors on the back. Hard edges on the pedestal are damaged, also open border is havily distorted. In overall, model would need too many manual fixes, which makes it unusable.
  • Cancer: again, cancer itself is not so tragic, but the edge is really bad. Only a part of one antenna was kept.
  • Sarcophagus: completely unusable at all
  • Gravestone 4: a lot of damaged edges, teeth details lost. Unusable again.
BakeMyScan
0.5/5


Blender

First of all, I have to say that I really like the new Blender version 2.8. I’ve never been a Blender fan before, because I found it strange to control, but after the changes in version 2.8 have gone through, it finally begins to look like a fully usable 3D program. I’m even thinking hard about leaving some paid Autodesk programs and switching to Blender.  Good job guys, keep going!

Wireframe

How it looks with normal map


Conclusion

Well, it’s just a basic edge collapsing decimation method. Not great, not terrible :), but there are definitely better methods. It wastes polygons on flat surfaces where they are not necessary, so then it lacks them where they should be. On the other side, antennas on the cancer statue was kept, open edges are also handled nicely. 3/5.
 
  • Sad lady: not bad in overall, but lot of errors on her back and also few other places. Her nose could be kept better, unfortunatelly you can’t mark it as important with some kind of weighting. Anyway, usable model with some manual fixes needed.
  • Cancer: not bad, but wastes a lot of polygons on the ground. Antennas are kept, would need only slight fixing,
  • Sarcophagus: edges are not exactly straight as they should be, which makes visible artifacts in normal map.
  • Gravestone 4: the teeth on the top are not kept correctly, also statues lost some details. It is a pity that it used so many polygons unnecessarily to parts where they are not needed.
 
 
Blender
3/5


Metashape


Like I mentioned in methodology section, tested models was created in Reality Capture, which is true even for Metashape. So the model was only imported to Metashape, it was not computed by Metashape. I don’t know, if it can affect quality of the decimation, but I actually don’t care. I’m not using Metashape for model creation and I don’t plan it until they make it signifficantly better, as it’s much slower than Reality Capture, much more memory-intensive and the meshes are much less detailed in comparison with RC.

Wireframe

How it looks with normal map

Conclusion

I did not measure how long each method took (initially I wanted to, but some took a really long time and sit for 30 minutes with a stopwatch in my hand and constantly check to see if it was already done wasn’t exactly what I wanted), but metashape was clearly one of the fastest.
On the other hand, the result is not convincing. Many details have been lost, polygons on flat surfaces are used inefficiently, and in very noisy areas there are errors.

  • Sad lady: lots of errors on her back. Nose was not handled correctly, it deforms also her mouth.
  • Cancer: antennas are kept. Would need some fixing but they are here. Wasting polygons on the gound
  • Sarcophagus: some edges are not as straight as they should be. Little waste of polygons to keep the open edge straight. The helmet on the side is somewhat deformed, but normal map can more or less mask it.
  • Gravestone 4: teeth are mostly lost, which makes signifficant distortion in normal map. Again, lots of wasted polygons where they are not necessary.
Metashape
2.5/5


Meshlab

To be honest, I never liked this piece of software. I’m pretty sure, the guy who programmed it was excellent in 3D mathematics, but also really bad in creating user friendly interface. The filters have often nothing-to-say names AND THERE’S NO UNDO! Come on, how’s even possible to have application like this without undo?! It’s 2019, geez!
Anyway it has some really great features, so it would be nonsence to discard it only because of bad UI.

Meshlab is one of the programs, which allows you to paint weights – mark some parts of model more or less important, so there will be both versions with painted weights and without them. There is also more decimation methods available, but I tested only Quadric Edge Collapse Decimation, as this one is the best.


Meshlab without weighting


Wireframe

How it looks with normal map

Conclusion

Meshlab has one huge advantage – it does not generate errors on heavily noisy surfaces like everyone else does. On the other hand, the polygons are fairly uniform, which results in some details being lost and again a significant number of polygons on flat surfaces are not effectively used.
It is also a bit of a disadvantage that open edges are not processed quite correctly, but it is not a big problem, to fix them manually would be quite simple.
 
  • Sad lady: No errors on her back, on the other side, all triagles are pretty similar size, which leads to some loss of details. Her nose is lost completely. Also the open edge is not perfectly straight, but it would be easy to fix it manually. There is actually an option for this, but then it wastes a lot of polygons on the edge, so I rather left it off.
  • Cancer: the edge is deformed again, but not so badly. Antennas are unfortunatelly lost.
  • Sarcophagus: some edges are not exactly straight. Also the edge is pretty bad this time.
  • Gravestone 4: teeth are pretty bad, polygons are wasted on the back unstead of use them wisely on statues and teeth.


Meshlab without weighting
3.5/5


Meshlab with weighting


Wireframe

How it looks with normal map

Conclusion

Weighting certainly greatly improves the efficiency of the use of polygons where they are important, although there is still something missing to perfection. Unfortunately, very complicated shapes, such as the square teeth on the last model, were not processed correctly even with weighting.

  • Sad lady: No errors on her back again. Thanks to weighting, her nose is kept this time. Polygons are much more effeciently used now, on the other side, sime details was lost, like the deep holes on the pedestal.
  • Cancer: thanks to weighting, antennas are kept this time and also their shape is most similar to the original of all
  • Sarcophagus: there was not much for weighting, so the mesh is pretty similar to the previous, only the helmet on the side is more detailed. I’m also decimating this mesh to only 2500 polys, so tehre’s not much room for details anywhere.
  • Gravestone 4: The teeth are MUCH better than in model without weighting. Still would need some manual touches, but only slight. Also polygons are much effectively used in overall.


Meshlab with weighting
3.9/5

RealityCapture


Wireframe

How it looks with normal map

Conclusion

Reality Capture apparently uses a similar method to decimation as Blender, a simple Edge Collapsing, but unlike it, it does a bit worse – it does not properly maintain the open edges.

  • Sad lady: Lots of errors on her back. Edge is broken, also her nose could be better.
  • Cancer: The antennas are here, well at least somehow.
  • Sarcophagus: The edge is more lost than present. Some edges are not straight even when they should be.
  • Gravestone 4: The teeth are heavily deformed, and again, wasting polygons on unnecessary parts.
RealityCapture
2.5/5


Zbrush


And finally we got there Zbrush.
Also Zbrush allows you to set importance of mesh parts (using masking), but you have to be carefull, because from a certain intensity of the mask, Zbrush considers this part as not-to-be decimated at all, which can lead to something like this… which, well, is funny, but not exactly what you want :).


Zbrush without weighting

Wireframe

How it looks with normal map

Conclusion

Even without weighting, zbrush is absolutely the best in effectivity of using polygons only where they are needed.

  • Sad lady: Flat surfaces on the pedestal are very low poly exactly as they should be. What’s unfortunate is lots of errors on her back.
  • Cancer: Antennas are unfortunatelly lost. Even without weighting, it does not waste the polygons on the ground so much like the others.
  • Sarcophagus: Yes, this is how it should look. Straight edges are straight, no wasting polygons on flat surfaces. Zbrush also the only one, who kept that small part on the top as geometry. All others lost it, so it exist only in normal map.
  • Gravestone 4: And again, best work of all again, even without weighting. The teeth are kept very nicely, even the statue wit the anchor has its index finger, which was lost in all previous programs. Very nice work!
Zbrush without weighting
4/5


 Zbrush with weighting

Wireframe


How it looks with normal map


Conclusion

Zbrush is by the far the best in using polygons effectively. All other programs are wasting polygons on flat surfaces where they are not necessary and then missing them where they should be. Shape recognition is the best also – for instance, Zbrush was the only one, who kept that small 1cm flat surface on the top of the sarcophagus gravestone as a geometry – all other programs lost it, so its only faked in normal map. Also the teeth on last model are the best. Not perfect, still would need some manual corrections, but it would be very easy to do.
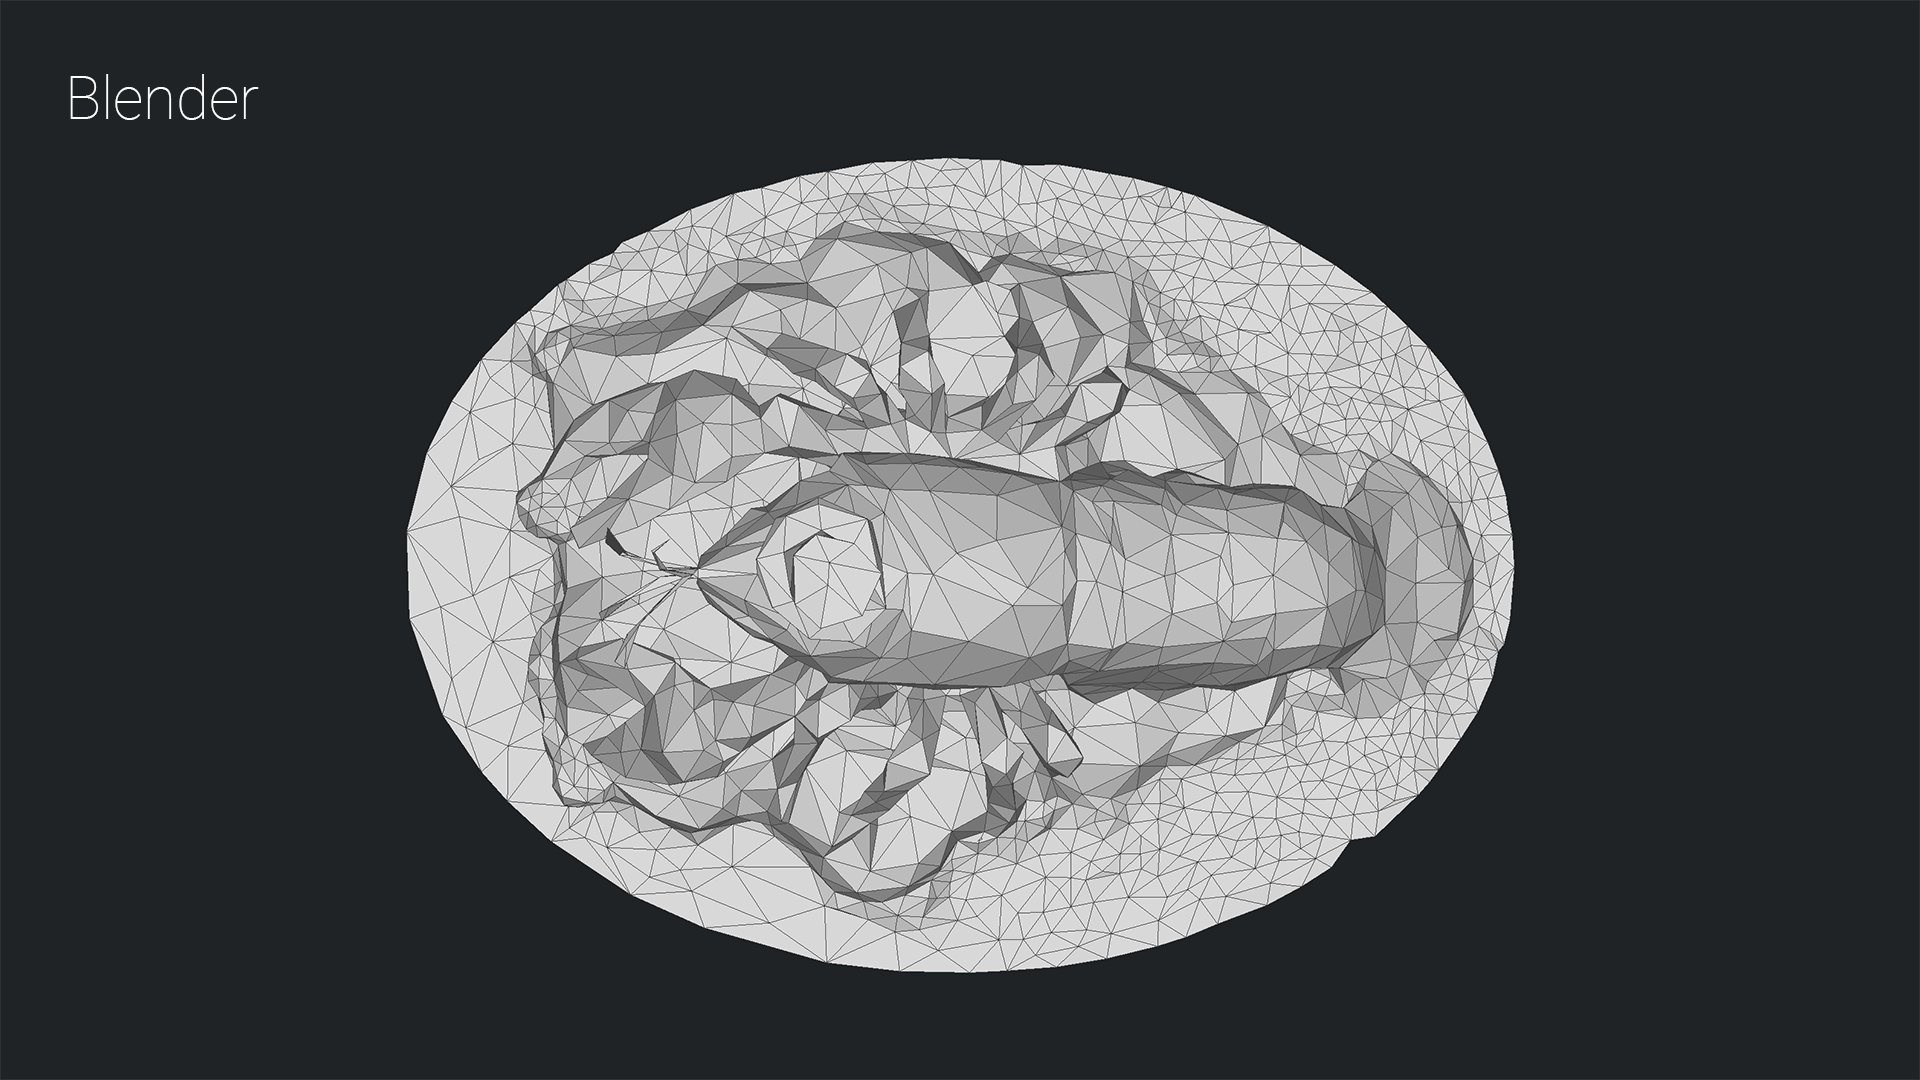
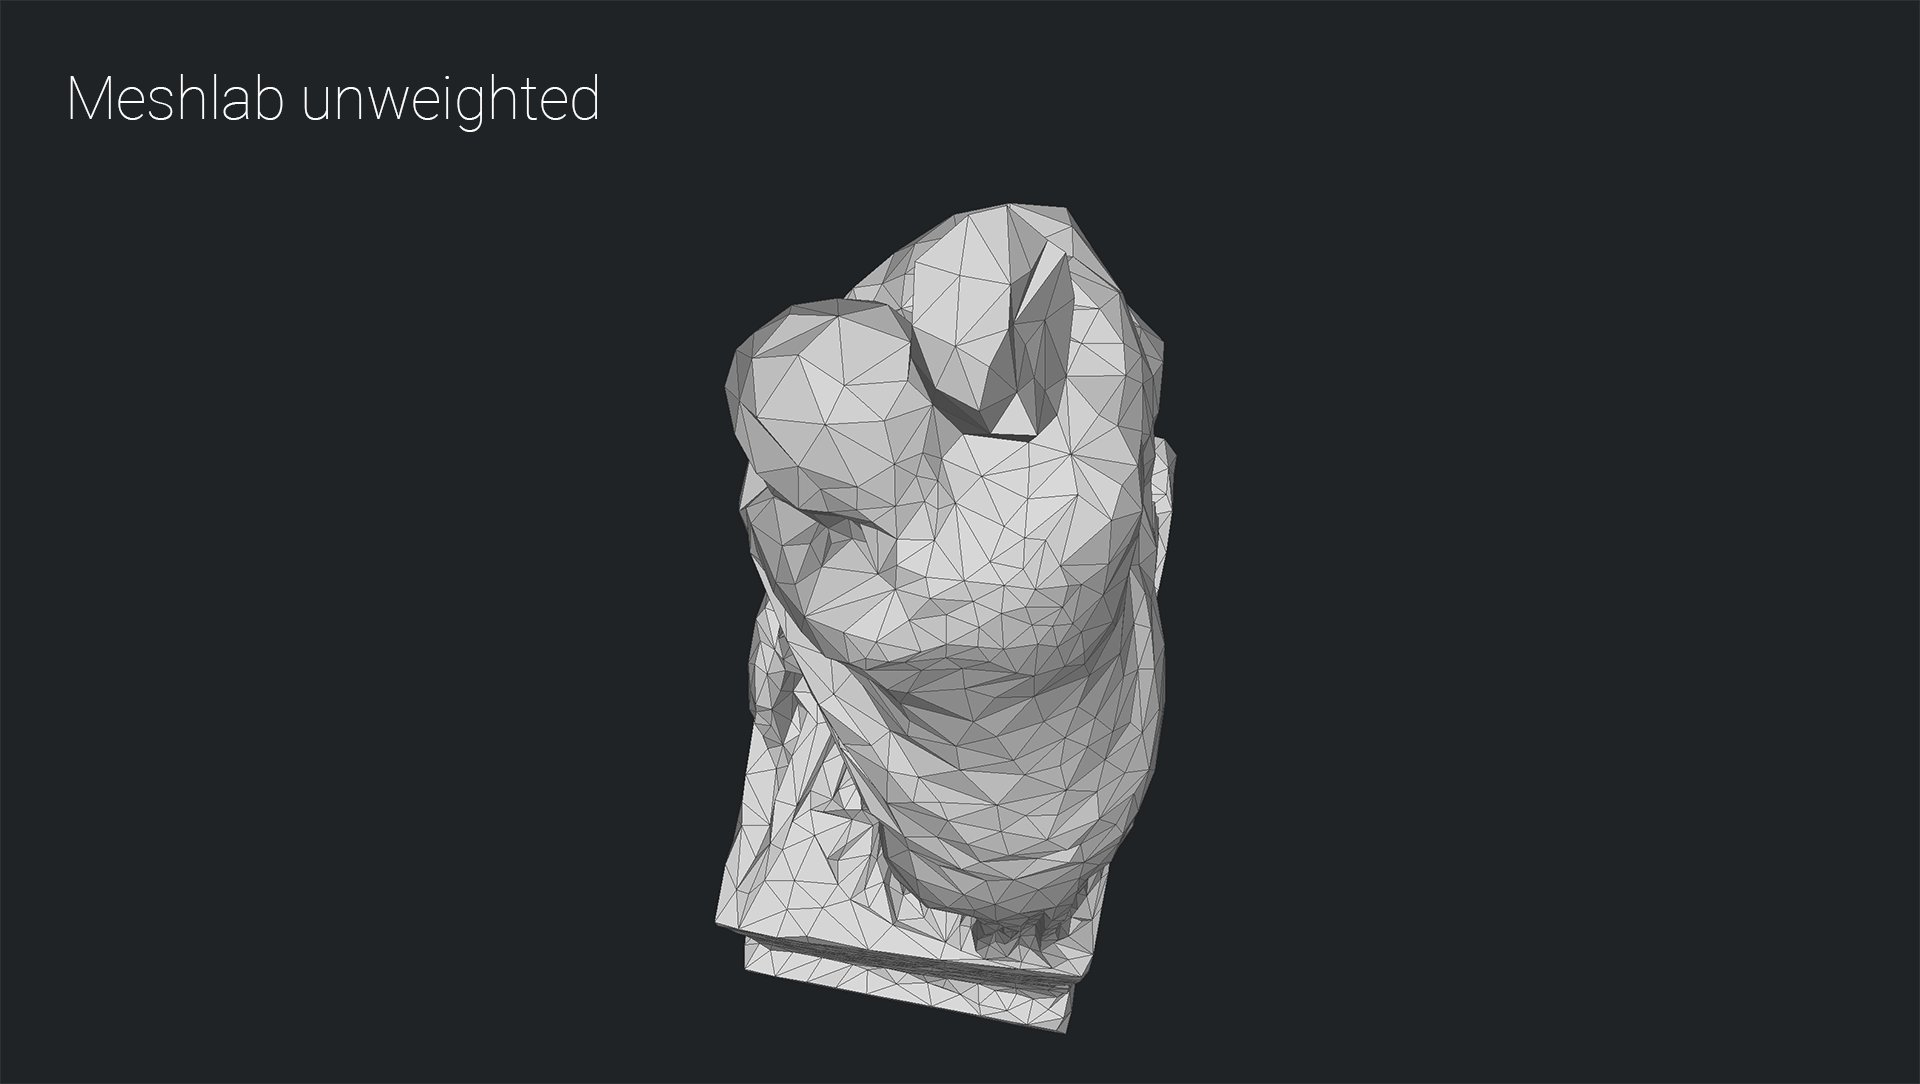
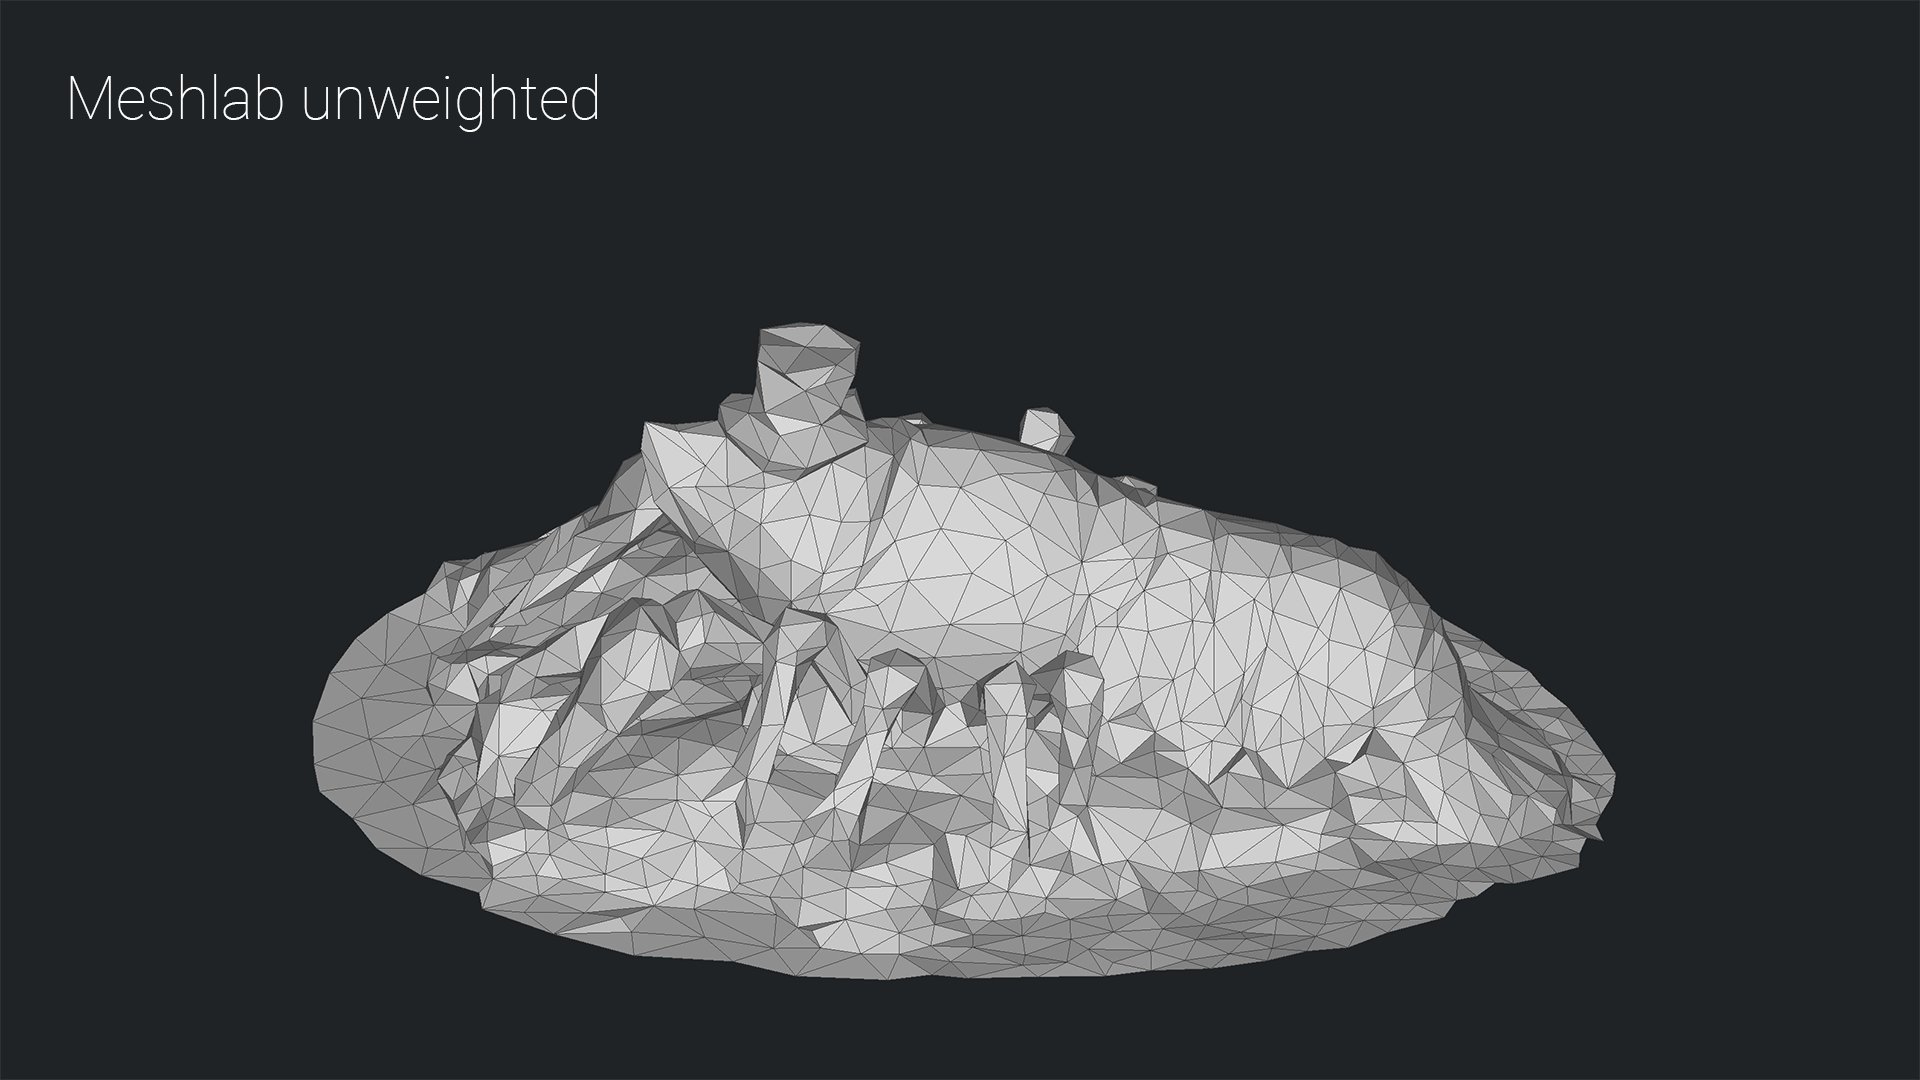
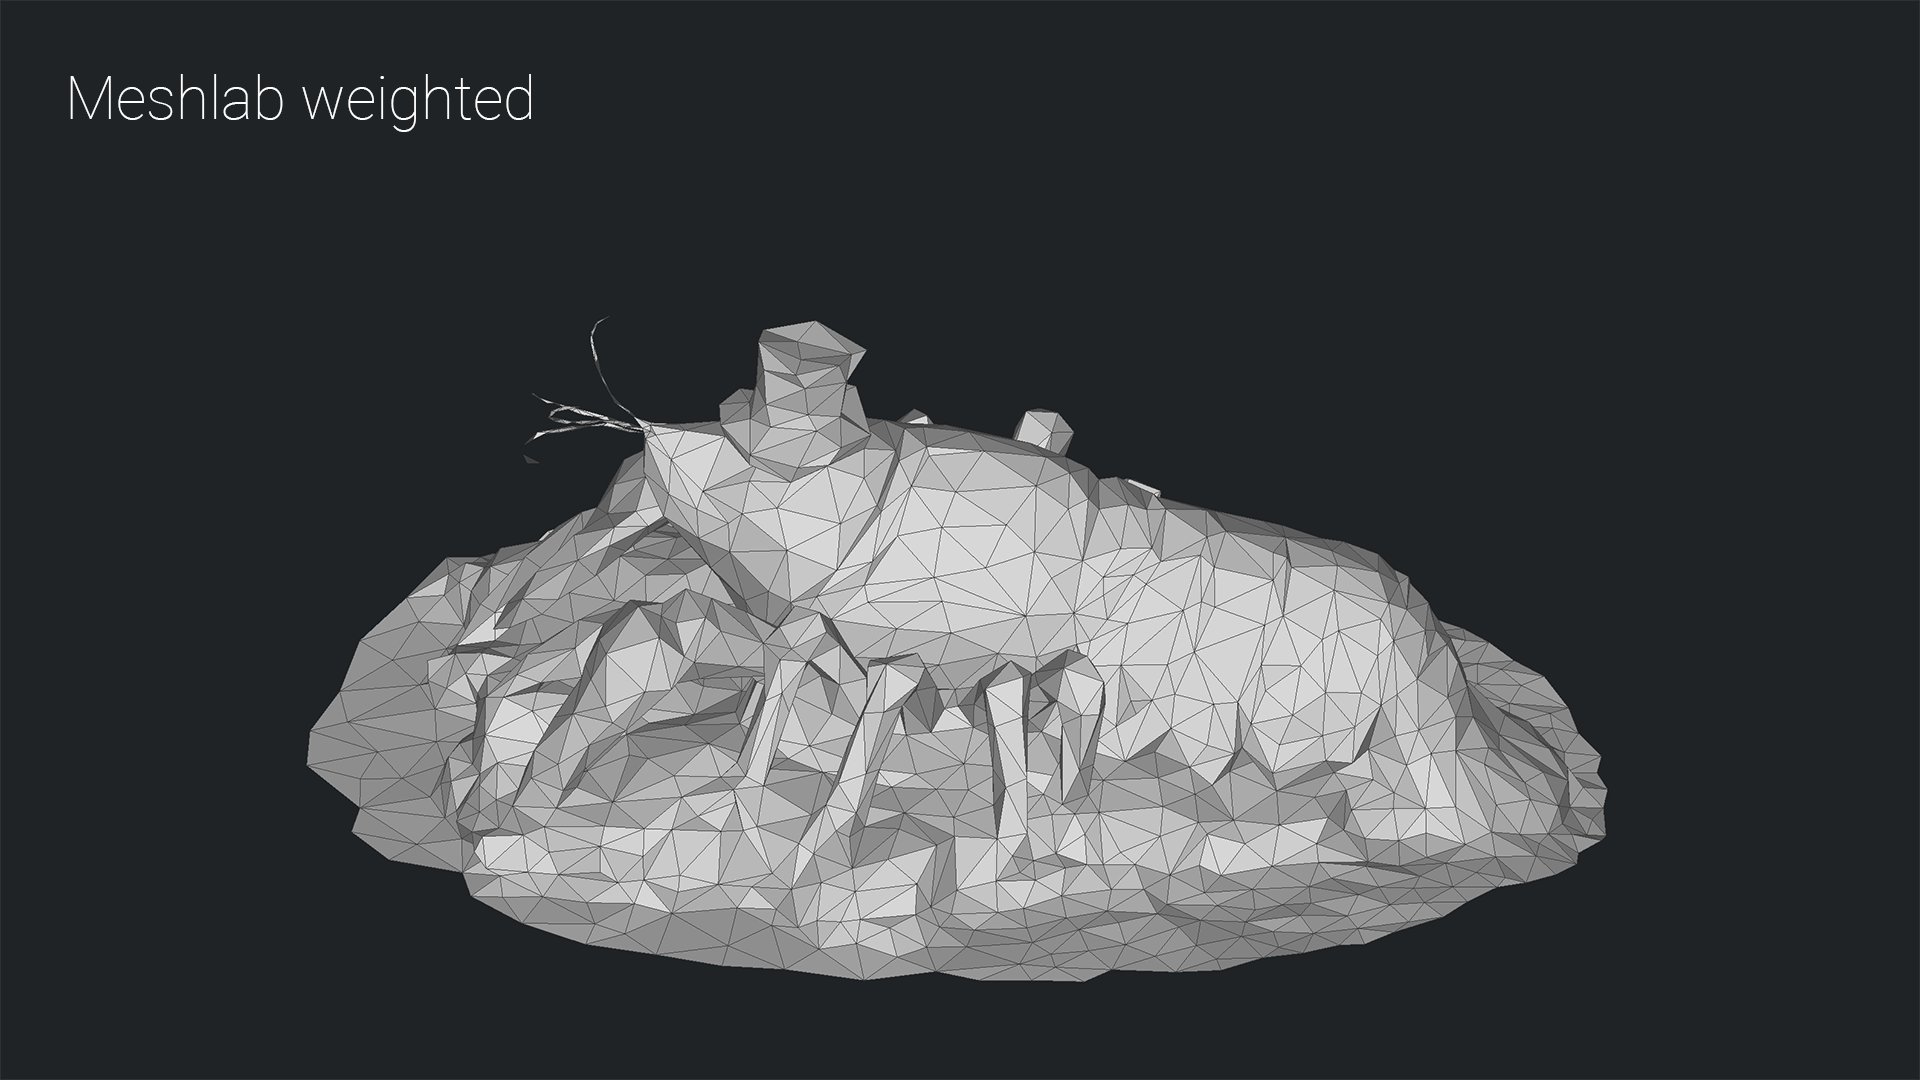
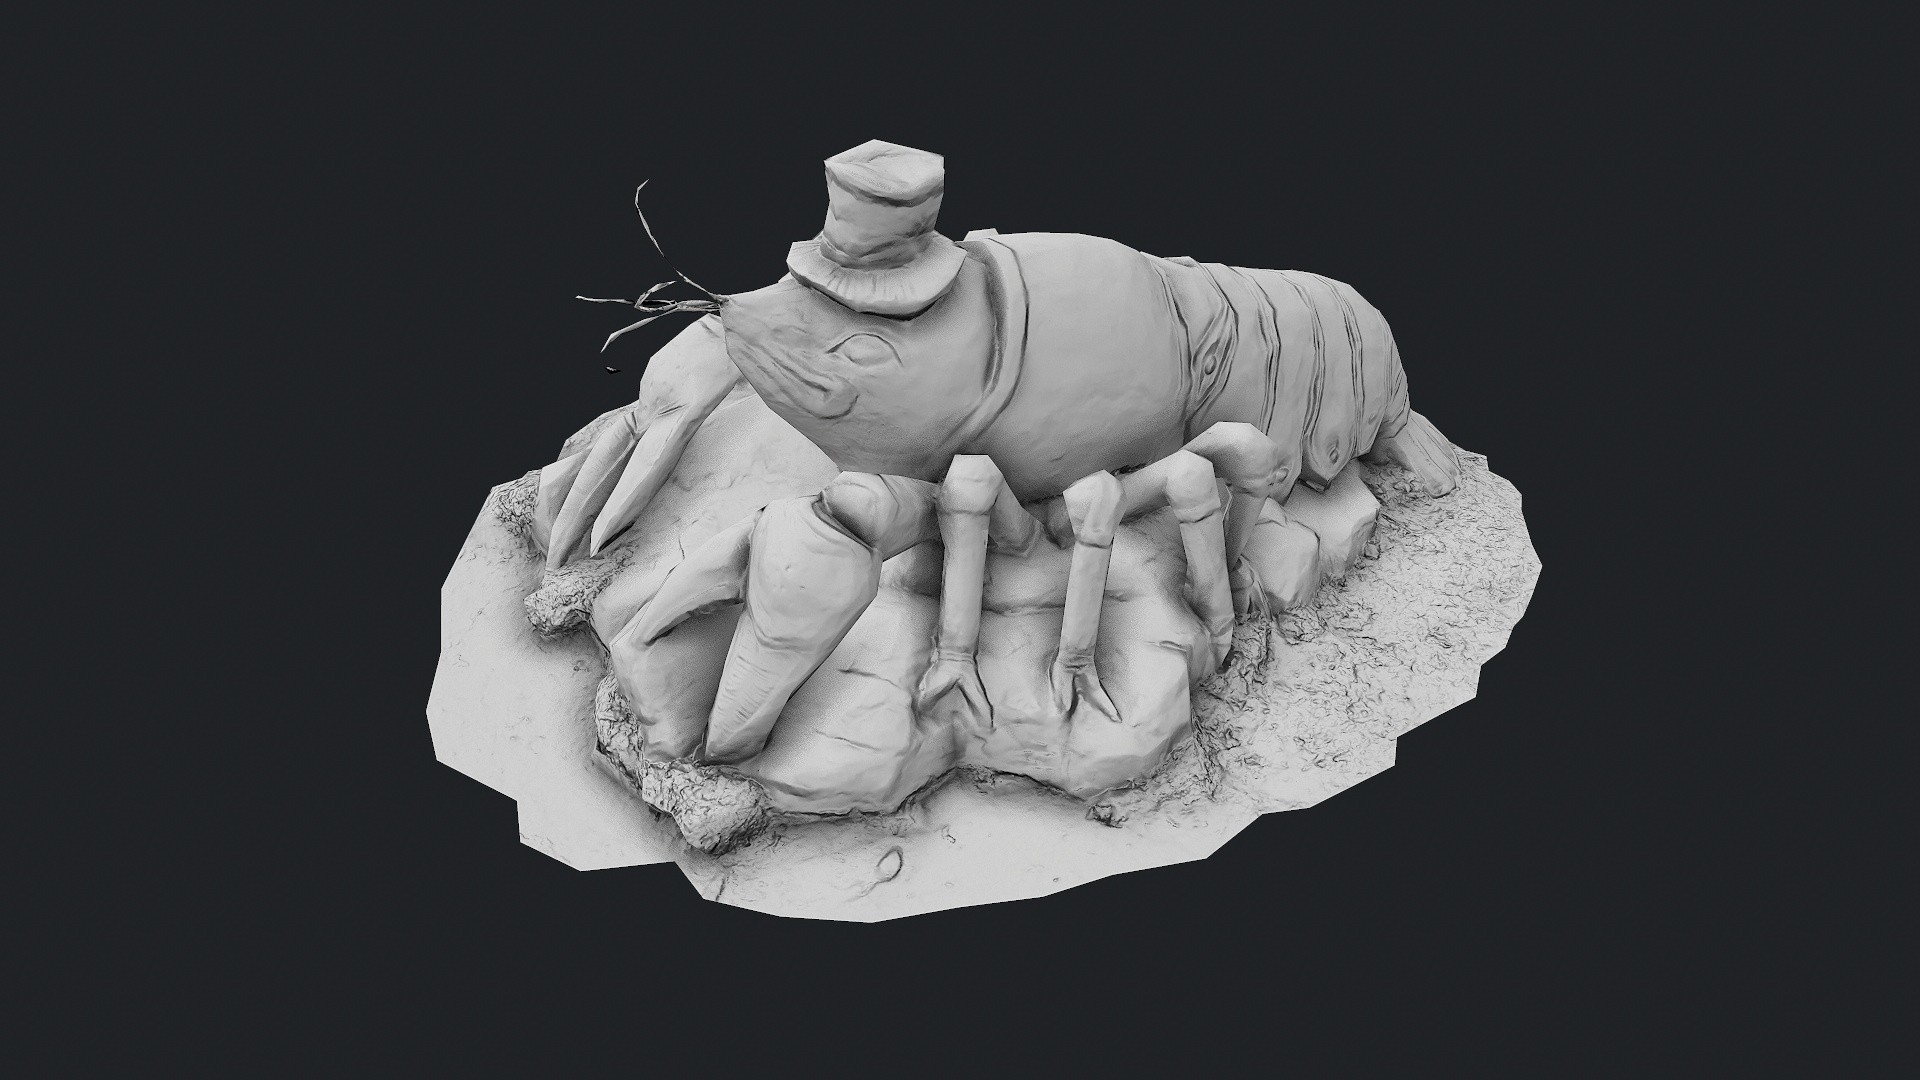
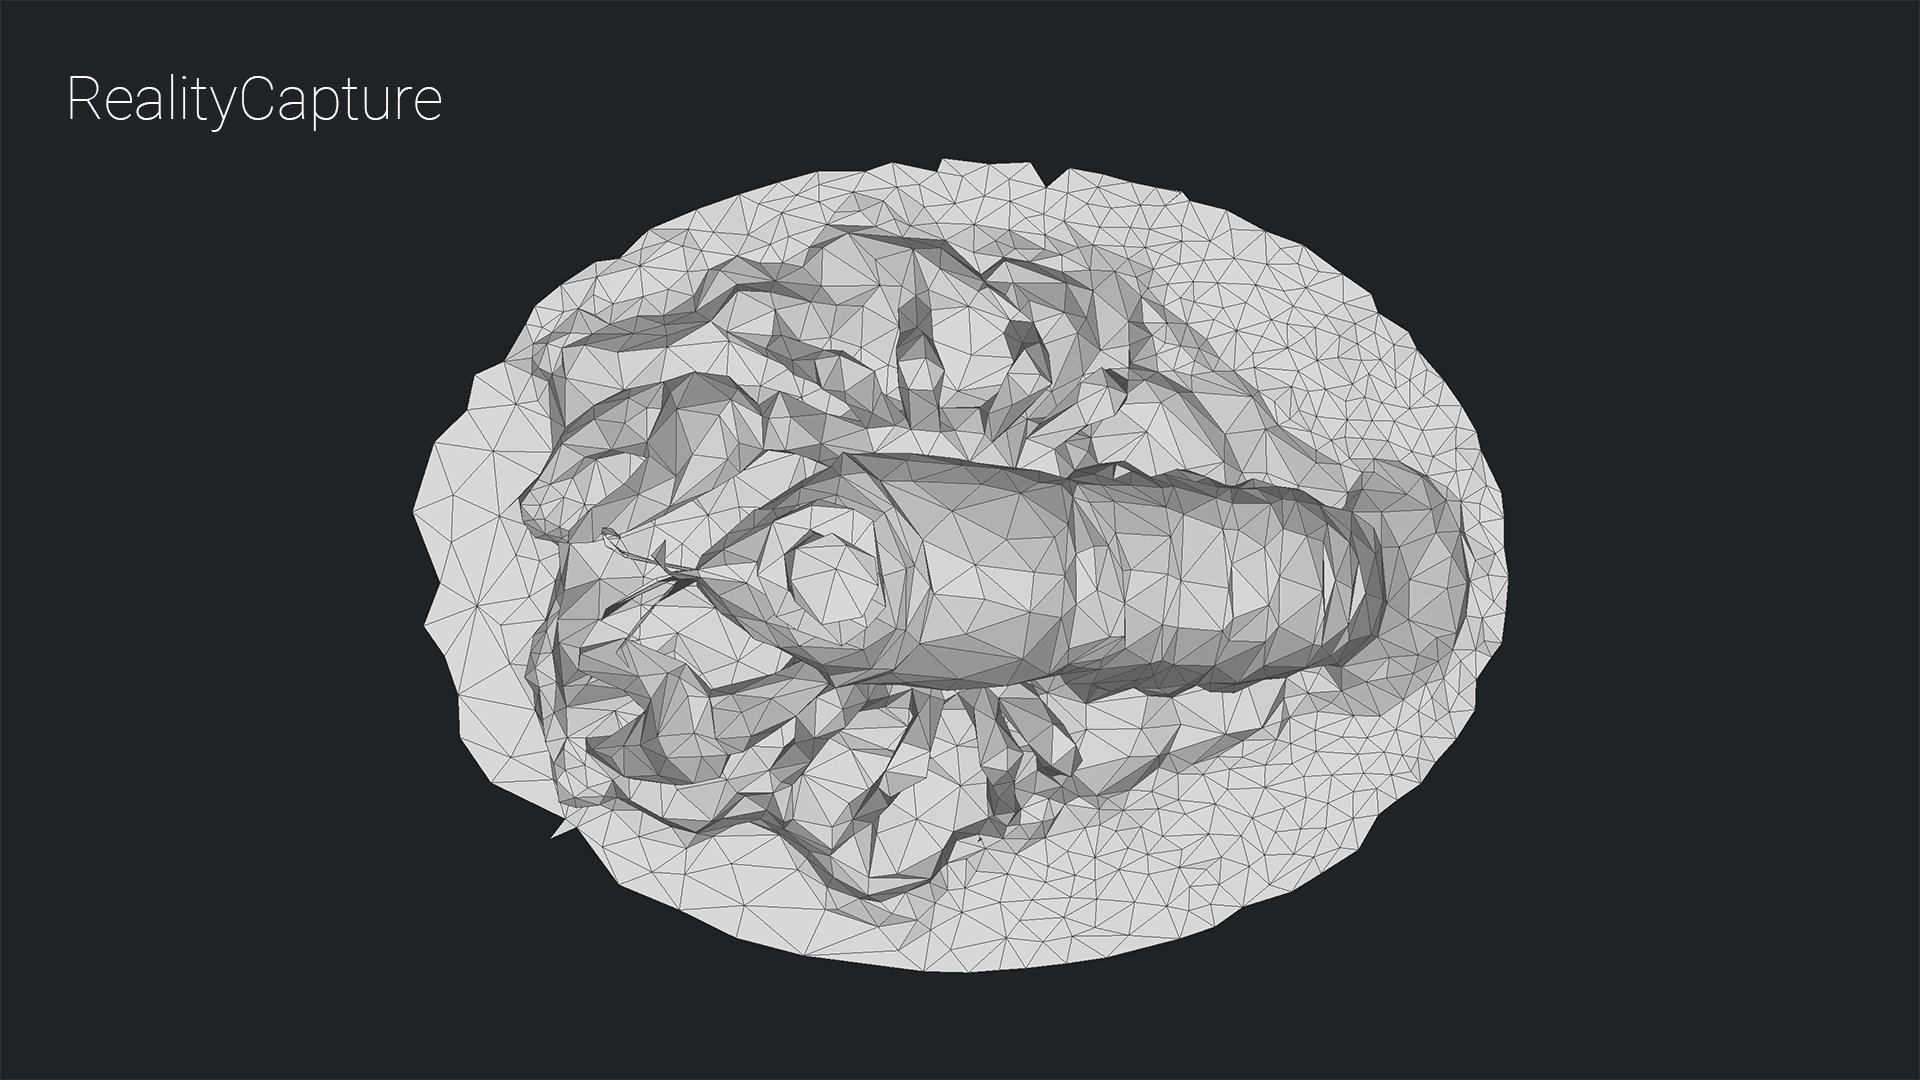
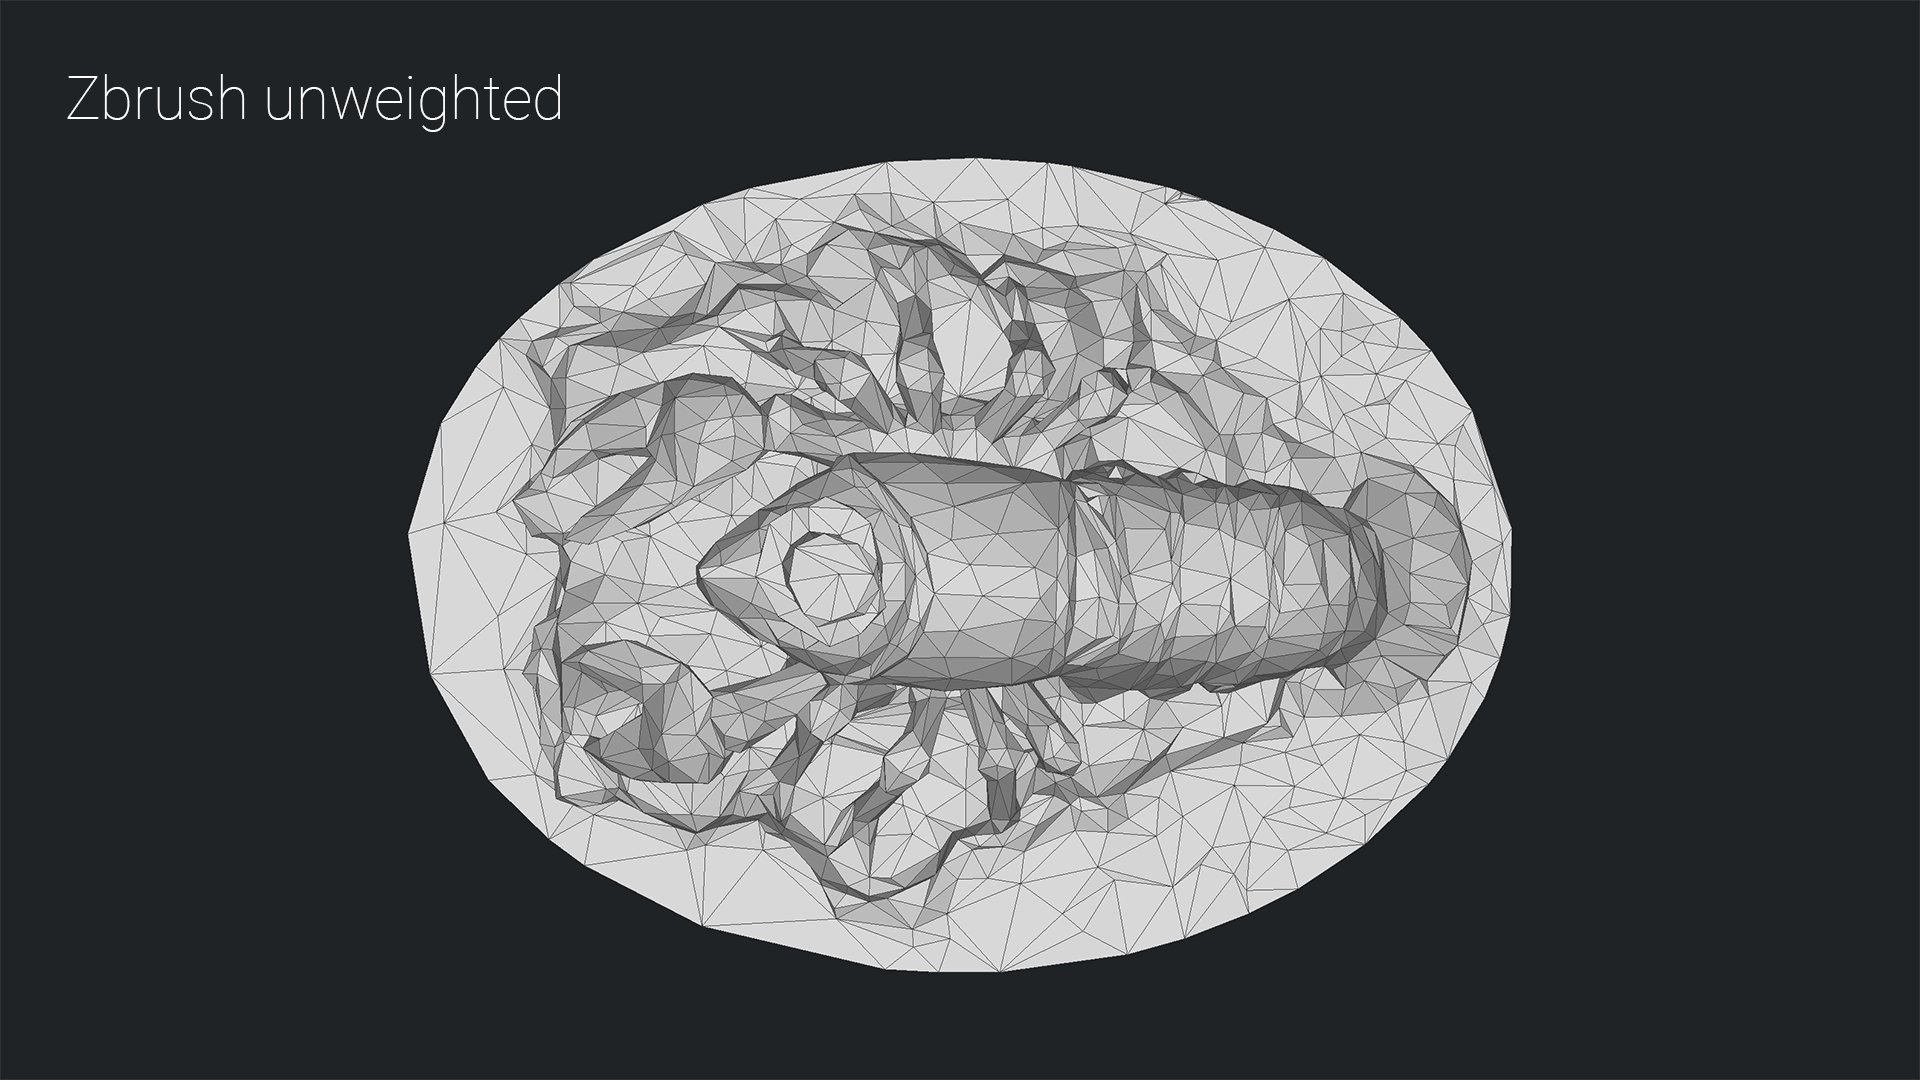
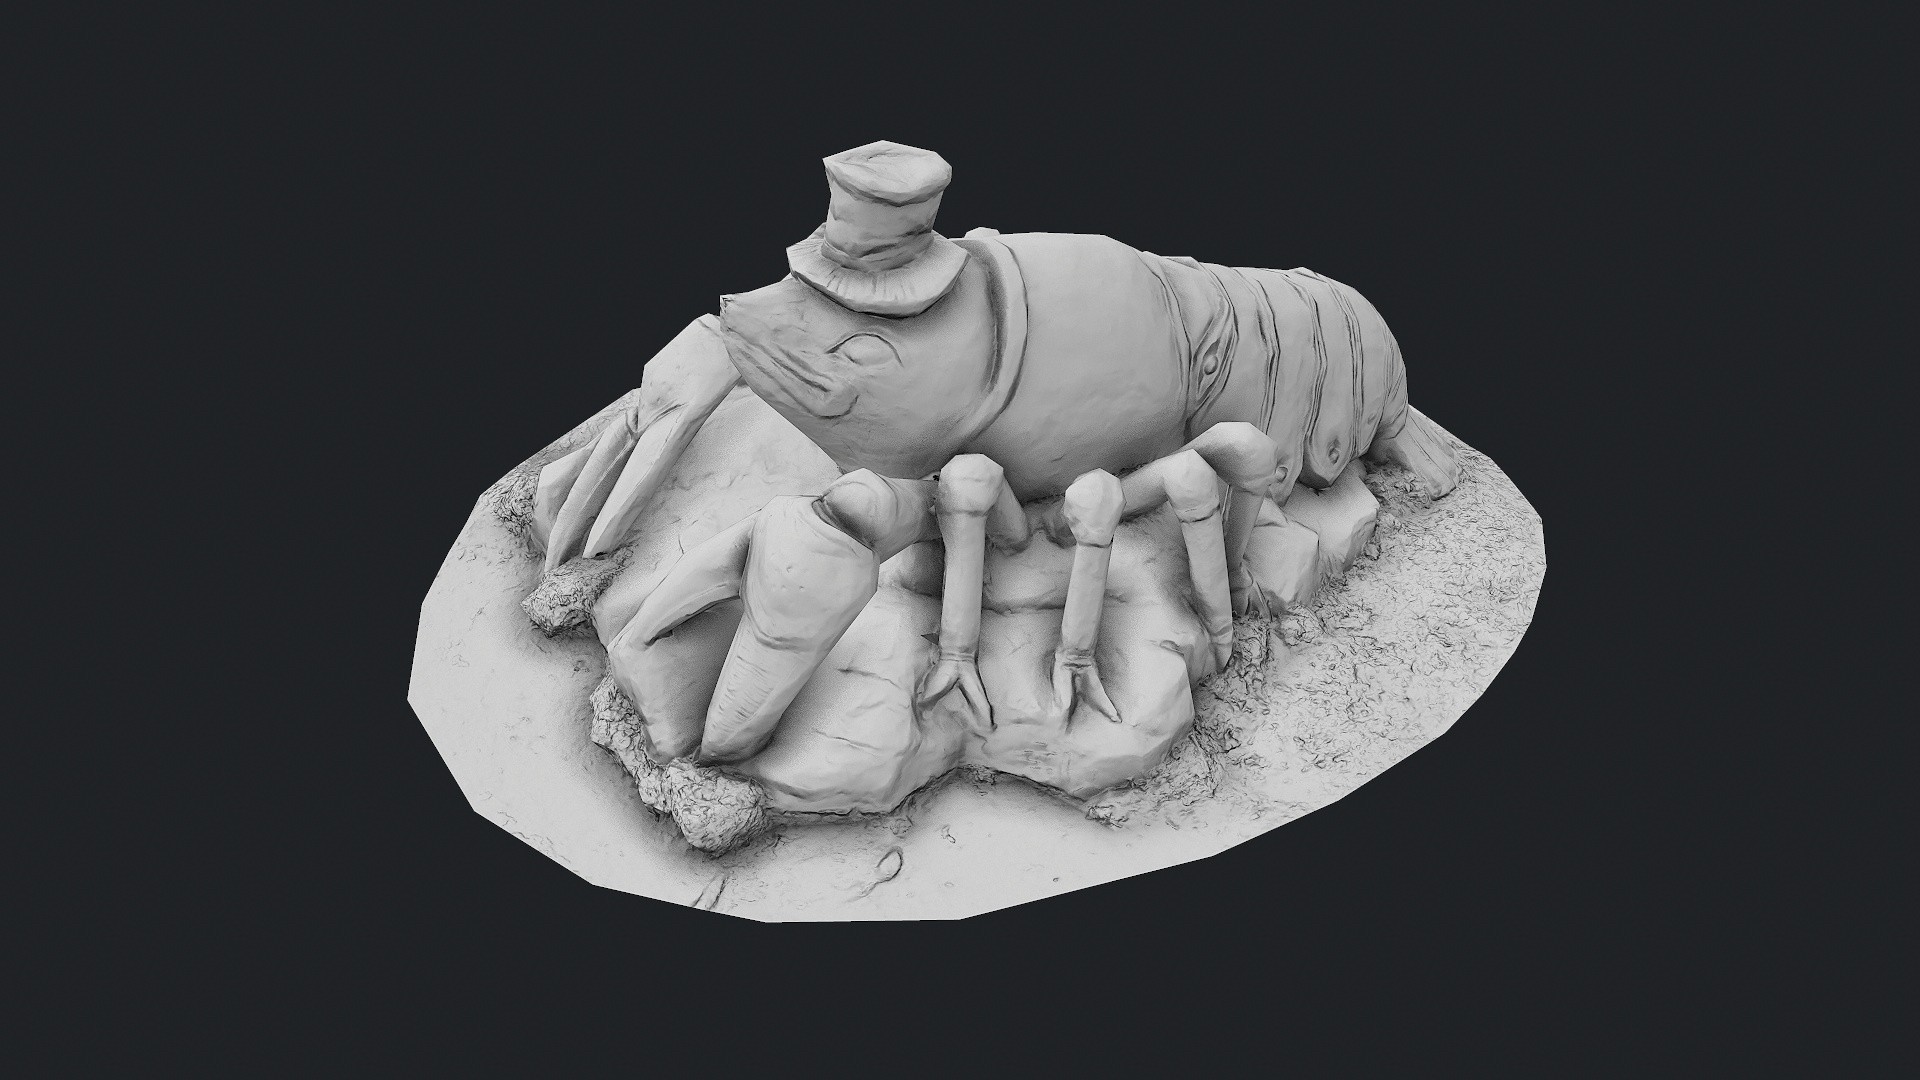
On the other side, sometimes it has its own head and even weighting does not help – for instance, I was not able to keep the antennas on cancer model – they were always lost, even with weighting.
 
  • Sad lady: Her face and fingers are best of all. I’ve set maximal priority to the staue, so the pedestal is so low poly, that it begins to lose some details, like the holes on the back, but normal map can fake it nicely or it would be not a problem to edit it.
  • Cancer: I’ve set maximal priroty to the statue, so it started to lose the edge a little. Suprisngly, I was not able to keep the antennas even with weighting. I tried even to weight only the antennas and keep everything else unweighted, but they were lost anyway. Strange.
  • Sarcophagus: Similar to Meshlab, there is nothing much to weight on this model. I’ve set some weighting to the helmet on the side, so the helmet is now more precise but it already lost that small area on the tom which I mentioned in unweighted version.
  • Gravestone 4: With weighting I could set more importance to the teeth and statues and less to the back and other less imortant areas. The teeth are now almost perfect.
Zbrush with weighting
4.5/5

Side by side comparison

Here you can see the models compared side by side.

Sad lady

[sketchfab id="a2c9df2736724f52af08a7a6b8cbdba8" start="0" spin="" controls="1"]

Cancer

[sketchfab id="9b626c5820054bac85b275b4fca7a05f" start="0" spin="" controls="1"]

Sarcophagus-like gravestone

[sketchfab id="91a16b92a1e040d3a52fe074883b7f54" start="0" spin="" controls="1"]

Gravestone 4

[sketchfab id="32003e77e2584281ab739f0676de8f1d" start="0" spin="" controls="1"]

Overall conclusion

Ok, so main motivation for all this was to find out, if there’s something better than Zbrush and it’s Decimation Master. Well, the conclusion is: there isn’t. Yes, it’s not perfect as you can see, none of the methods received full 5/5 stars, but Zbrush is clearly closest. It makes some errors which have to be fixed manually, but in overall, it’s just the best. Shape recognition is the best by far – flat areas have minimum polygons, while more detailed areas are much more dense and you can also affect this manually with masking if you need more polys on some important areas, as faces or hands.

Naturally, I’m not saying that rest of the software is useless, but it’s not as good as Zbrush.

Toplist:

  1. Zbrush + manual weighting
  2. Zbrush without weighting
  3. Meshlab + manual weighting
  4. Blender
  5. Reality Capture
  6. Meshlab without weighting
  7. Metashape
  8. BakeMyScan (iterative method)

Toplist (free only):

  1. Meshlab + manual weighting
  2. Blender
  3. Meshlab without weighting
  4. BakeMyScan (iterative method)

Shameless promo at the end :): all models here will be soon available for sale on sketchfab and later, hopefully, also on Unreal Engine Marketplace and Unity Asset Store. All in game-ready quality of course. I can’t say exactly, when it will be, but if you start following our FB page, I promise you will not miss it ;).

Here’s a little teaser, what you can expect:

2 Responses

  1. Hi Libor
    Very nice done, but would like to see models with a bit higher poly count ( for testing only ) let say double poly count. As from my testing sometimes its good to increase ( sometimes just slightly, 500 polys ) poly count to get much better results. The polycount here is a “bit” strong for that sort of topology. i know poly budget can be hard to overcome but…. for some models that have high details you just cant go down too much.

    Except that im very happy with you workflow and showcase of the results !

    1. Thanks Milos! Keep them as lowpoly as possible was the purpose, that’s why they are as they are. Anyway for instance for that Cancer statue, I tried to push it to 10k polys, but the antennas was lost anyway.

Leave a Reply

Your email address will not be published. Required fields are marked *